


Restoring/rebuilding a very old shotgun


 02-12-2014 | 09:51 AM
#12
Typical Buck
Joined: Aug 2007
Posts: 749
Likes: 0
great work just looked at my boyds gun stock catalog and they have a butt stock for a cresent single shot. $55 plus shipping 1-2 weeks will ship after ordering. forearm is $35 plus shipping.
http://www.boydsgunstocks.com/produc...17349&cat=1227
http://www.boydsgunstocks.com/produc...&cat=undefined
http://www.boydsgunstocks.com/produc...17349&cat=1227
http://www.boydsgunstocks.com/produc...&cat=undefined
Last edited by Bbj270; 02-12-2014 at 09:55 AM.
02-12-2014 | 10:30 AM
#13
Thread Starter
Typical Buck
Joined: Jan 2014
Posts: 921
Likes: 0
I see its out of stock but beyond that, Where were you about a week ago when I posted a �Want to buy� request on this site? LOL
The butt stock looks like it may work but the fore end stock wouldn�t (its for a 410 Ga and dimensionally not correct for this gun)
The butt stock looks like it may work but the fore end stock wouldn�t (its for a 410 Ga and dimensionally not correct for this gun)
02-13-2014 | 02:31 AM
#16
Thread Starter
Typical Buck
Joined: Jan 2014
Posts: 921
Likes: 0
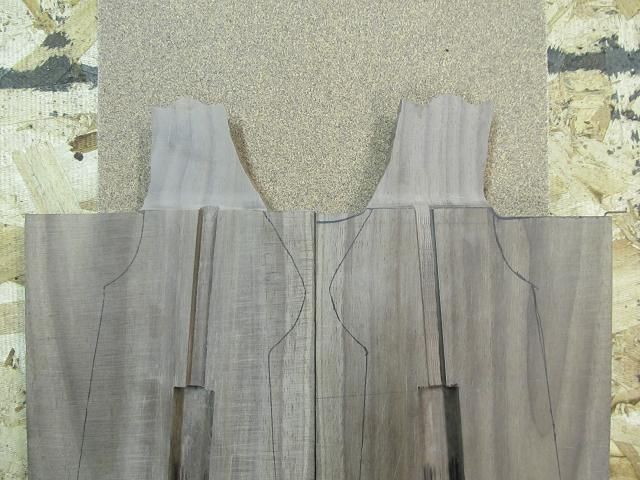
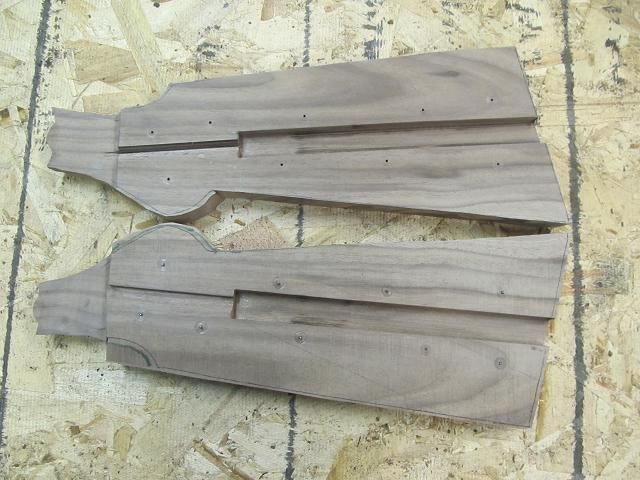
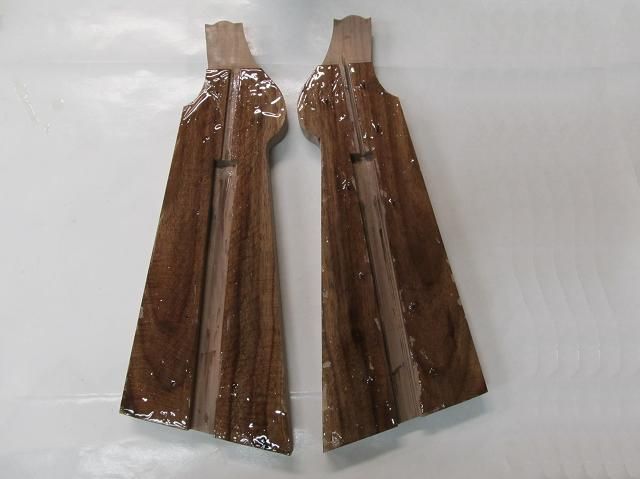
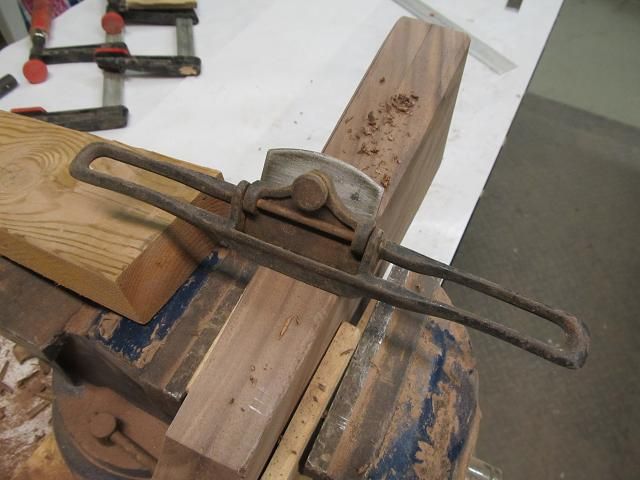
Both halves of the receiver joint are complete then the halves are rough cut to the shape I need.
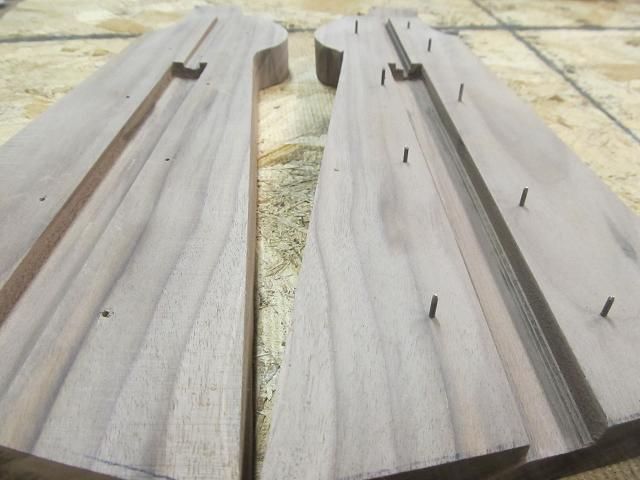
For added strength and for alignment I will use 9 hardened steel pins hidden within the stock. This will add to the epoxies shear and tensile strength but it also ensures the flat for the washers on both halves lines up during the slippery clamping process
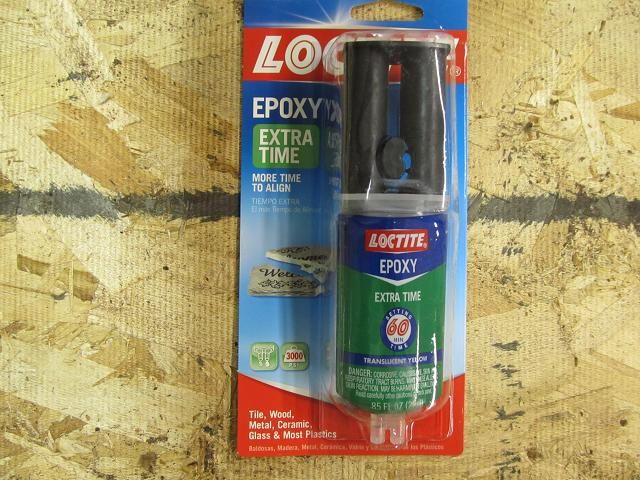
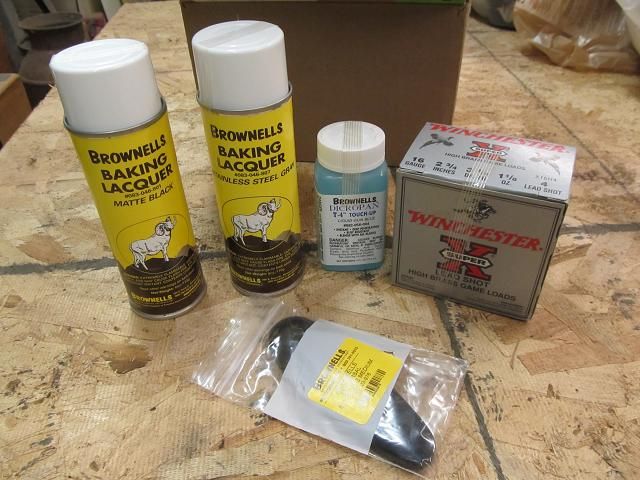
This slow cure epoxy has a 3,000 PSI tensile rating, can be drilled and tapped, is waterproof and heat resistant and does not shrink. It also has a good wetting property (since its slow cure). Their data sheet shows a 1,345 PSI shear strength on maple to maple. As have stated I have used this many times in the past on wood laminations with incredible success.
Epoxy likes rough surfaces so before I applied the epoxy I roughed up both halves with a bandsaw blade by bending a blade into a “u” shape and raking the teeth across the wood. Its important to coat both surfaces for the best adhesion. It uses more glue (which oozes out during clamping) but you can be sure you wont have any dry spots starved of epoxy.
Light clamping pressure is all that is needed to ensure you don’t squeeze out the epoxy. After 24 hours the epoxy will be fully cured the it will be one solid piece. I used flattened stick to make sure to scrape out the epoxy the oozed into the channel for the bolt. While the epoxy was still curing I lowered the large washer down into the hole so it stays with the stock. Only the lock washer will be removed with the bolt during disassembly in the future.
The Brown truck made a delivery to the house .
To be continued…………………..
For added strength and for alignment I will use 9 hardened steel pins hidden within the stock. This will add to the epoxies shear and tensile strength but it also ensures the flat for the washers on both halves lines up during the slippery clamping process
This slow cure epoxy has a 3,000 PSI tensile rating, can be drilled and tapped, is waterproof and heat resistant and does not shrink. It also has a good wetting property (since its slow cure). Their data sheet shows a 1,345 PSI shear strength on maple to maple. As have stated I have used this many times in the past on wood laminations with incredible success.
Epoxy likes rough surfaces so before I applied the epoxy I roughed up both halves with a bandsaw blade by bending a blade into a “u” shape and raking the teeth across the wood. Its important to coat both surfaces for the best adhesion. It uses more glue (which oozes out during clamping) but you can be sure you wont have any dry spots starved of epoxy.
Light clamping pressure is all that is needed to ensure you don’t squeeze out the epoxy. After 24 hours the epoxy will be fully cured the it will be one solid piece. I used flattened stick to make sure to scrape out the epoxy the oozed into the channel for the bolt. While the epoxy was still curing I lowered the large washer down into the hole so it stays with the stock. Only the lock washer will be removed with the bolt during disassembly in the future.
The Brown truck made a delivery to the house .
To be continued…………………..
02-14-2014 | 02:38 AM
#19
Thread Starter
Typical Buck
Joined: Jan 2014
Posts: 921
Likes: 0
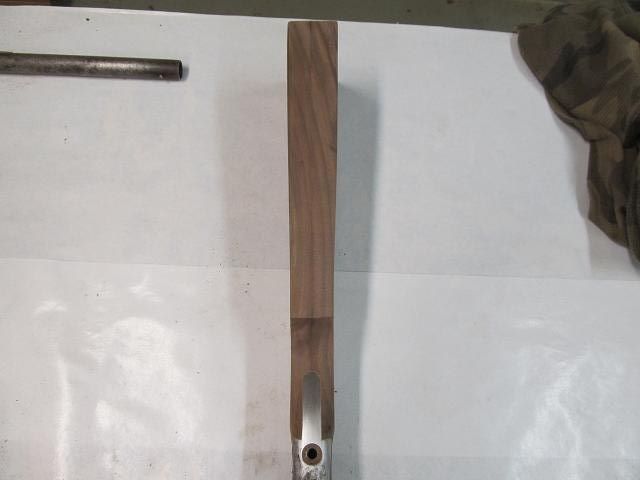
The epoxy is cured and the stock is unclamped and cleaned up to the rough outline.
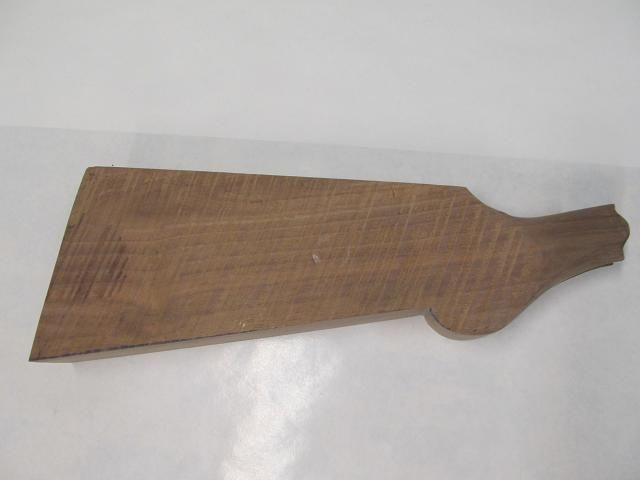
But the stock is the same thickness from back to front.
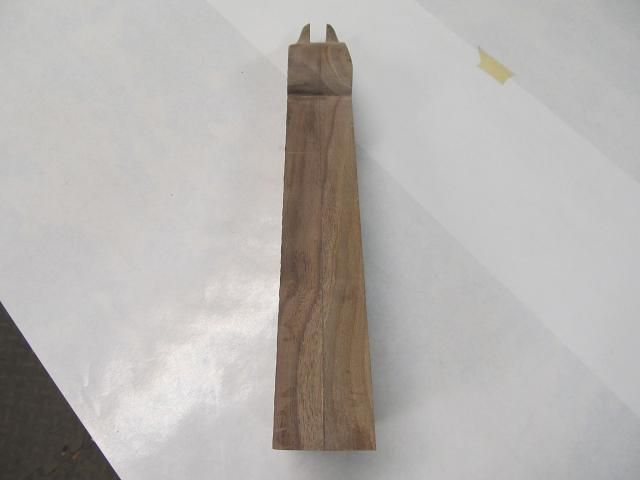
All the stocks on the guns I own are tapered from the butt end to the grip so I will do that next.
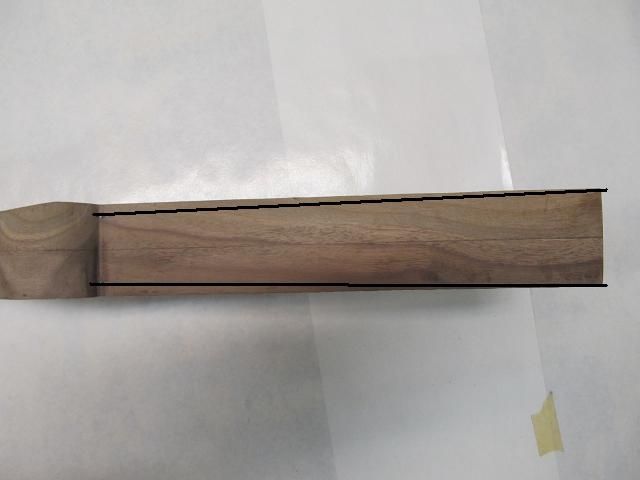
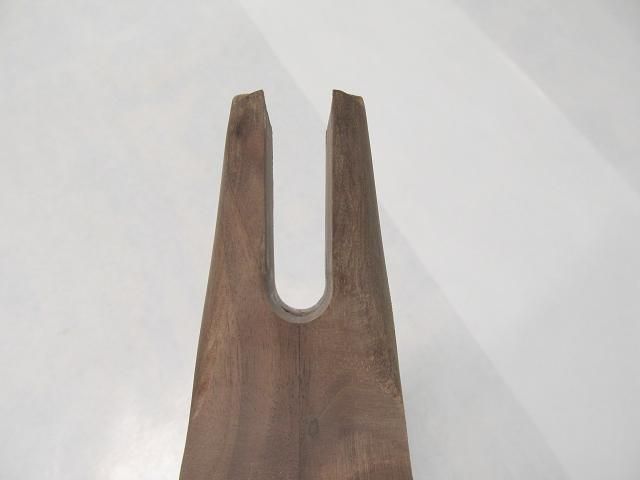
I set a depth on each side so I know when I went deep enough.
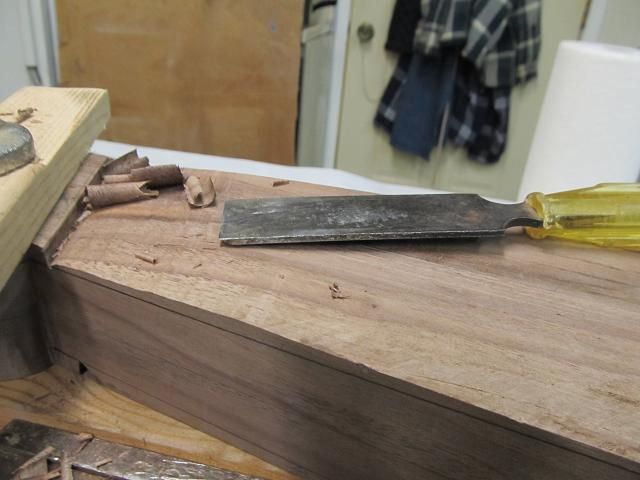
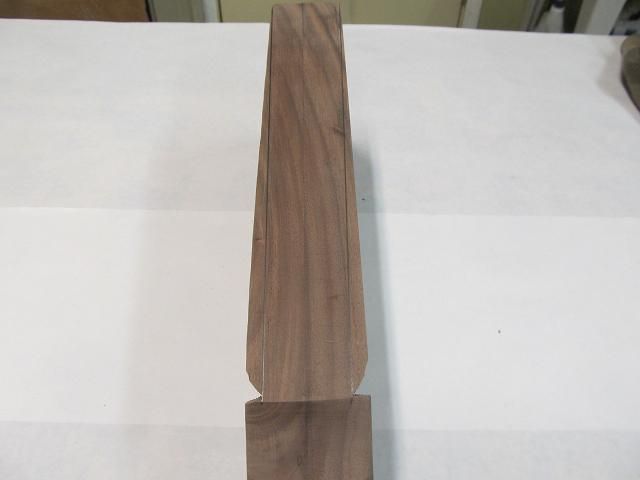
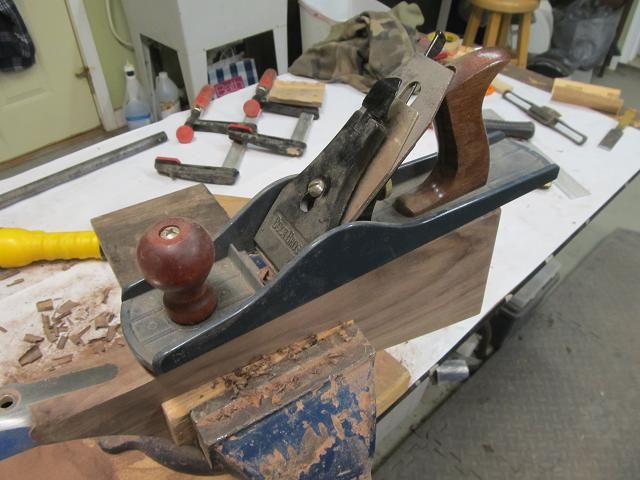
Then lots of chiseling and sanding to remove all the wood.

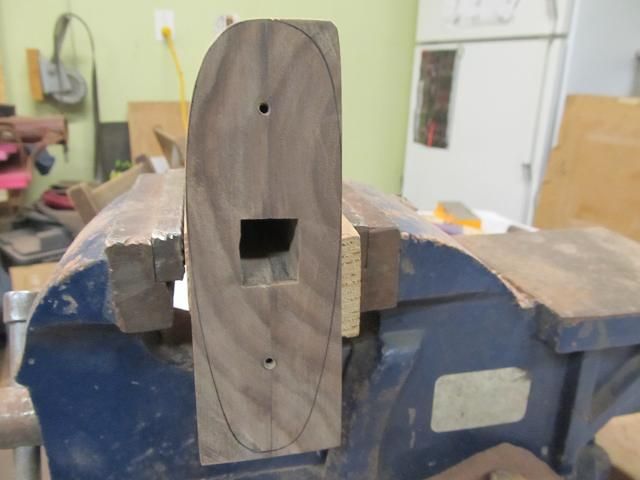
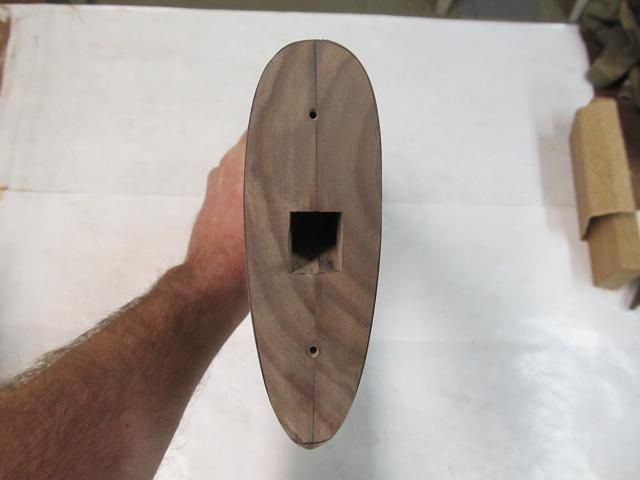
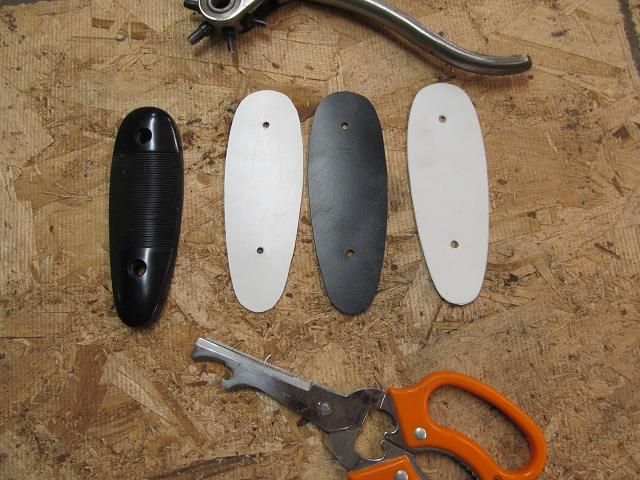
Then I used the butt plate as a guide for shaping. Remember I made one slab of wood thicker than the other. That was so I could bias the screw holes to one side rather than right on the glue joint. Now its time to remove all the corners and round the stock.

This was the wrong tool for the job.
This was a better choice to keep the comb straight. It allowed me to remove a lot of material very quickly.
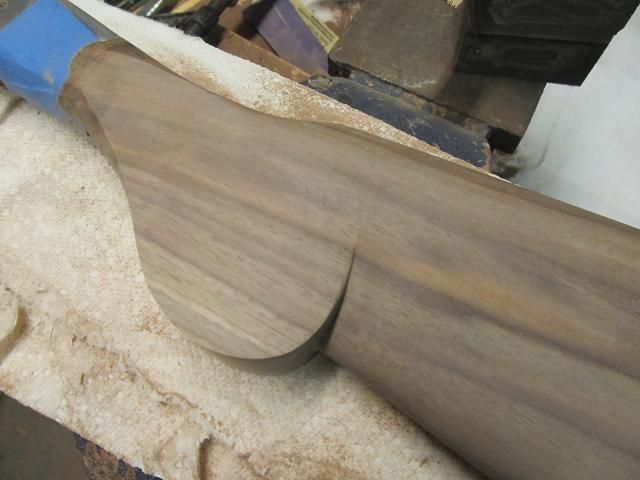
After a lot of sanding to the outline of the butt plate, one corner is done, three more to go.
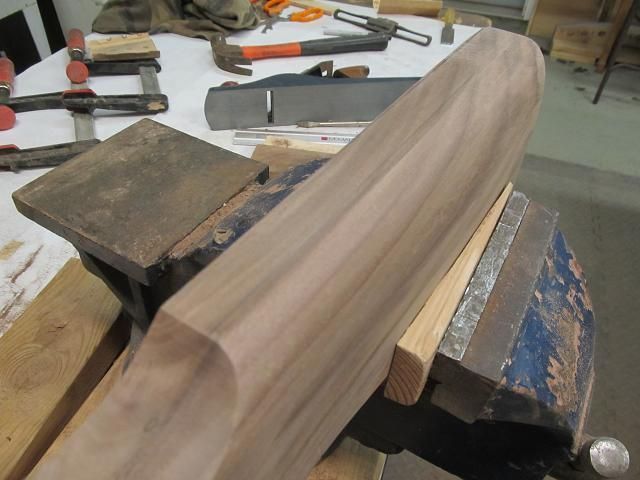
Fast forward and all the corners are finished..
The sanding left a radius at the base of the grip.
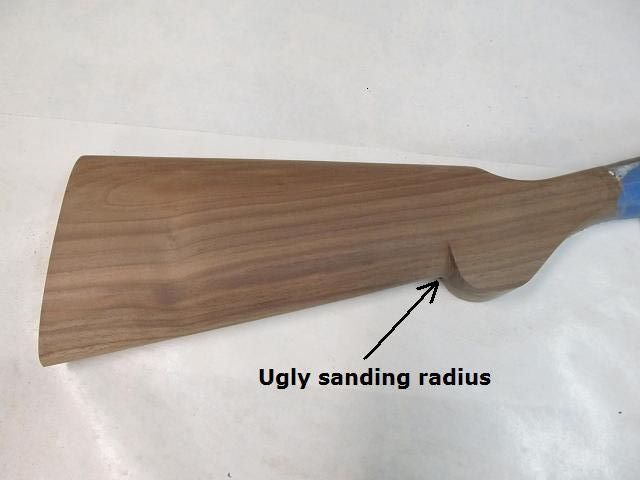
Time to break out the chisel again.
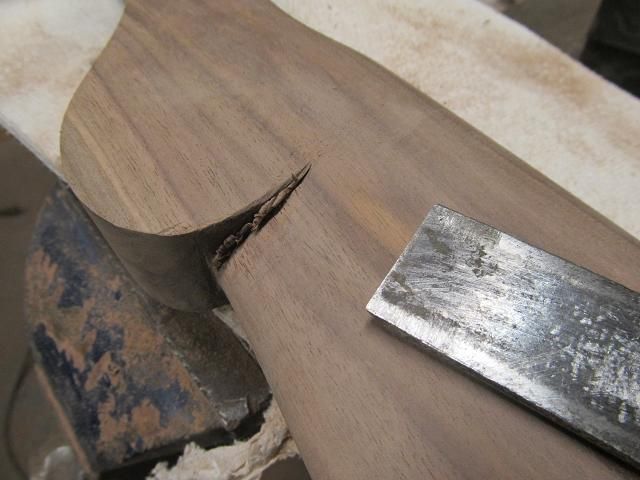
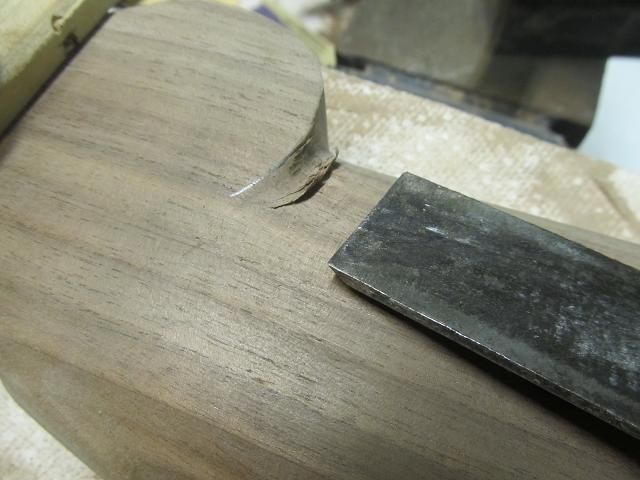
And more sanding to finish with a clean and sharp line,.
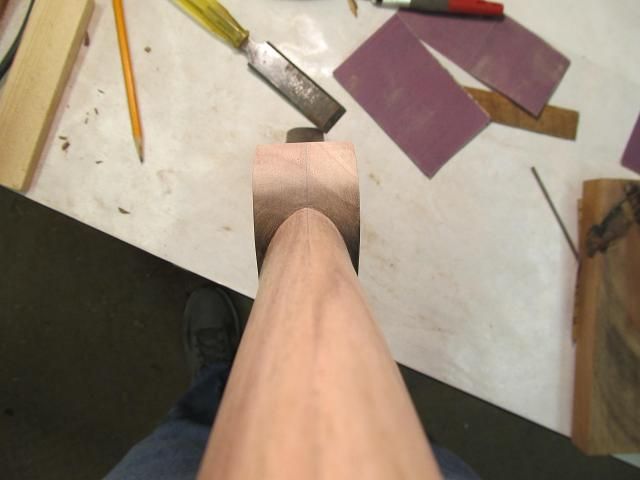
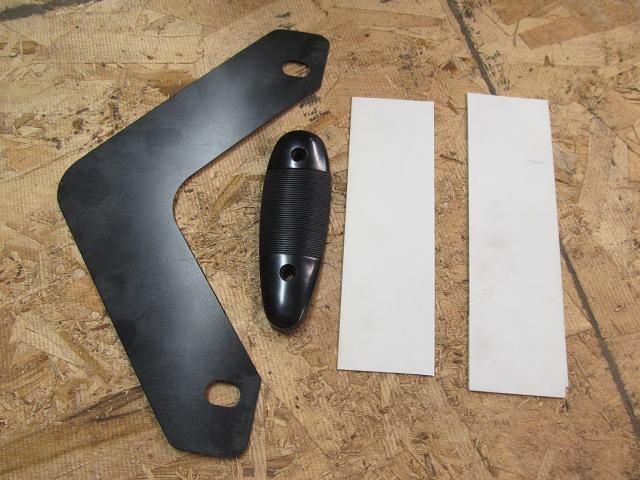
The original gun most likely had only a black butt plate. While that�s fine and all, I hoped to dress it up a bit more so I cut up one of my flexible cutting boards and the divider out of a three ring binder to add a bit more style. (nothing but the best for this job. plus the guy in the cube next to me will never know those dividers are missing)
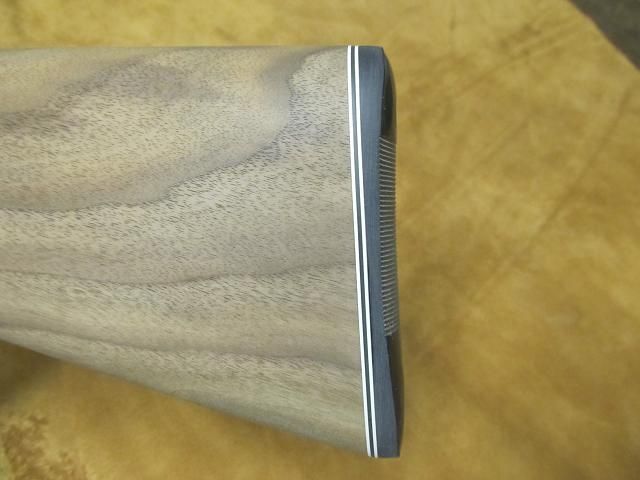
I think it adds a bit of class to the look without adding any cost.
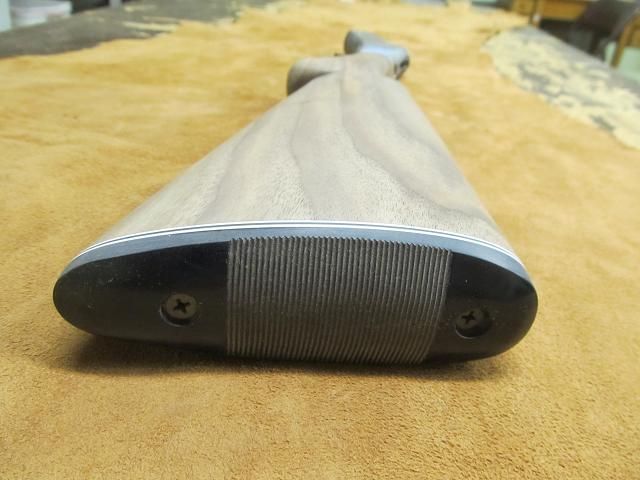
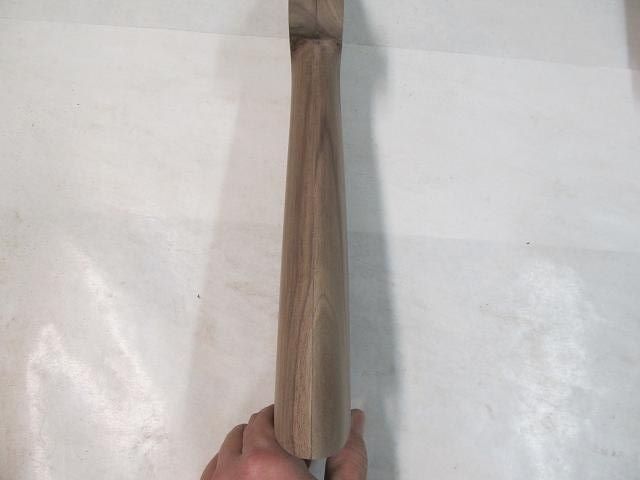
The step that I failed to show was rounding the bottom of the grip. This stock wont have a flat grip nor a plastic grip cap so I rounded it off. You can see that rounding in the pic above.
The next steps are to point and flute the top of the comb near the grip and to do lots of final sanding all the way to 800 grit.
Too be continued�..
But the stock is the same thickness from back to front.
All the stocks on the guns I own are tapered from the butt end to the grip so I will do that next.
I set a depth on each side so I know when I went deep enough.
Then lots of chiseling and sanding to remove all the wood.
Then I used the butt plate as a guide for shaping. Remember I made one slab of wood thicker than the other. That was so I could bias the screw holes to one side rather than right on the glue joint. Now its time to remove all the corners and round the stock.
This was the wrong tool for the job.
This was a better choice to keep the comb straight. It allowed me to remove a lot of material very quickly.
After a lot of sanding to the outline of the butt plate, one corner is done, three more to go.
Fast forward and all the corners are finished..
The sanding left a radius at the base of the grip.
Time to break out the chisel again.
And more sanding to finish with a clean and sharp line,.
The original gun most likely had only a black butt plate. While that�s fine and all, I hoped to dress it up a bit more so I cut up one of my flexible cutting boards and the divider out of a three ring binder to add a bit more style. (nothing but the best for this job. plus the guy in the cube next to me will never know those dividers are missing)
I think it adds a bit of class to the look without adding any cost.
The step that I failed to show was rounding the bottom of the grip. This stock wont have a flat grip nor a plastic grip cap so I rounded it off. You can see that rounding in the pic above.
The next steps are to point and flute the top of the comb near the grip and to do lots of final sanding all the way to 800 grit.
Too be continued�..