Traditions St.Louis Hawken Build How To
 11-09-2016 | 05:39 PM
#1
Thread Starter
Banned
Joined: Dec 2008
Posts: 9,186
Likes: 0
From: Boncarbo,Colorado
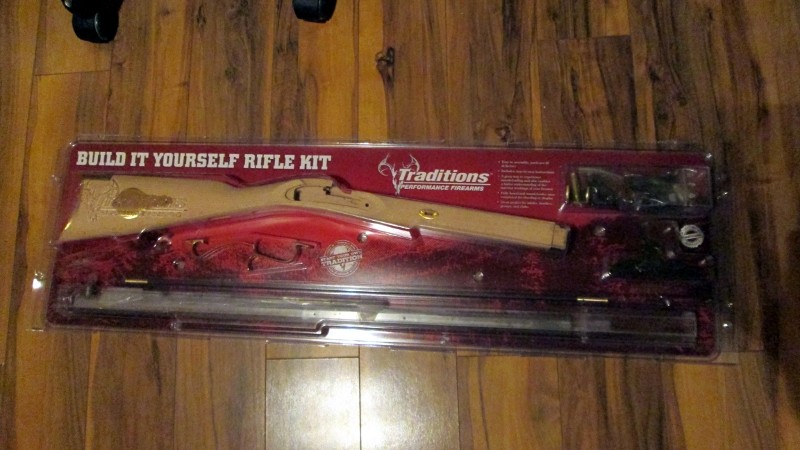
Traditions St.Louis Hawken .50cal Percussion Kit Build Along
Well, After a week solid of thinking, It was time to purchase a new side hammer to replace my "old" one that was getting a little to heavy for me in the mountains.
I decided to go and get the St.Louis Hawken .50cal kit. Why .50cal? I am lucky to hunt Colorado big game every 2 -3 years depending on what I am putting in for. Our draw system really stinks, but what can you do? Besides to hog hunting in Oklahoma with a good buddy!
Also, Due to the fact I don't get to hunt every year for deer or elk, the .50cal round ball is perfect for target shooting. Super easy recoil, cheap to cast or even to buy, and basically, if I ever need to use a conical, a .50cal is the way to go due to the market being FULL of .50cal projectiles.
After a long search, I ended up at Muzzle-loaders and after some more time of looking around online for the best prices, they won and I put in a call and it was out on the truck that evening! Also got online and ordered a Birchwood Casey stock finish kit, along with cleaning patches I know I will need, and a bottle of their Rusty Walnut stain. I plan on using their Walnut and Rusty walnut stains to help pop the figure and add a nice fire like glow. That is of course unless I change my mind as I normally do!
This article is going to be a huge helper to anyone building this model and I plan to cover everything from the basics, upgrading and of course, problem areas that I encounter to help the next Builder should he or she run into an issue while they build their own St.Louis Hawken kit!
This kit ran $318 + $8 shipping. Some places wanted MORE for a kit, than Muzzle-Loaders wanted for the factory built rifles!
Why a kit? Simply because I can control the quality of the finished product, but add my own personal touches such as stain, stock finish, barrel finish and of course, the modifications I will be doing!
If you want to look into a new gun or a kit gun, check out www.muzzle-loaders.com they have the best prices by far on the Traditions guns.
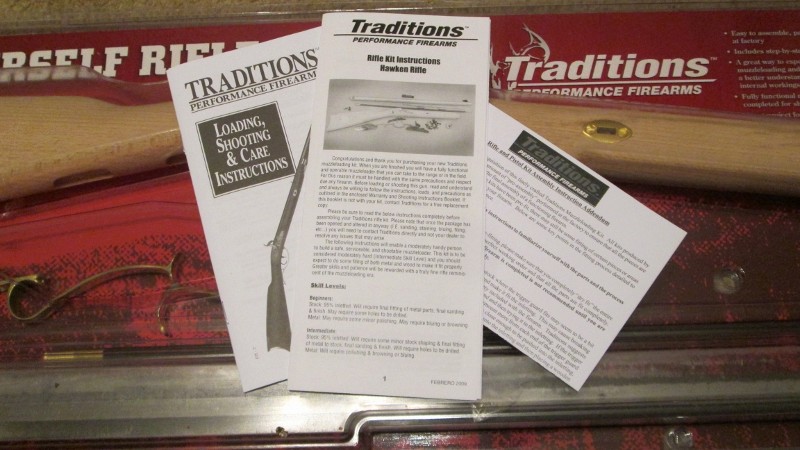
The rifle kit comes with the users manual as well as a couple manuals to help you along with the build, offering tips and tricks for properly fitting parts to the wood and what to look for along the way if you are having issues. Very helpful booklets!
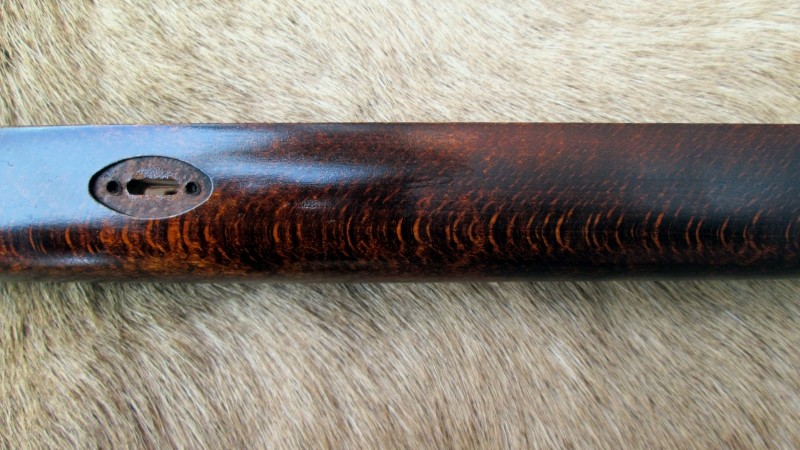
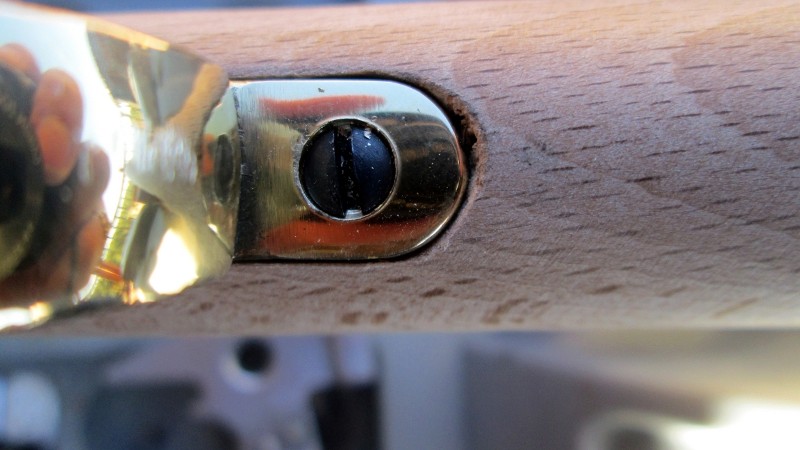
Using a pencil, I traced around the lock plate and used a spade shovel like wood scraper and 100 grit sand paper to gently open up the inletting. You don't want your inletting super tight, because once you stain and then start applying oil, it will build up and make for an even tighter fit.

Look for obvious rub marks such as these! Remove wood if needed. Once I had the inletting open enough for the lock to fit nicely. I used a small plastic mallet and tapped the lock into the inletting even more to make sure all fit well. These rub marks caused no issues and was just the bridle rubbing. You can open these areas up if you want, but if it doesn't cause any binding issues, all will be fine.
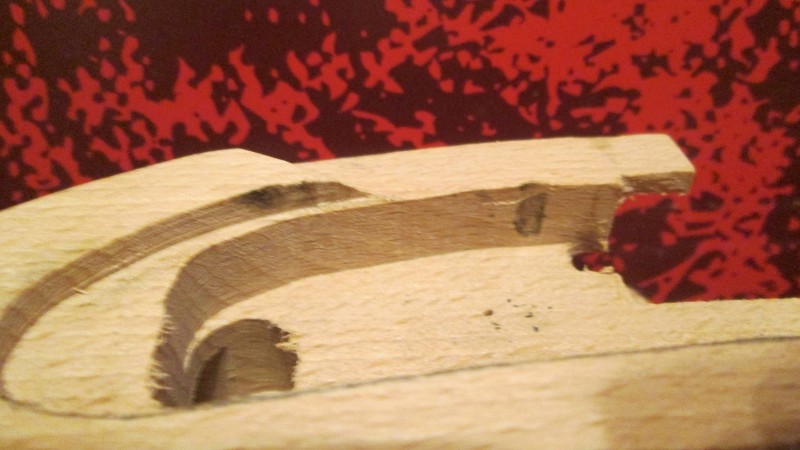
Below we can see a little "slag" that will need to be cleaned up for a nice metal to wood fit. The butt plate will also need a slight polishing before being antiqued. I really honestly do dislike brass. Metal is much nicer when browned.
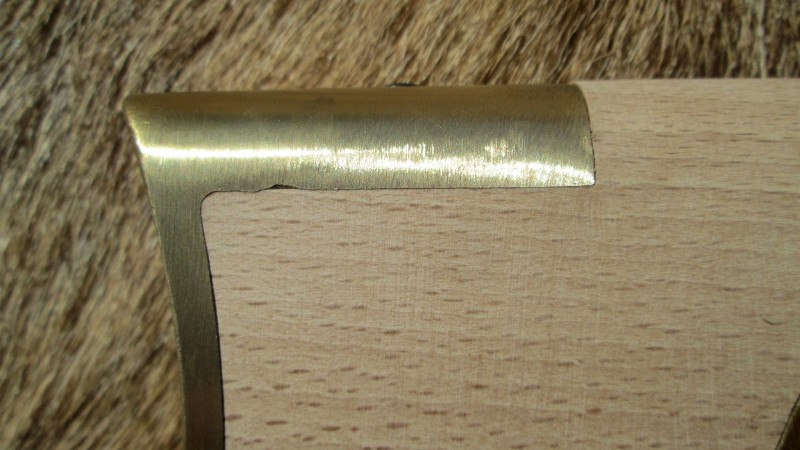
A little extra wood in this area below is great as it allows YOU to fit the butt plate perfectly to the wood and get the shape just right.
Before removing any wood from the Tang area, Always check and decide if it will need a little bedding for a perfect rock solid fit. In my case, I will bed the tang & trigger plate as these are issue areas that can cause the tang screw to loosen up over longer shooting sessions.
Lets think about it for a minute... Wood.... Steel.... High recoil... Movement.... When you start shooting heavier loads such as conicals, any movement in this area WILL cause the metal to eat into the wood and change the balance of how well the wood to metal fit is. I always bed these areas to make them super strong and handle any extra recoil it may see one day.
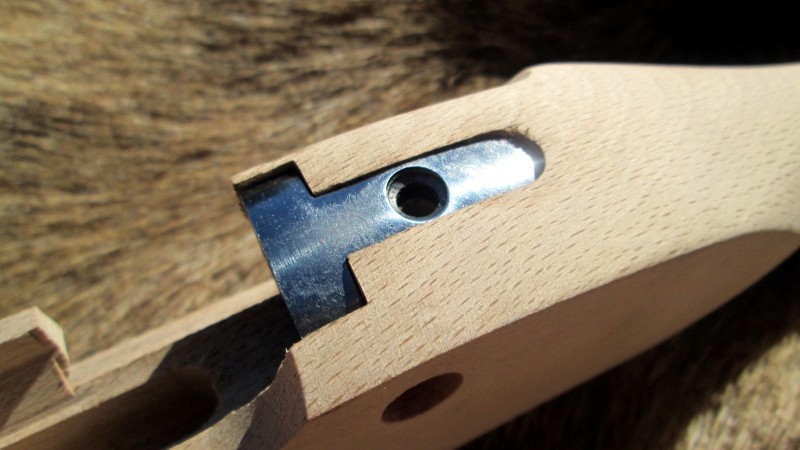
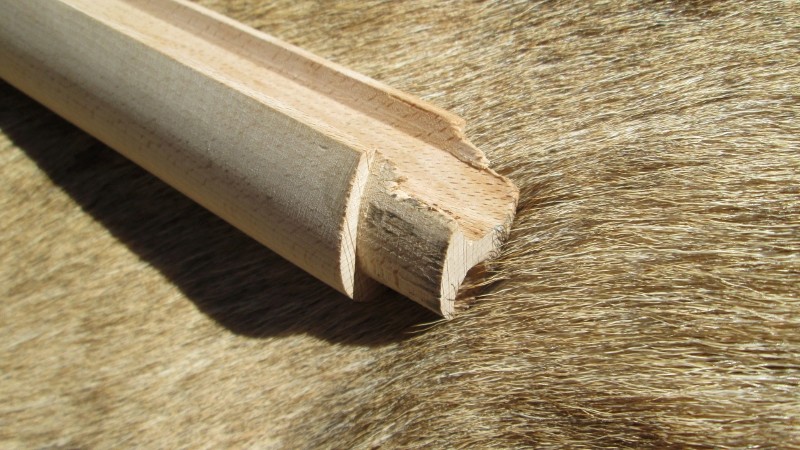
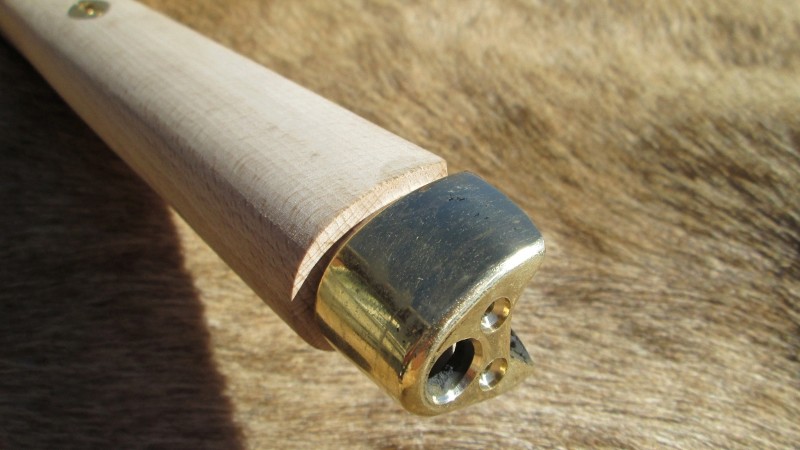
The nose cap needs quite a bit of wood removed, but luckily, this is a very easy area to work on as its just straight and round at the bottom. Remove the wood with a file and sand paper until the nose cap is a nice easy slip fit. Drill holes and wax screws before installing! Brass screws can snap off if not waxed! Once the nose cap has been screwed into place you can use masking tape on the brass and then go about shaping the wood around the nose cap.
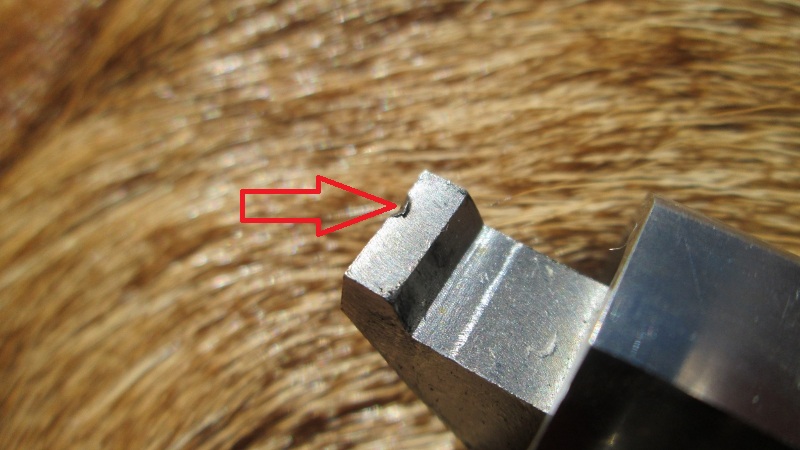
Inspect all metal to metal contact parts for burrs such as this burr below. A metal file will easily remove it and make for a better fit into the tang.
Two screw holes! Yes, sadly, this kit comes with plastic sights that screw into place. In my opinion it costs more to drill and tap these holes than to just machine a dovetail like they did on the front sight!
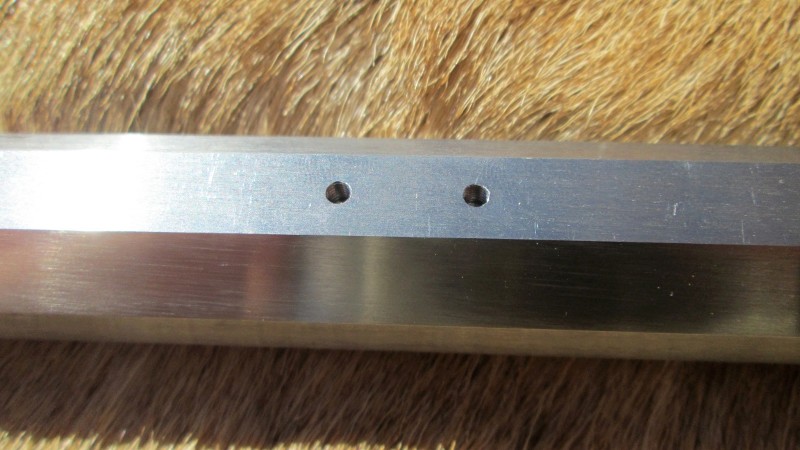
Factory plastic sights VS a Hawken drill and screw on sight available from the Hawken Shop. I have not made up my mind as to using this sight or just cut the dovetail in the barrel flat and install better sights. I honestly feel that cutting the dovetail is the best way to go.

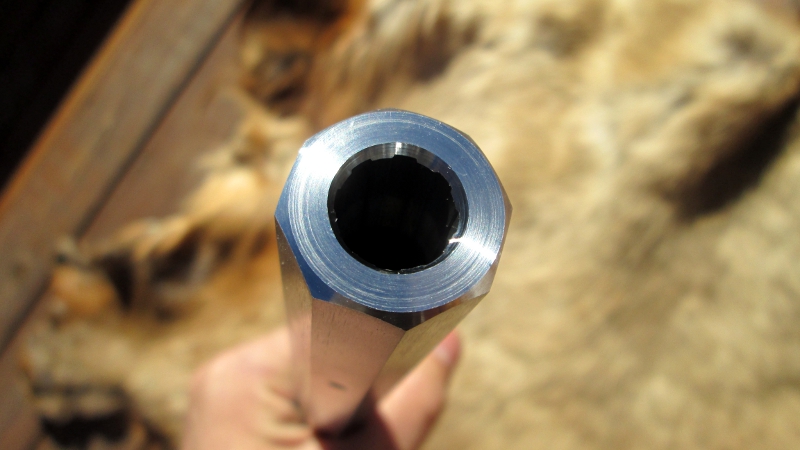
One of the first things I looked at when I opened the box was the barrel! Always inspect the crown for major nicks/burrs. A burr can cause poor accuracy and cut patches. This crown was perfect and shines like a chrome finish.
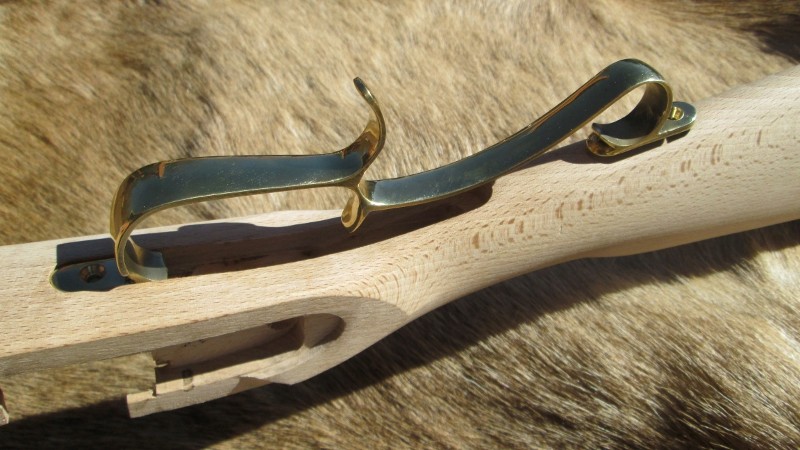
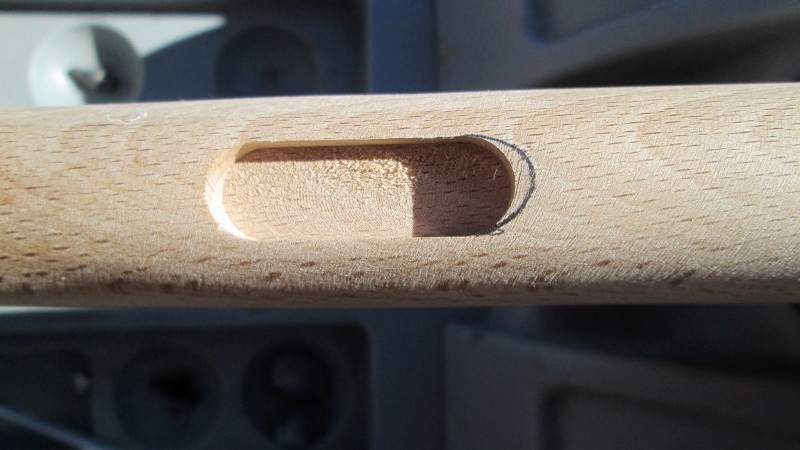
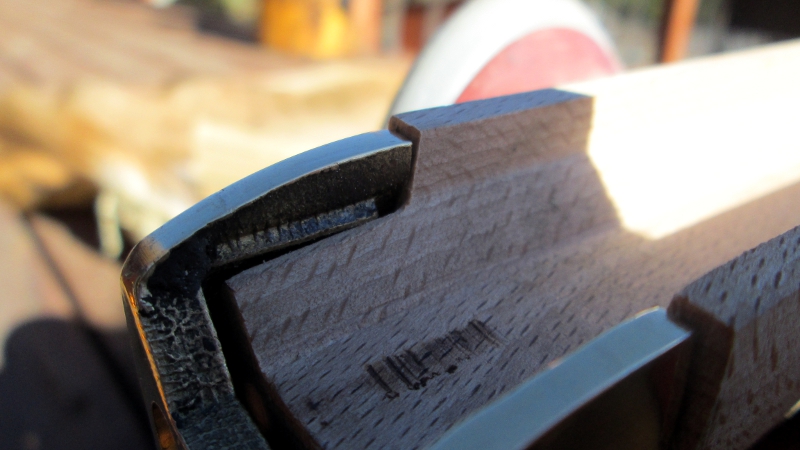
The trigger guard WILL need inletting extended in order to properly fit. In the building manual is clearly states " DO NOT BEND TRIGGER GUARD TO MAKE IT FIT!" Breakage of the trigger guard is NOT covered under warranty.
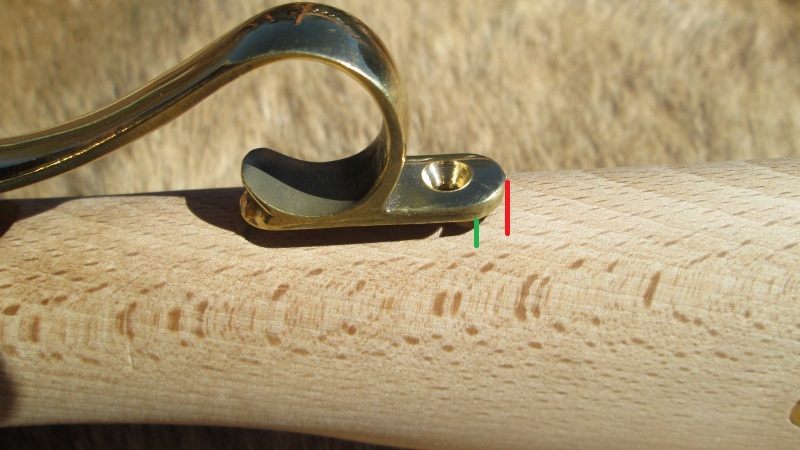
Start of inletting - Stop of Inletting needed
The wood actually has some real nice pattern in it and I will be able to make areas like this, pop out very nicely once I start applying a finish.

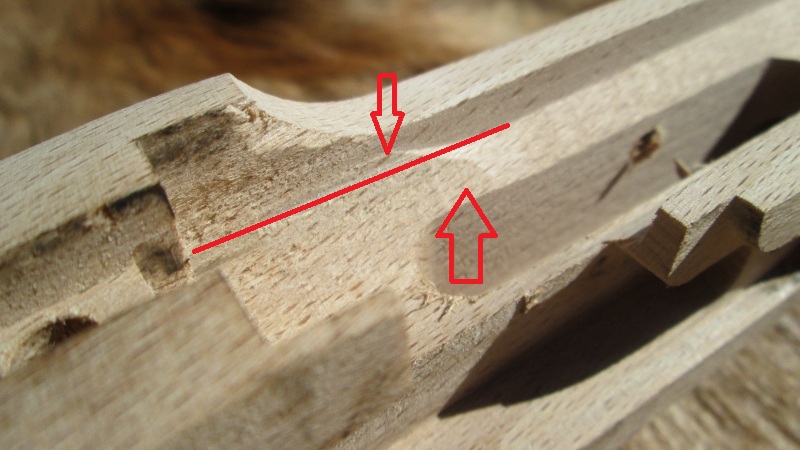
Inletting shows some run off from the milling machine. The barrel seems to fit perfectly, but I will smoke the barrel and lay it in the channel to find if this is causing any uneven seating issues.
Now to start inletting the trigger guard, I actually went and inletted it a little more than usual due to the angle the trigger guard goes in, it needs some extra room otherwise it WILL scrape the finish off the first time you remove it to drop out the trigger for cleaning. First I installed the front section and screwed it down. Next I lined the rear section up with the inletting and traced around it using a pencil.
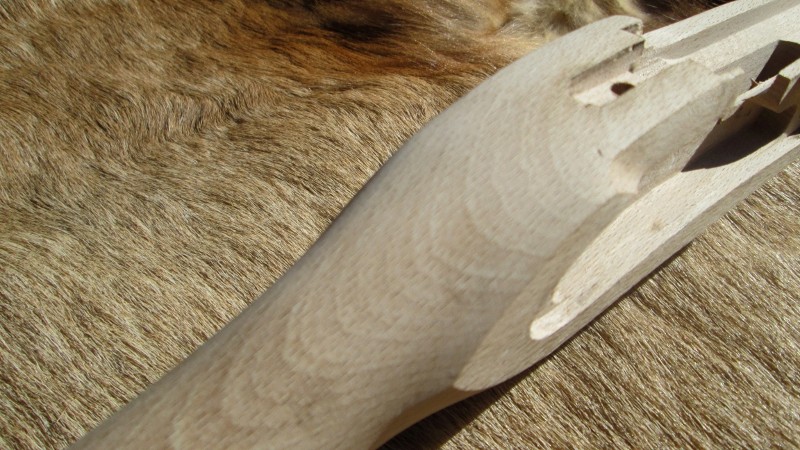
This looks a little off and it is. Once you start, you can always remove a little more. Its better to remove less than take out to much all at once.
Using my wood scraper, I lightly tapped on the back end of the scraper and traced the pencil line and very carefully, started to remove pieces of wood.
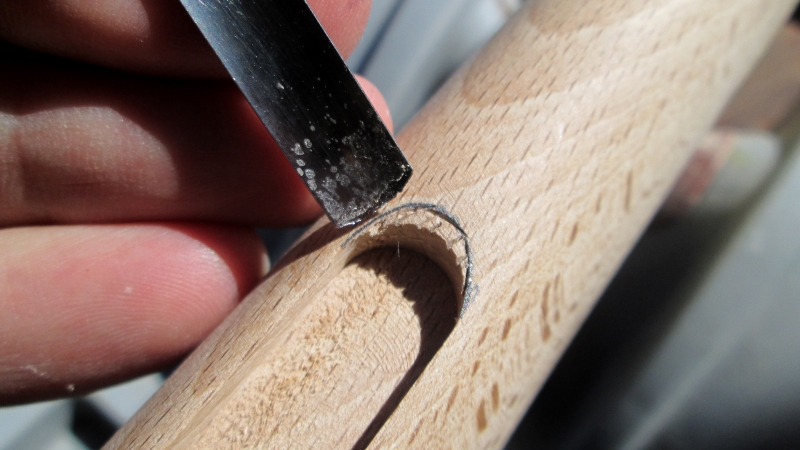
This is not completely finished. I finished and evened this out later by wrapping a piece of 100 grit sand paper around a pencil and went to work sanding it even and smooth. Remember, a little extra room in this section of the trigger guard is a must! I have factory finished rifles that now lack stain/finish due to them being tightly inletted.
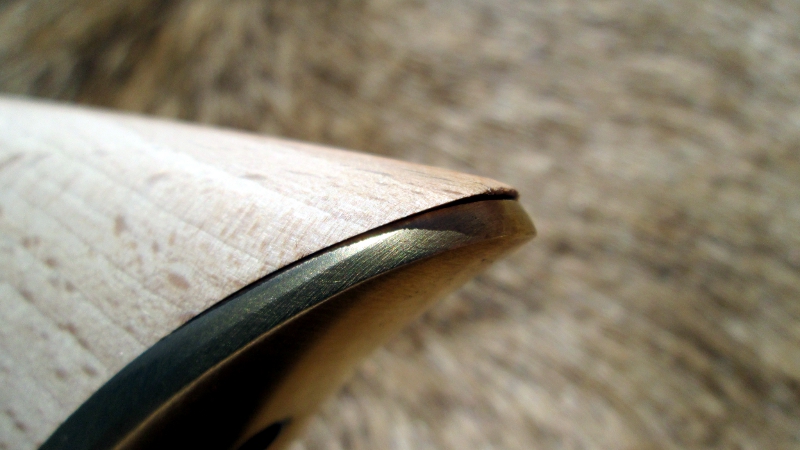
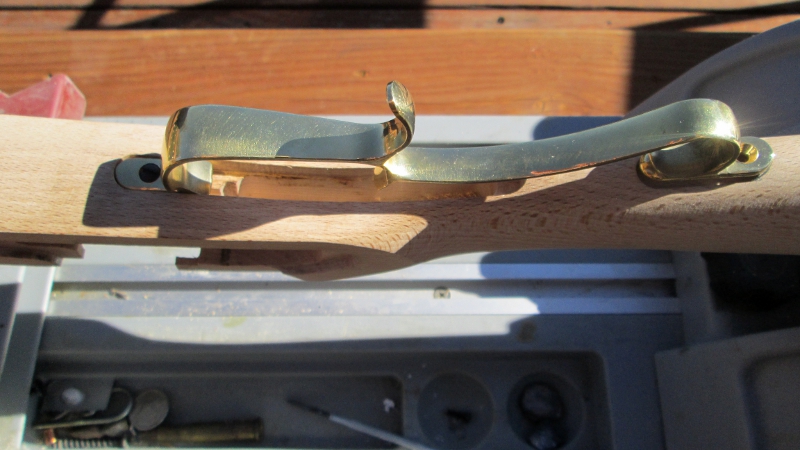
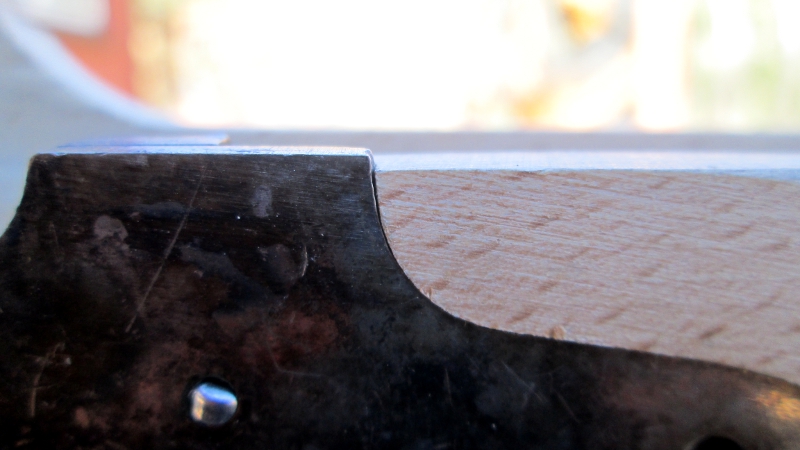
Fitting the nose piece was no big deal. File off a little more wood than needed so you can perfectly adjust the nose cap with the top of the wood. * Note * Install percussion/Flicklock and see if the metal of the lock sits evenly or above wood line. If the lock sits above the wood line, install the nose cap perfectly flush with the wood. You'll see what I mean a couple pictures down.

Originally the wood was flush with that brass bumper you can see above the wood/empty space. This position actually put the brass ABOVE the wood line, therefore, I removed extra wood so I could center the nose cap perfectly level with the wood.

Now this is what I am talking about above a couple pictures! Notice how the lock metal sits ABOVE the wood line? Normally this should sit flush but lets face it, its a $318 kit gun and not everything will be perfect. You could file or grind this part of the lock down for a flush metal to wood fit, or you can do like me and say to hell with it, It's not a multi-thousand dollar rifle, the deer won't notice! It doesn't hurt the function of the the rifle in any way.
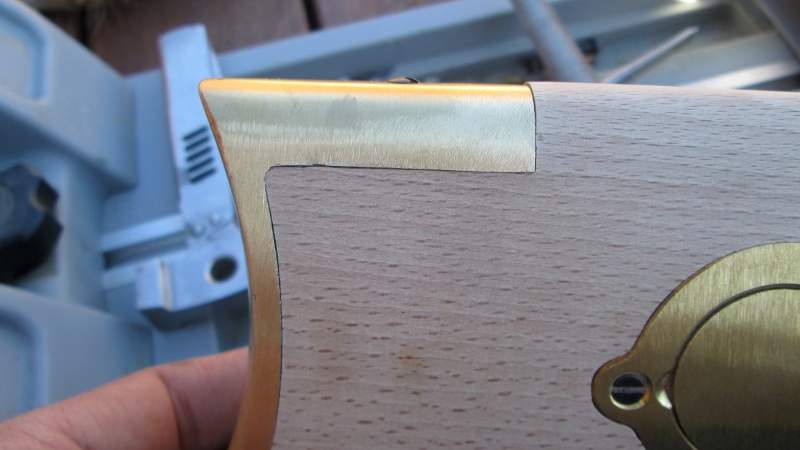
The top section of the butt plate had a burr under it * Note the first pictures in this thread * I simply used my file and knocked it down and rechecked fit. All was good! I still have to file the metal to the wood, but that comes later as its very easy to do.
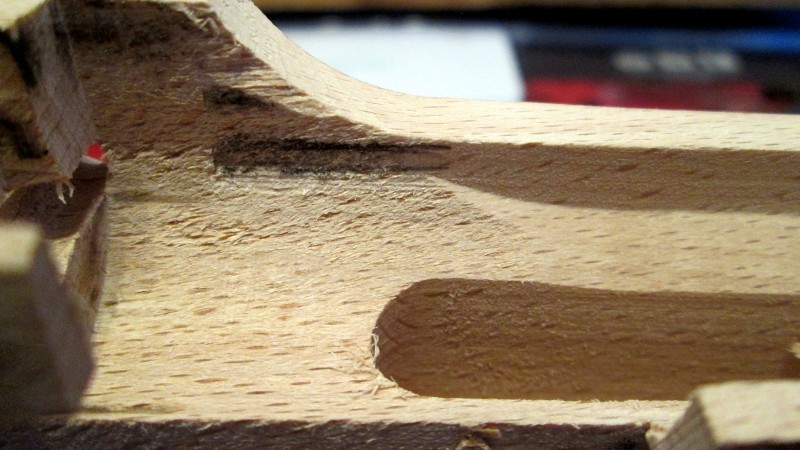
Now also getting back to some earlier shout outs about the barrel channel inletting, I used a few matches and blackened the bottom and sides of the barrel and gently laid the barrel into place, squeezed the barrel into place and with a plastic mallet, gave it a couple knocks to leave an imprint. This unfinished section of barrel inletting was fixed by using a straight scraper and now the barrel sits level. Black line shows how much I had to remove for a nice barrel to wood fit.
Last edited by MountainDevil54; 09-23-2018 at 12:39 PM.

 11-28-2016 | 11:17 AM
#4
Thread Starter
Banned
Joined: Dec 2008
Posts: 9,186
Likes: 0
From: Boncarbo,Colorado
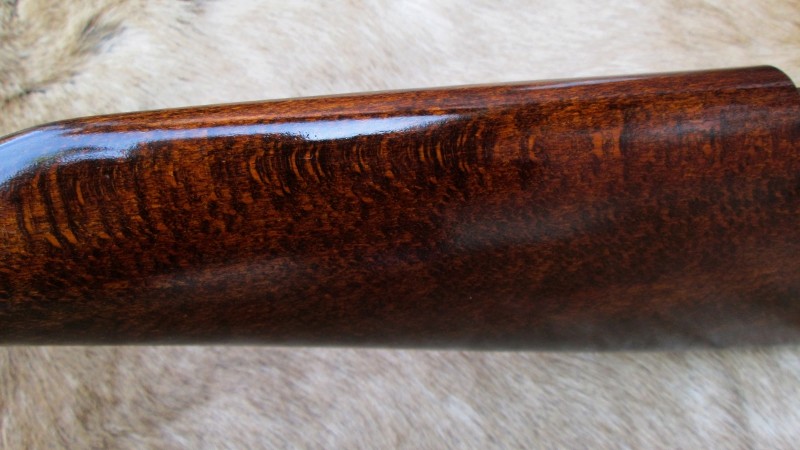
Really nice and dark! I buffed it back with steel wool and tested with boiled linseed oil. The color is perfect. Got it soaking in BLO now to presoak the wood and then apply truoil tomorrow afternoon.

Last edited by MountainDevil54; 09-23-2018 at 12:39 PM.
11-28-2016 | 02:48 PM
#6
Thread Starter
Banned
Joined: Dec 2008
Posts: 9,186
Likes: 0
From: Boncarbo,Colorado
yep! I already got a spot on the wall for it.
I thought about leaving the lock silver, but with the brown barrel and brass, kinda just to much going on for another color.
Looking forward to getting some truoil laid down!
I thought about leaving the lock silver, but with the brown barrel and brass, kinda just to much going on for another color.
Looking forward to getting some truoil laid down!
11-28-2016 | 08:47 PM
#7
Boone & Crockett
Joined: Jan 2004
Posts: 12,823
Likes: 5
From: Eastern PA
Jon you're making me think of a project for over the winter while I'm in Florida. Last year I purchased a T/C Hawken at an on line auction and took my time refinishing the stock and polishing the brass. I must have put 15 coats of TruOil on it. But it came out really nice.
11-29-2016 | 06:01 PM
#8
Spike
Joined: Feb 2016
Posts: 56
Likes: 0
Interesting. Your note on 50 cal caught my eye as the recent Oct. issue of MuzzleBlast had an interesting article about the Bridger Hawken. In the article reads some history of Sam Hawkens move westward into CO and made note of the 50 being so popular was because of the availability.
11-30-2016 | 06:05 PM
#9
Spike
Joined: Feb 2016
Posts: 56
Likes: 0
Have to clarify myself. The article DID NOT mention 50 cal and availability. I recalled that today and confirmed by re-reading the article, the author told me that when I visited him in September on my way to Friendship. He's also planning 2 additional Hawken articles and supporting rifles - repo's that he is building.
The Bridger Hawken - 1866 was a 54 cal.
The Bridger Hawken - 1866 was a 54 cal.