


Project GLADIOUS
 07-13-2014 | 05:42 PM
#1
Thread Starter
Typical Buck
Joined: Jan 2014
Posts: 921
Likes: 0
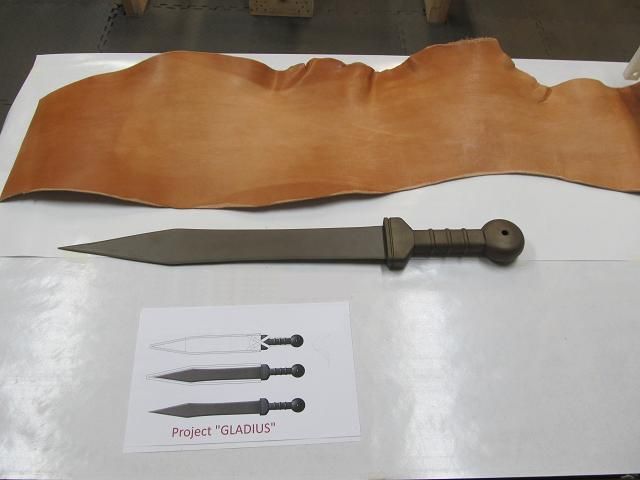
I was contacted by a fellow from another forum and asked to make a sheath for a sword he bought. I had never made a sheath for a sword before so I decided to take on the job. He asked me to make a leather sheath for his Cold Steel “Gladious” sword. (see link)
http://www.coldsteel.com/Product/97G...S_MACHETE.aspx
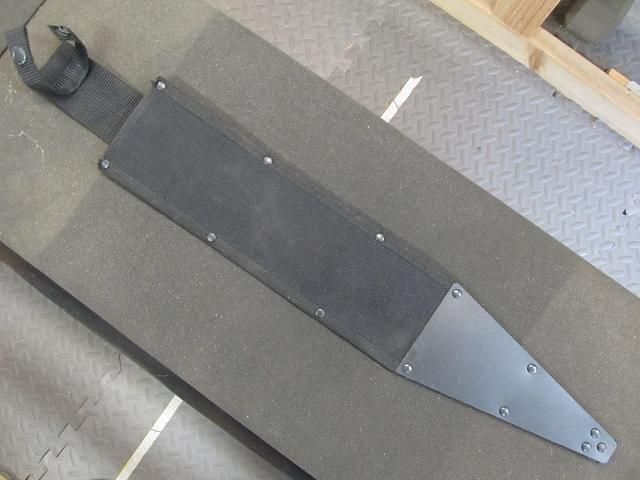
At nearly 2 pounds its an impressive piece but sadly it comes in a canvas and plastic sheath.
He wanted something a little more in keeping with the era (more “period”). Right away I could see all sorts of potential for Celtic stamping and ornate carving but he would hear nothing of the sort. He wanted it plain, an everyday foot soldier sort of look to it with nothing fancy. I was bummed out but it’s his sword and I have to respect that.
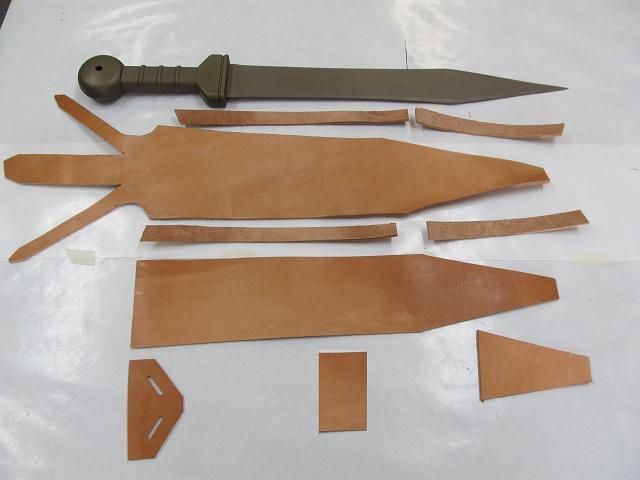
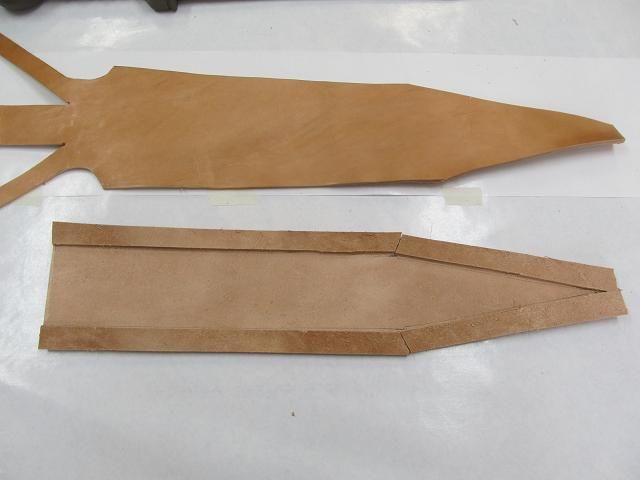
The sheath that came with the sword and the typical wrap and snap like so many knife sheaths have but modern snaps would also not have been in keeping with the time period so I needed to find another way to keep the sword in the sheath with the leather I had on hand. I am using 8 Oz tooling leather (about an 1/8 of an inch thick.)
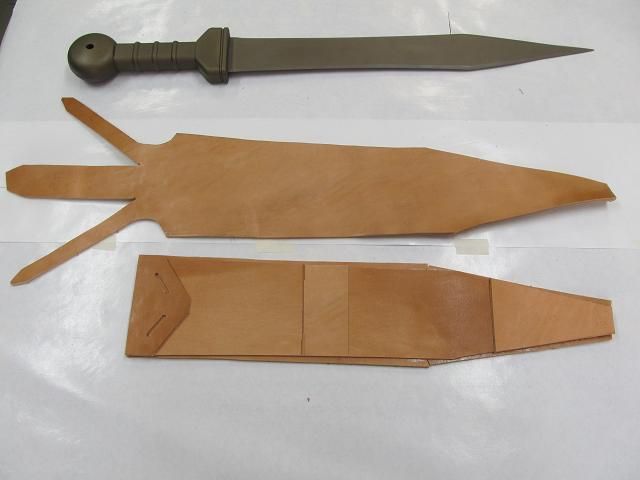
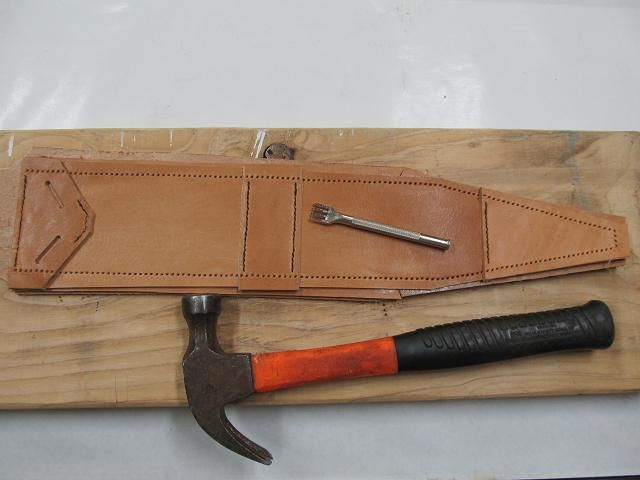
Step one was to create a design and then cut out all the pieces of leather with a razor knife.
All the pieces are positioned and tacked in place with contact cement so they don’t shift while hand stitching.
The welt is sandwiched between the front and rear portions of the sheath and is equal to the thickness of the sword blade otherwise a blade this long would get pinched/trapped in the leather and the blade edge would cut all the stitching during insertion.
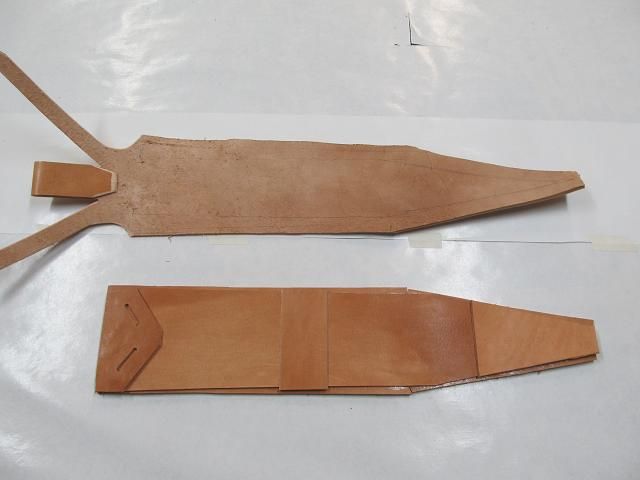
The features of the front face are stamped and stitched since it would be impossible to do so after the front and rear of the sheath are joined.
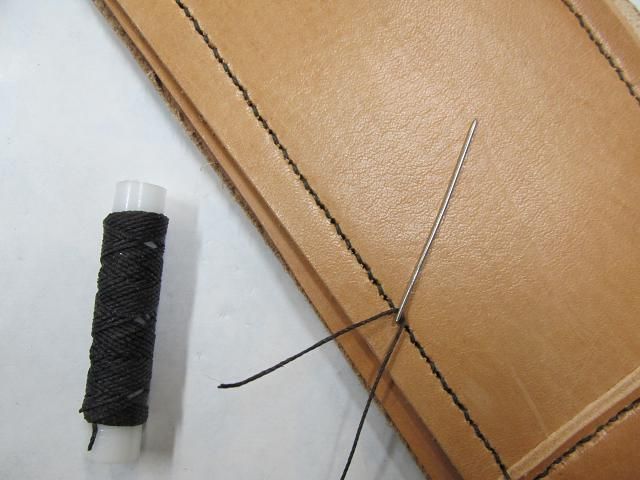
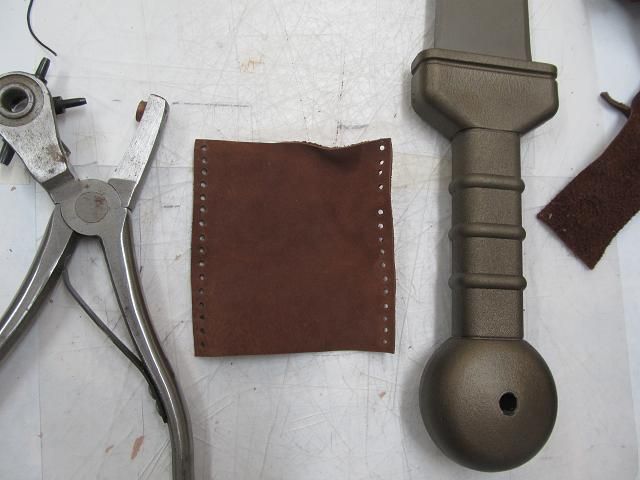
Then all the stitching holes are stamped through all the layers.
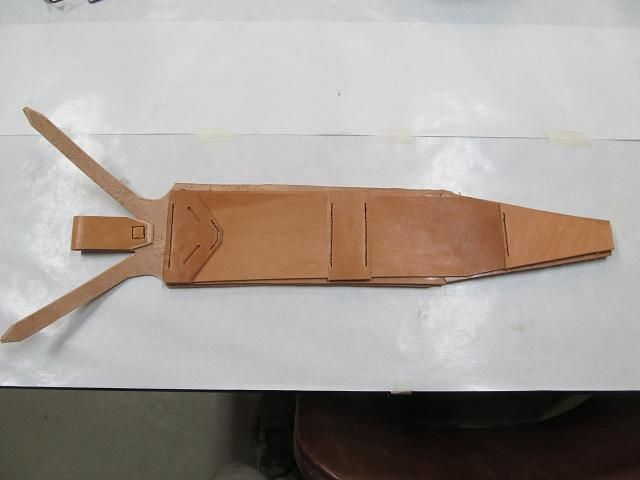
Then lots and lots of time stitching by hand. (and with a pliers because this sheath is over a half inch thick to prevent that needle tip of the sword from coming though the leather)
After stitching the final trim is done with a razor knife.

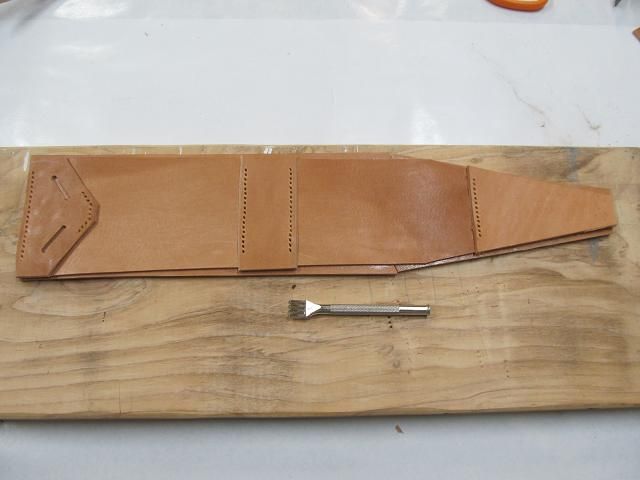
Then the outer edges are beveled and wetted and slicked round with a deer antler.
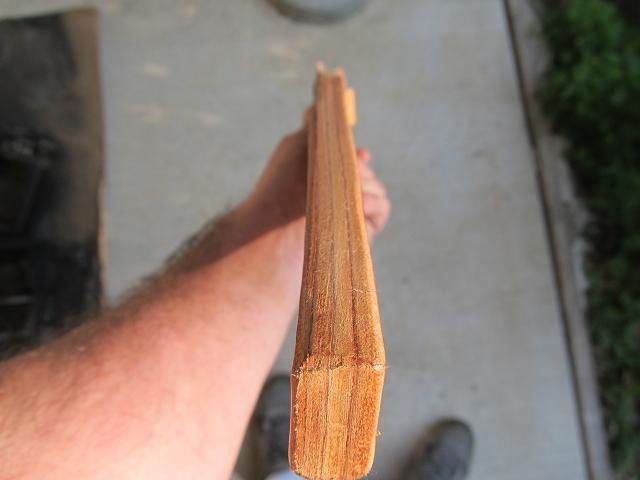
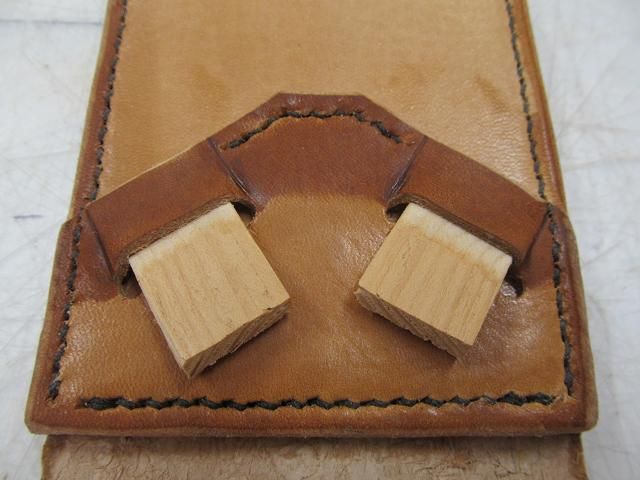
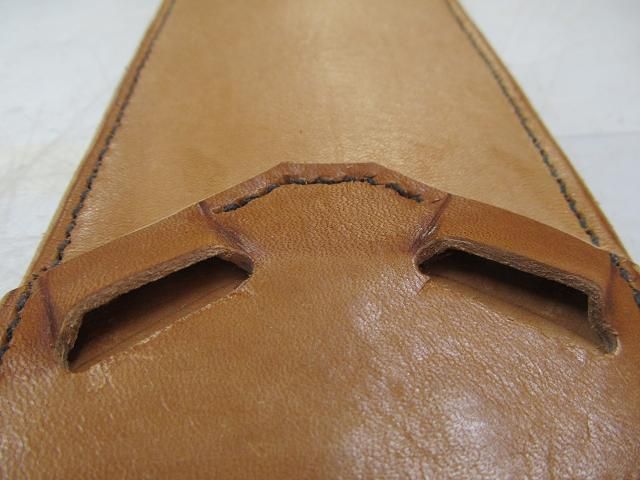
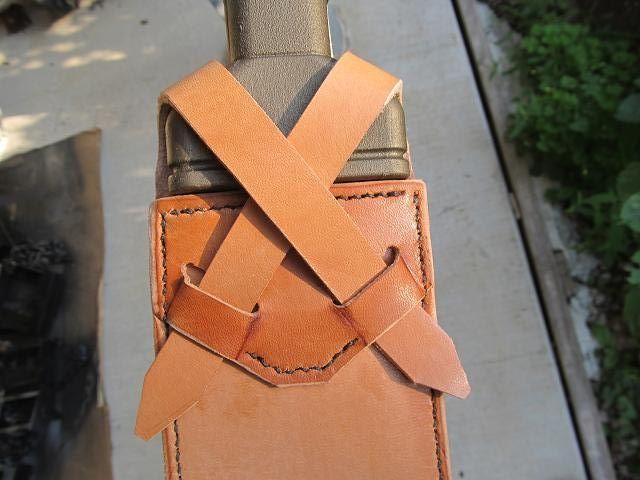
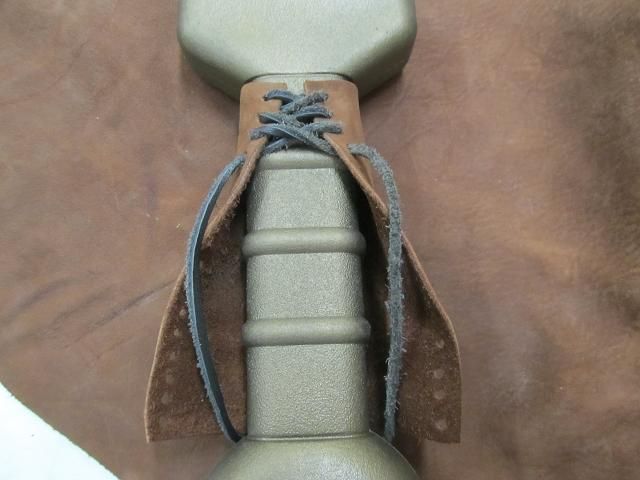
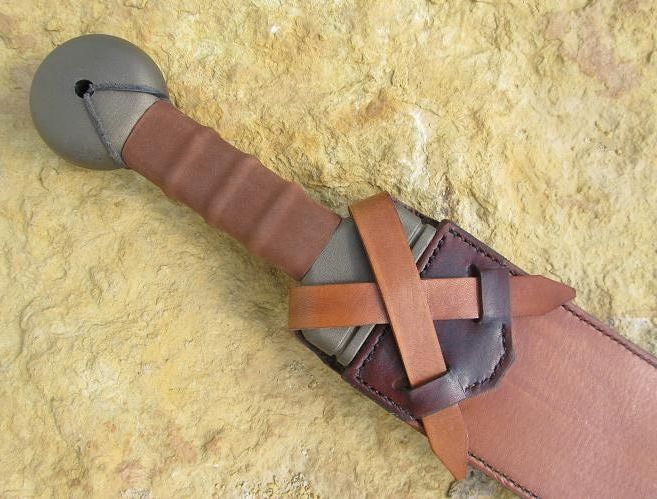
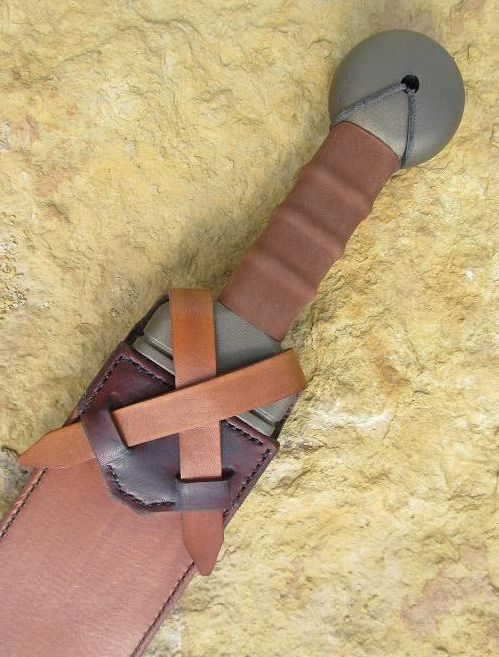
The sword will be kept in the sheath with the two integral leather straps but feeding the straps though the openings will be tough so I tapered some wood blocks and wetted the leather to mold and lock in a shape. The wood blocks are tapered to a zero thickness that allows the straps to be fed in but still afford the friction at the lead outside to hold the straps securely.
So far so good. Time for a trial fit.
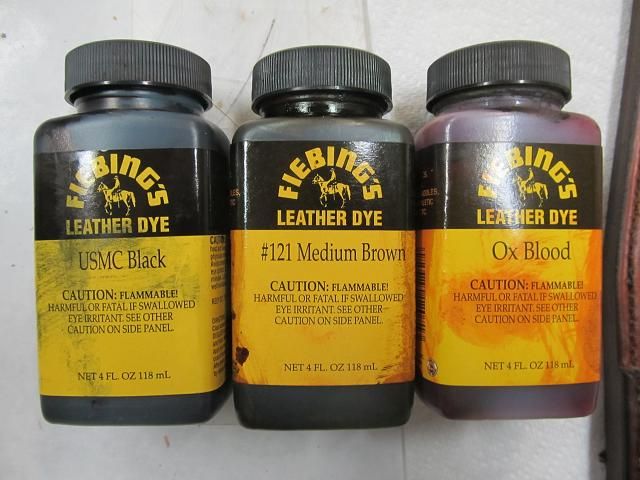
I wanted the sheath to have a distressed/antique sort of feel to it. I did a little mixology with denatured alcohol and a few colors.
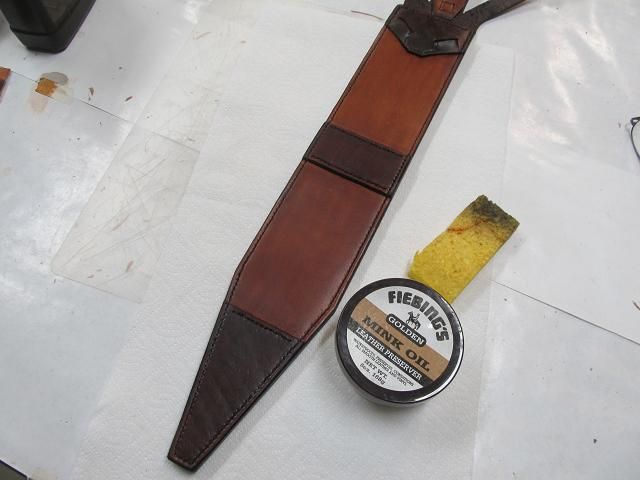
After drying I gave the sheath a few applications of warmed mink oil to waterproof.
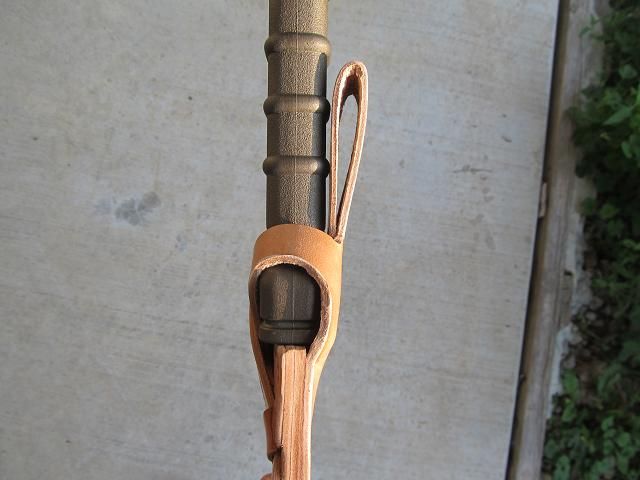
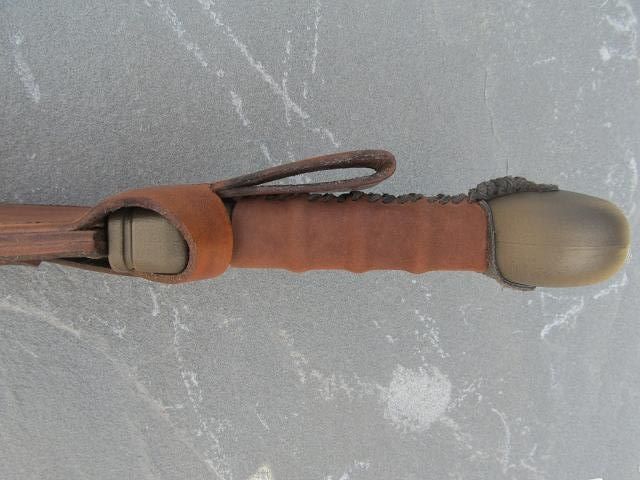
Then I turned to the grip and wrapping it with leather.


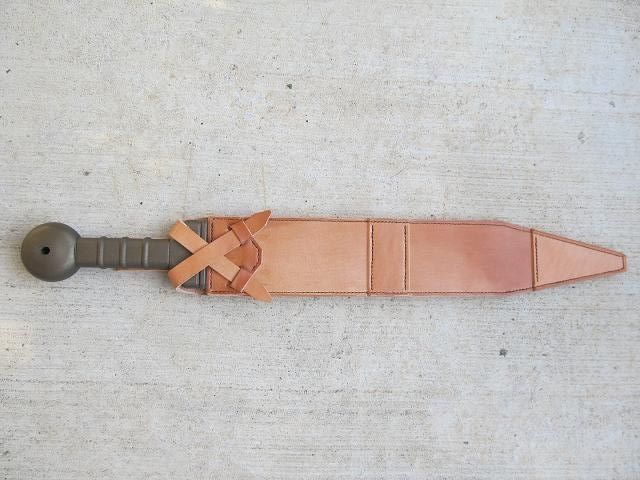
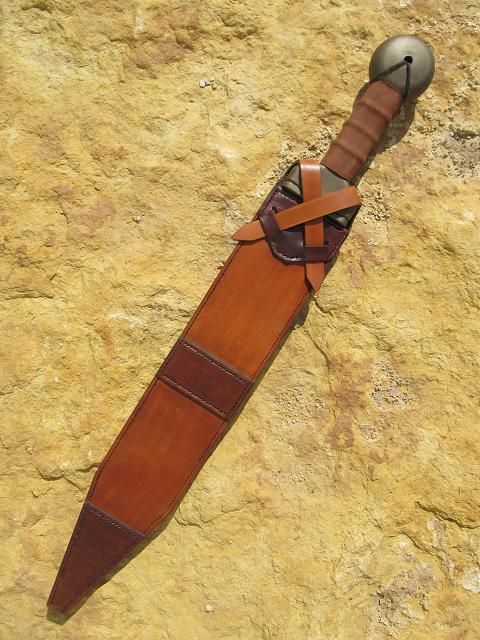
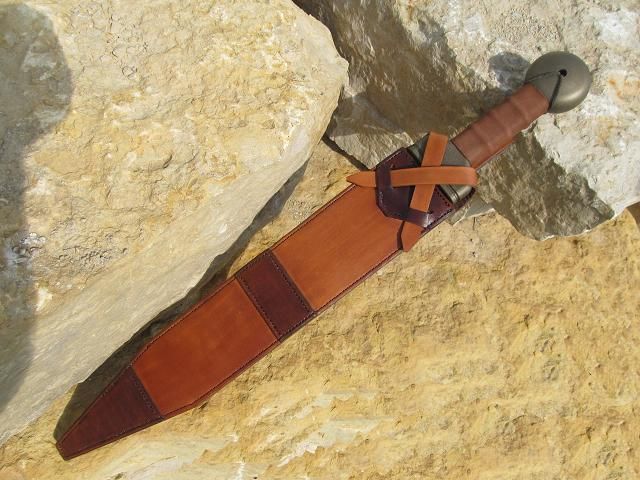
Project Gladious is finished and ready to return to its owner.
http://www.coldsteel.com/Product/97G...S_MACHETE.aspx
At nearly 2 pounds its an impressive piece but sadly it comes in a canvas and plastic sheath.
He wanted something a little more in keeping with the era (more “period”). Right away I could see all sorts of potential for Celtic stamping and ornate carving but he would hear nothing of the sort. He wanted it plain, an everyday foot soldier sort of look to it with nothing fancy. I was bummed out but it’s his sword and I have to respect that.
The sheath that came with the sword and the typical wrap and snap like so many knife sheaths have but modern snaps would also not have been in keeping with the time period so I needed to find another way to keep the sword in the sheath with the leather I had on hand. I am using 8 Oz tooling leather (about an 1/8 of an inch thick.)
Step one was to create a design and then cut out all the pieces of leather with a razor knife.
All the pieces are positioned and tacked in place with contact cement so they don’t shift while hand stitching.
The welt is sandwiched between the front and rear portions of the sheath and is equal to the thickness of the sword blade otherwise a blade this long would get pinched/trapped in the leather and the blade edge would cut all the stitching during insertion.
The features of the front face are stamped and stitched since it would be impossible to do so after the front and rear of the sheath are joined.
Then all the stitching holes are stamped through all the layers.
Then lots and lots of time stitching by hand. (and with a pliers because this sheath is over a half inch thick to prevent that needle tip of the sword from coming though the leather)
After stitching the final trim is done with a razor knife.
Then the outer edges are beveled and wetted and slicked round with a deer antler.
The sword will be kept in the sheath with the two integral leather straps but feeding the straps though the openings will be tough so I tapered some wood blocks and wetted the leather to mold and lock in a shape. The wood blocks are tapered to a zero thickness that allows the straps to be fed in but still afford the friction at the lead outside to hold the straps securely.
So far so good. Time for a trial fit.
I wanted the sheath to have a distressed/antique sort of feel to it. I did a little mixology with denatured alcohol and a few colors.
After drying I gave the sheath a few applications of warmed mink oil to waterproof.
Then I turned to the grip and wrapping it with leather.
Project Gladious is finished and ready to return to its owner.

