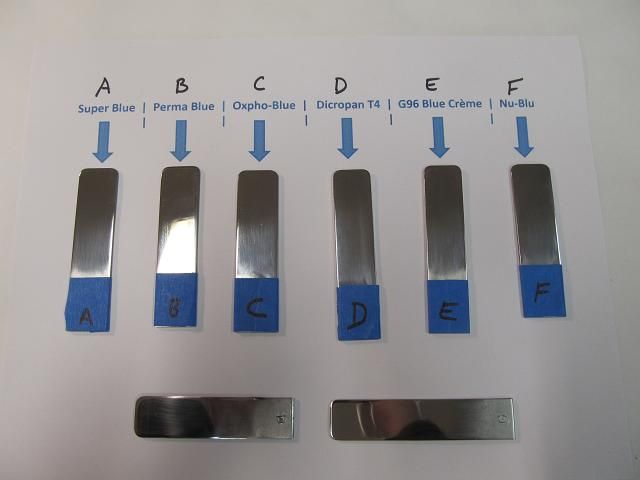
Here is the lineup of blues.
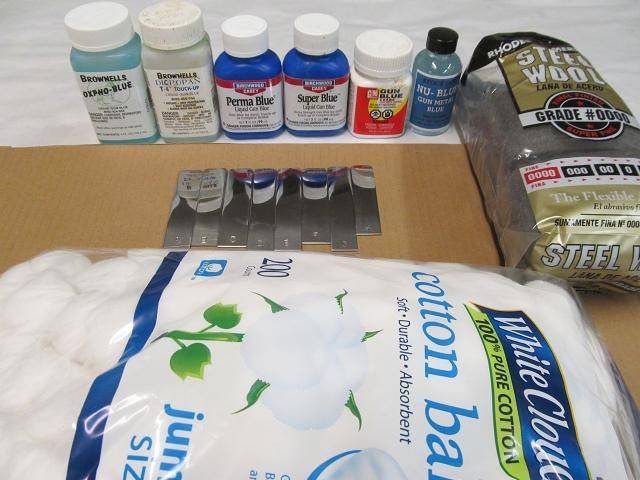
The bottom of each sample was taped to prevent bluing from contacting the metal for reasons that will be explained later. Here is the lineup of samples. A thru F are the bluing samples, the other 2 are the controls and have also been polished on one side and 400 grit bruised on the other. An additional control will be added which is a sample from the same sheet of steel but it will have nothing done to it in terms of sanding or polishing or bluing.
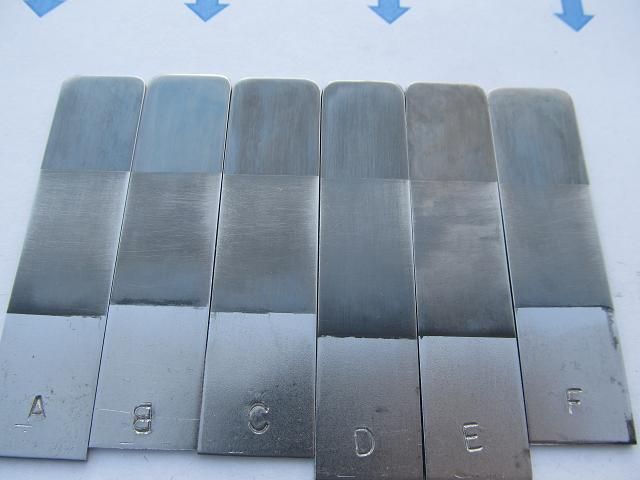
Each sample is then blued according to the Mfgr instructions. This is the appearance after the first application of blue. The first application does the most to the steel in terms of forming the oxide and black powdery soot (for lack of a better term). The first application does the most in regards to etching the metals surface. These samples have not been steel wool polished to remove the oxide soot. Samples A and E were the most caustic to the steel while C and D made the steel the blackest. After the blue was applied I wiped the pieces down with a clean paper towel prior to rinsing with water. All the samples soiled the paper towel with black soot except F. The soot was brownish red from F.
The dried samples were then buffed with 0000 steel wool. This is their appearance after the first bluing application and buffing.

Bluing etches the metal as it forms the oxidation. This impacts the polished surface. Not all the blues were equal in the caustic etching. Samples C and F retained the polished finish the best. Its hard to tell from still photos so I shot a short video showing the samples. You can see by the reflection of the overhead lights in the metal which samples retained their polished surface and which ones etched away the smooth surface finish. This video is of the polished side of the samples
https://www.youtube.com/watch?v=IzTfH0UHjSE
This video is of the 400 grit side.
https://www.youtube.com/watch?v=lM1dWtK-_rM
I took notes during the bluing. This is what I noted.
The least powdery (soot) finish was created by F
The least streaking (overall uniform finish) was sample F
The darkest bluing of the metal was on samples C and D
The least coloring (bluing) was sample E
The most streaking and powdery buildup was sample E
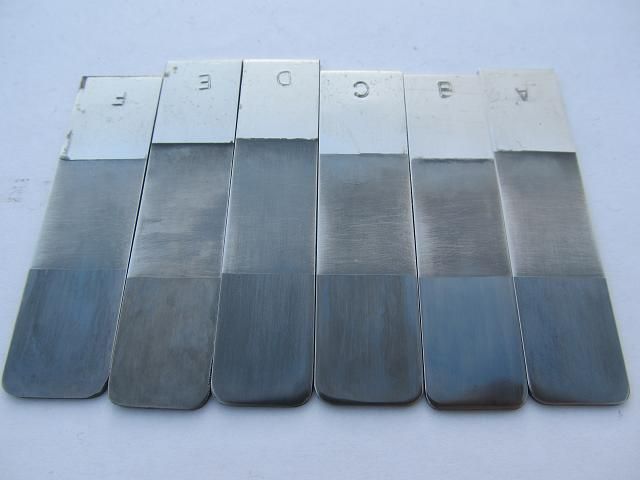
Then all samples were blued 3 more times. Here is an image after all bluing and buffing is complete.

My notes state the following
The least overall streaking and most uniform finish were samples B and F
The least caustic (white corrosion forming while the liquid sat on the metal) were D and F
The sample that retained the most polished finish on the metal was F
The darkest sample was D followed by F
The least dark was E
I asked my wife to write down her observations but the words she used most likely would not make it past the censors. She is such a kidder.
With this first comparison complete and based on these criteria.
Darkening/bluing of the steel
Uniformity
Retained surface polish
I have to give the nod to F with C and D coming in close behind.
Bluing, coloring the steel is all well and good but how it stands up to use is just as important (unless you like to reblue over and over because it wears through) so the next step was to evaluate how well the different blues stand up to abrasion. All the blued samples were taped off with a double layer of painters tape at one end of the sample so it would not be worn away but would lay directly next to the wear area for comparisons sake. Each sample was placed in a vise and given 200 strokes with a fine bristled (but stiff) stainless steel brush. Each sample will also get 100 strokes with 000 steel wool, then the tape will be removed to compare the wear and non-wear areas to see how well they retained the blue. This abrasion exercise is far more aggressive than normal gun use and would be considered extreme abuse but I didn’t have 10 years of pulling a gun out of a cloth case to see which wears better.
Here are the samples before the abrasion exercise.

Here are the samples after the abrasion process.
And viewed from another angle.
My notes state (and the pictures show) that samples D and F retained the most bluing and sample E lost the most bluing (but then E was the least blued to begin with).
During this process and so I get an additional opinion I would show the samples to my loving and supportive bride and ask her to point out the darkest and the shiniest and the one that retained the most bluing, etc. (also because she knows nothing about guns or metal or bluing or why this would matter, she would be a good impartial observer) She doesn’t say much but when she does she gets right to the point. So when I asked for her thoughts she looked at me and said:
“(Sigh) I thought you were going to fix that dripping kitchen faucet today? You promised me you would do it this weekend and the new faucet is still sitting in the box on the kitchen table? You always get sidetracked by your gun projects and my projects always blah blah blah blah blah (eye roll) my mother warned me that you were blah blah blah.”
But anyway, I digress. For the ability to stand up to abrasion (and haughty criticism with a hint of frustration) the nod goes to D and F. The samples that gave up the most bluing were E followed by A.