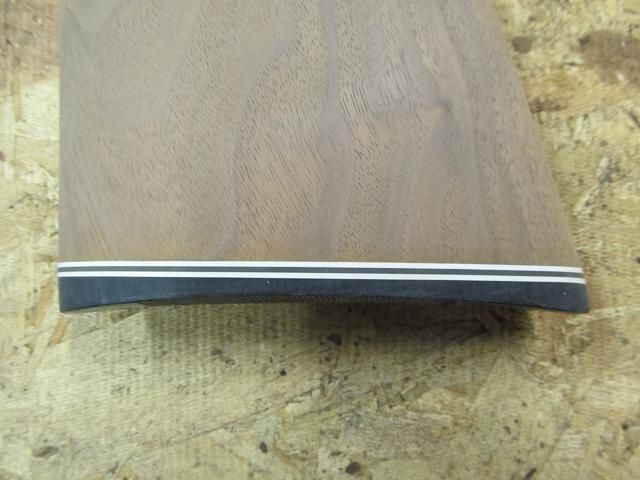
I placed a chisel in the butt plate end of the stock to spread the crack open. Then, using a syringe and Tightbond glue I filled the crack and clamped it tightly for several hours. During that time I cut a few black and white plastic spacers to match the plastic butt plate size and hole spacing. Then I attached the spacers and butt plate to the stock and sanded the old finish off the stock and down to the size of the original butt plate. This shaped the black and white spacers. The gun didnt originally have black and white spacers but I like how they dress up the look of a gun so I added them.
When I was sanding at the 400 grit level I made sure there was plenty of wood dust packed in the crack and then laid down a layer of super glue to mix with the fine wood dust. The super glue mixes with the wood dust and creates a great gap filler made up the same material as the surrounding wood. Look up “super glue and baking soda” on youtube. Its an interesting method of repair and crack filling. I used walnut dust from the stock instead of baking soda.
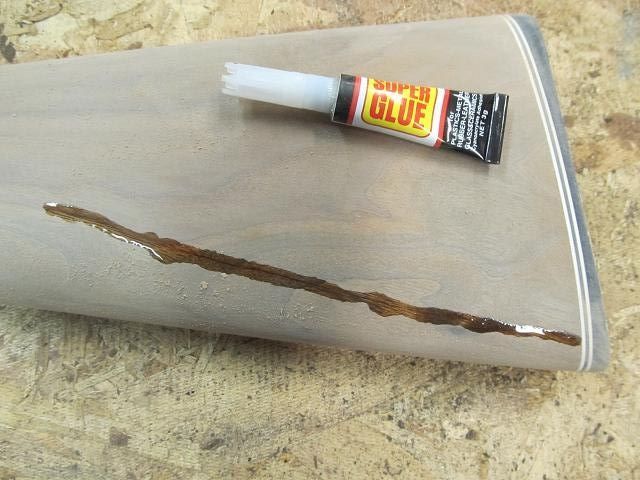
The goal here is to fill the void so that the crack is not visible as a surface imperfection that can be seen and felt through the finish. The super glue dries almost instantly and you can go back to sanding the wood.
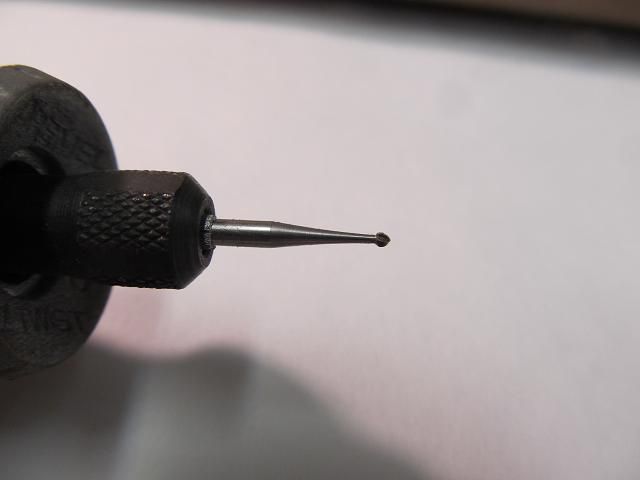
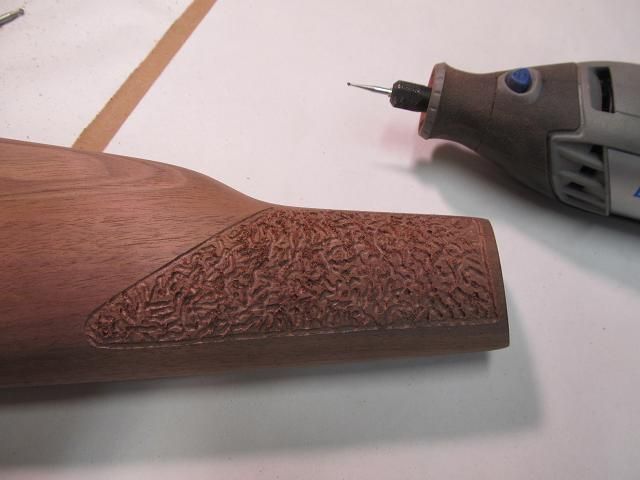
Satisfied that the stock repair worked I tried my hand at stippling. Stippling is the ugly 2nd cousin of checkering (which I want to get into down the road) In simple terms its just a pattern stamped, gouged, pecked, embossed into the wood to increase the grip or traction for your hand when holding the stock. It can be done with a hammer and nail or any of a variety of means to create a random or organized pattern in the wood. I planned to try it with a Dremmel tool and a very tiny ball cutter. I used the 105N engraving cutter
http://www.dremel.com/en-us/Accessor...l.aspx?pid=105
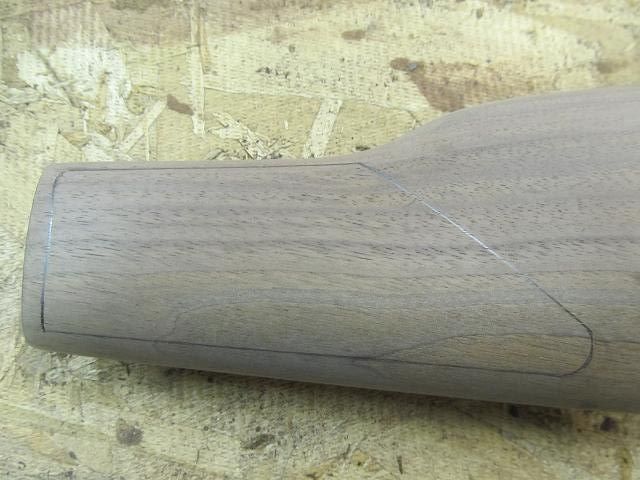
If you have ever knocked the bark off a piece of old wood and have seen the tunnels bored by insects, thats the sort of look I was going for (if the insects were working overtime and on crack)
I sketched an area on both sides of the grip that I would stay in (always stay inside the lines) The plan is to freehand as best as I can. I would freehand not only the outline but also the depth and the random pattern. I plan to only go about a 16th of an inch deep.
Keeping to the scribed line was tough but manageable. I couldn’t push too deep or the bit would really dig in and take you for a ride. I learned quickly to go slow with not much pressure. Here is how it turned out (fuzzy burrs and all prior to sanding).
Then I did some sanding with 400 grit to remove the burrs along the edges of the grooves.

Then I took a bit of 000 steel wool to it to get deeper into the grooves. Here is the outcome.
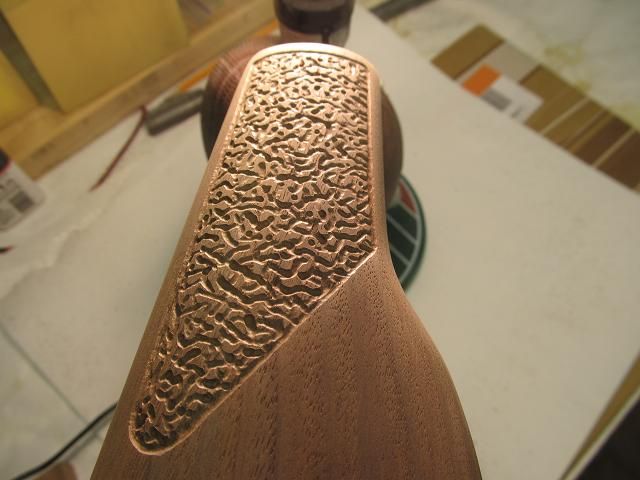
Here is a video that better shows the end result. Im pleased with the results.
http://www.youtube.com/watch?v=P759C2ekS5k
Now the stock parts can be refinised with tung oil and I can get to cleaning up the metal parts.