


Make Your Blackhorn QRBP
 08-16-2012 | 02:33 PM
#1
Thread Starter
Nontypical Buck
Joined: Aug 2008
Posts: 3,732
Likes: 0
From: Rapid City, South Dakota
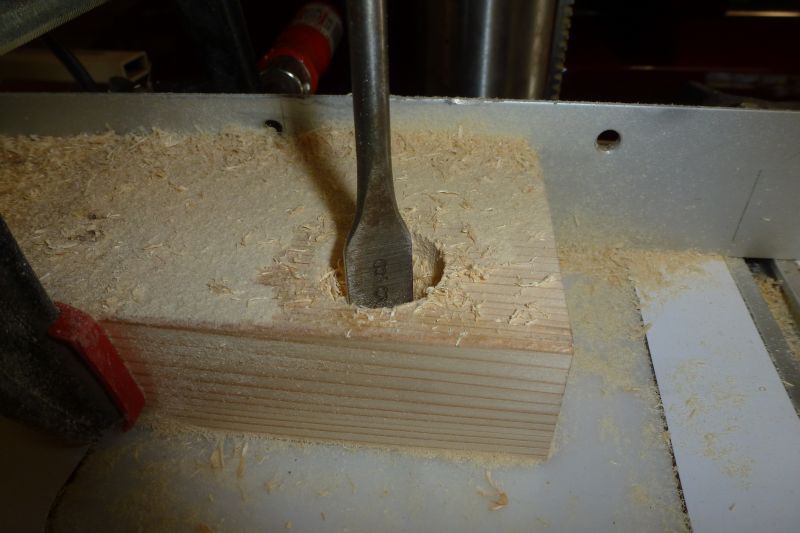
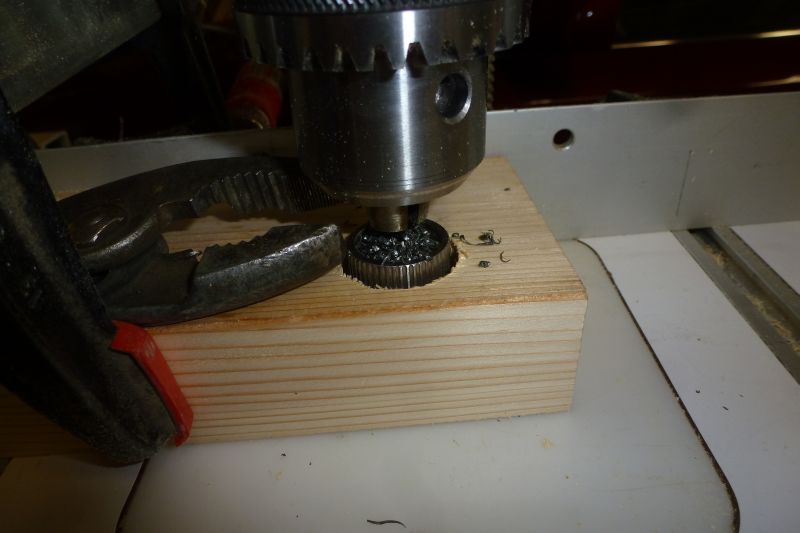
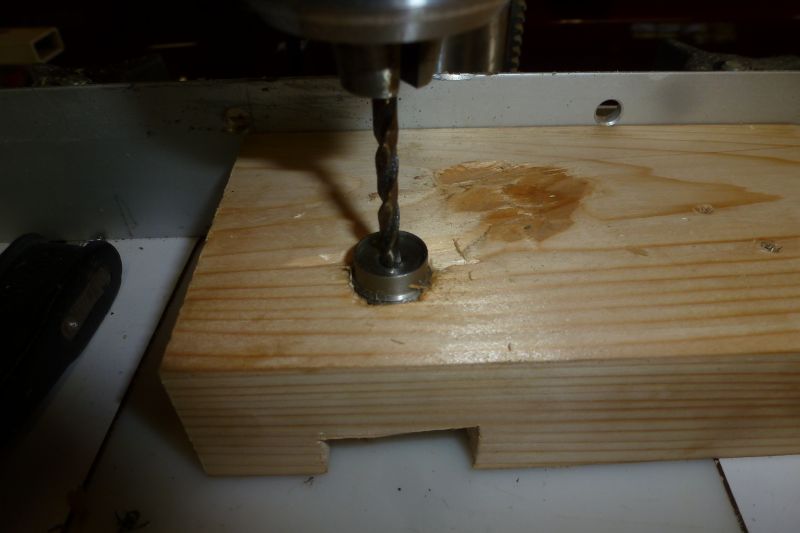
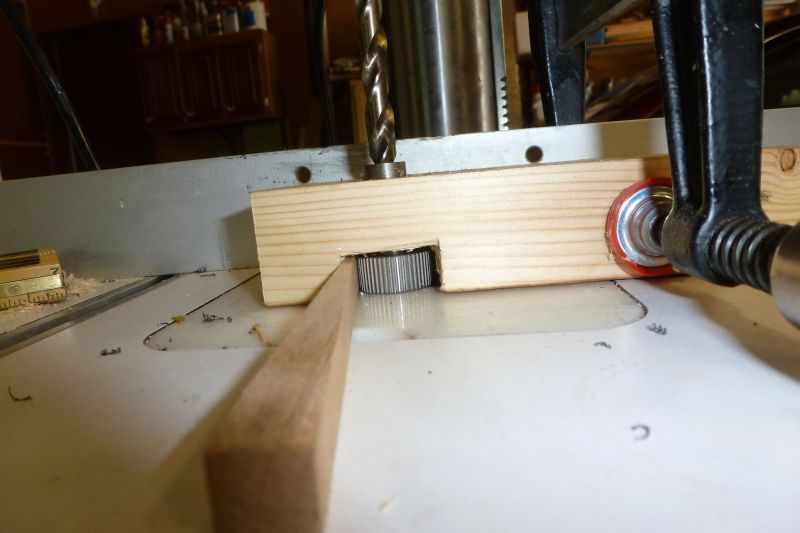
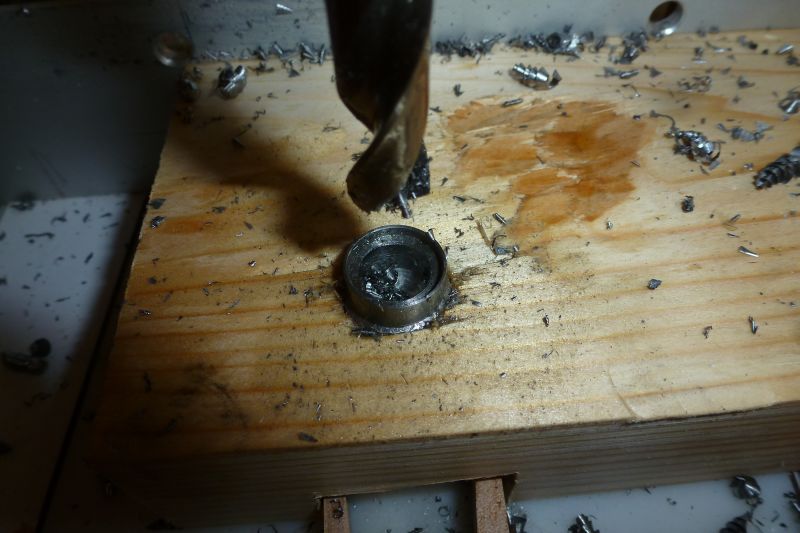
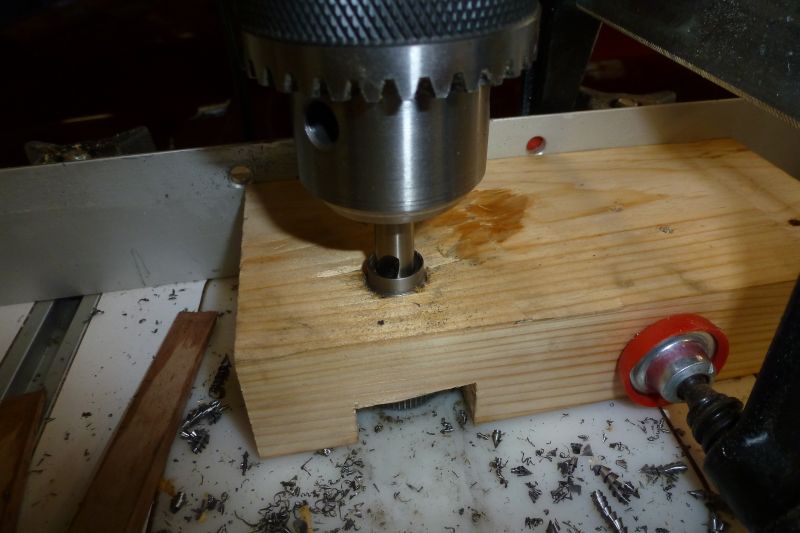
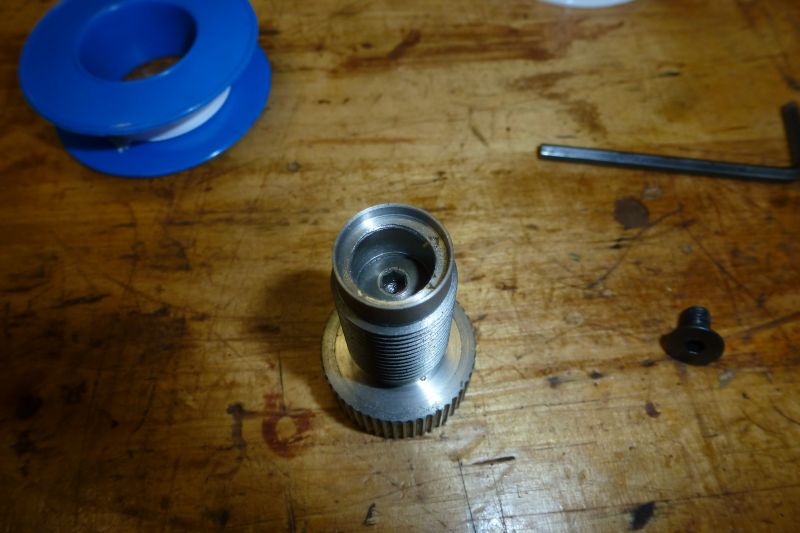
Returning home from the hills this morning i noticed the thread about the special QRBP made to successfully ignite Blackhorn 209 powder. This got me to wonder if i could make one this afternoon, without much machinery. It seemed i could make one using a drill press, and no other machine. To begin i found a chunk of 2 X 4, and a QRBP, and commenced. The 2 by was clamped and prepped.
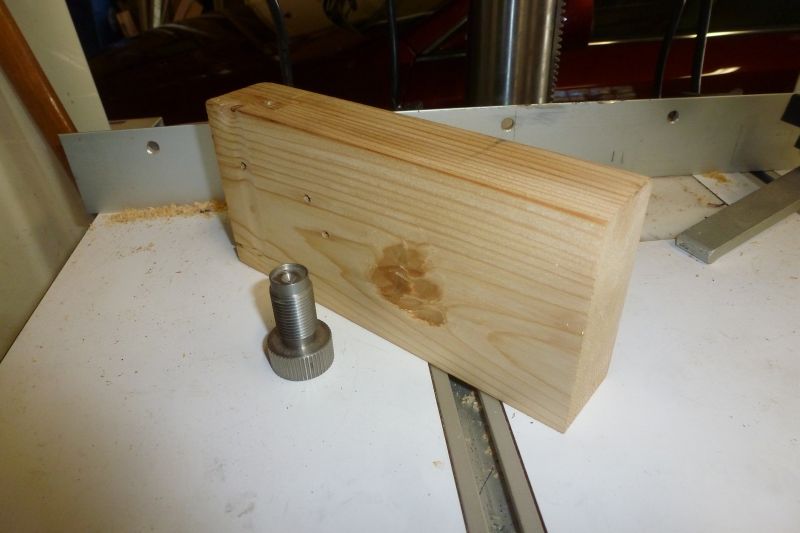
Started with a 1 1/8" drill, and made the hole deep enough to hold the head of the QRBP. Then switched to a 5/8" drill and drilled all the way through the 2 X 4.
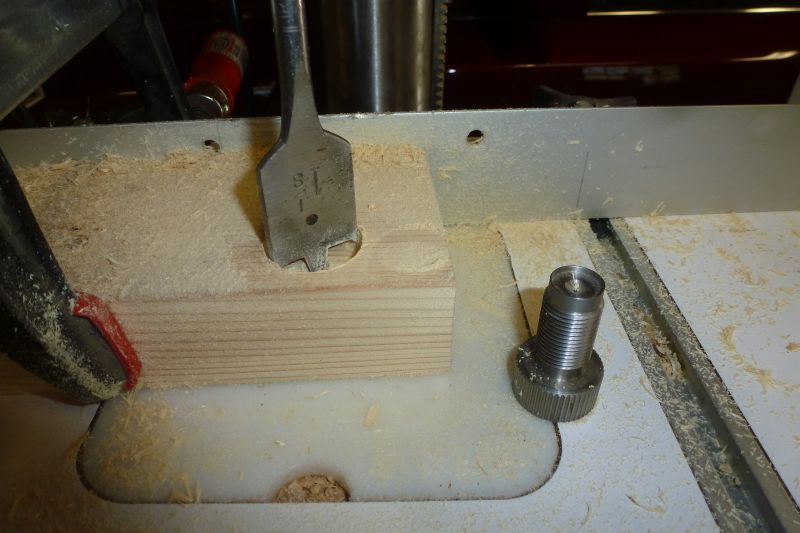
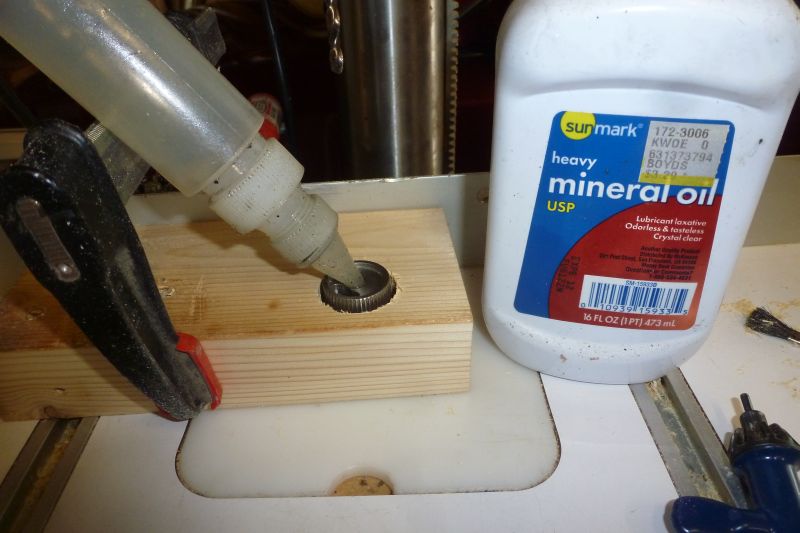
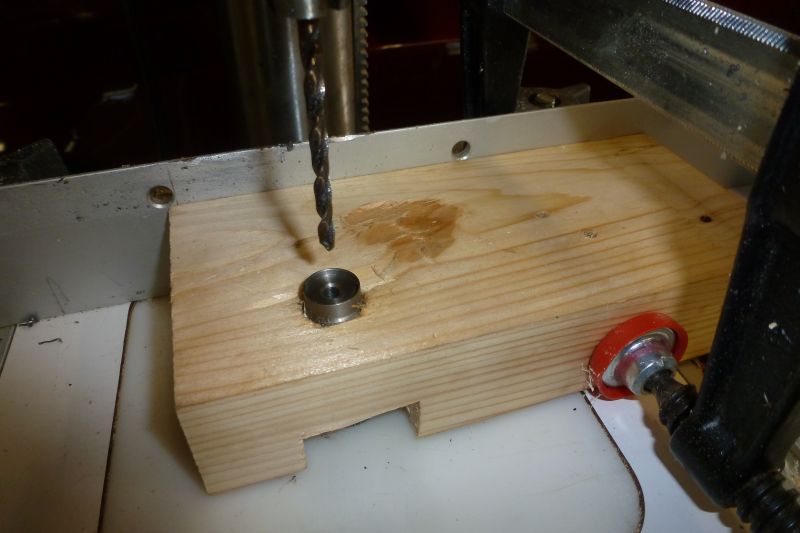
A 5/32" drill was chucked, the QRBP placed in the jig, lubricated, and the flame channel was enlarged and drilled the full length of the plug.
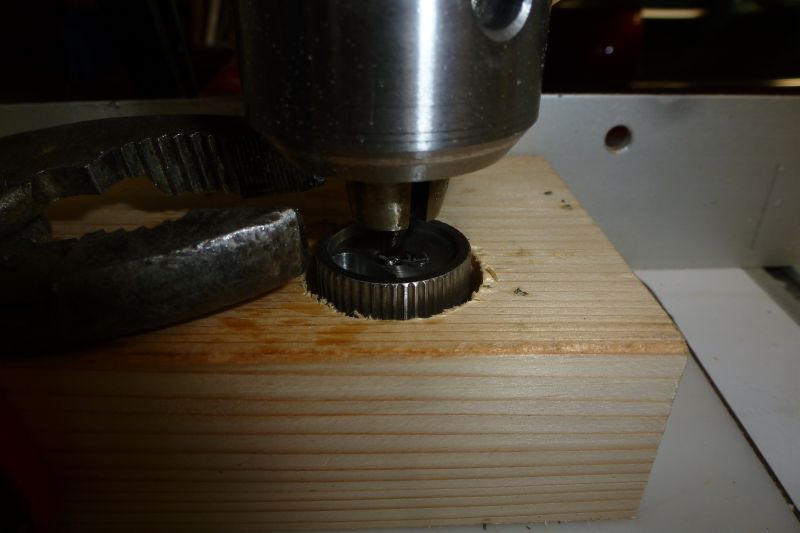
The clamp was removed holding the 2by to the drill press. The edge of the 1 1/8" hole was chiseled away.
The QRBP was installed into the 2by and the shebang was placed on the drill press table with the powder end of the plug up. The 5/32" drill was used to center the plug before the 'jig' was clamped to the fence.

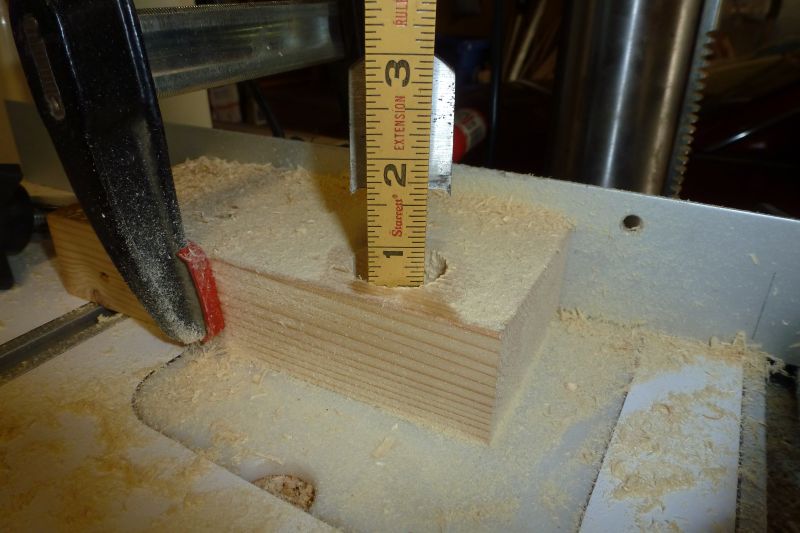
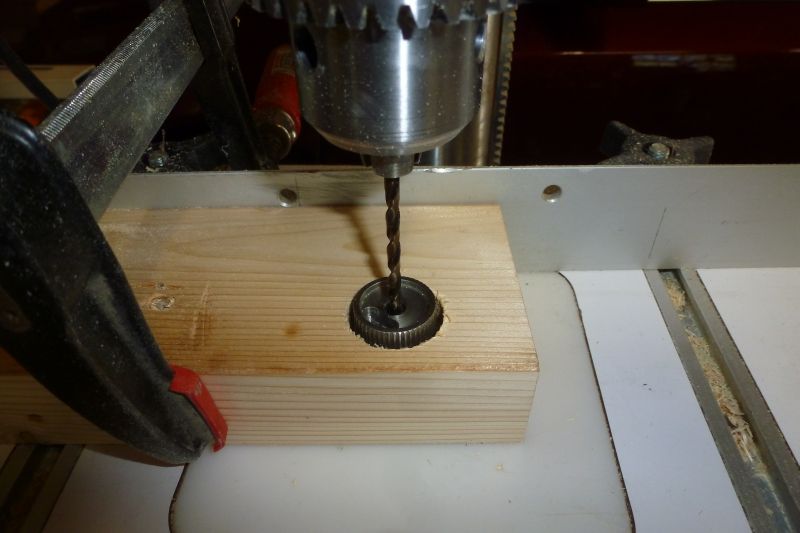
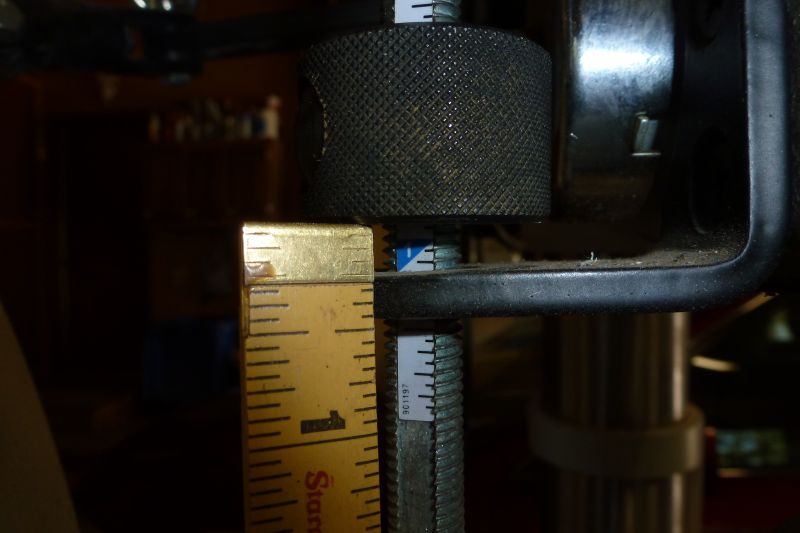
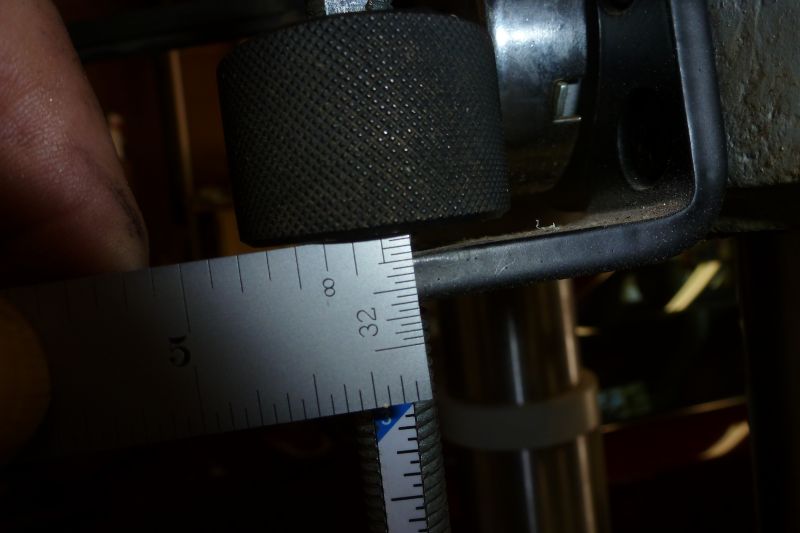
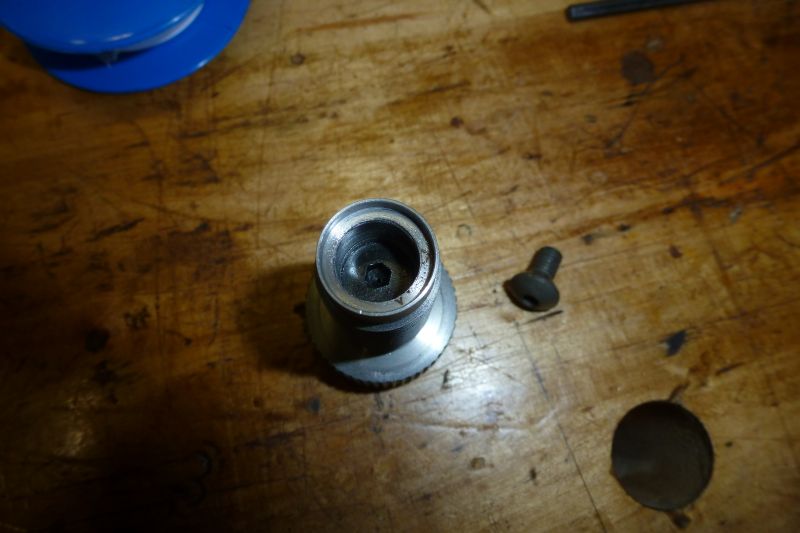
A 3/8" drill was chucked and lowered to the QRBP. The depth stop was set to 1/4". Wedges were used to stop the plug from spinning. This turned out to be a struggle.
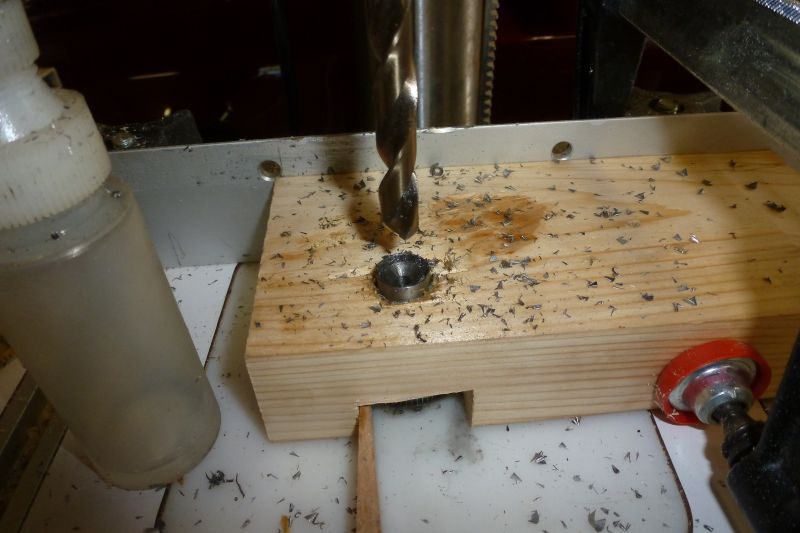
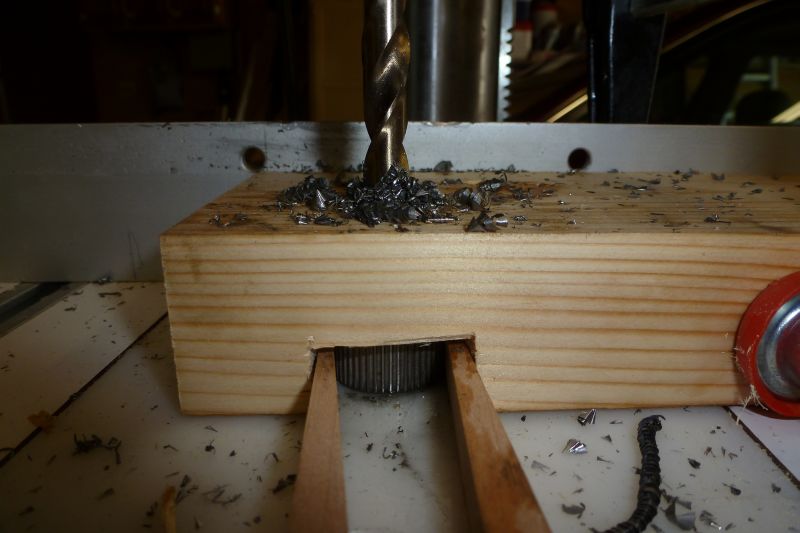
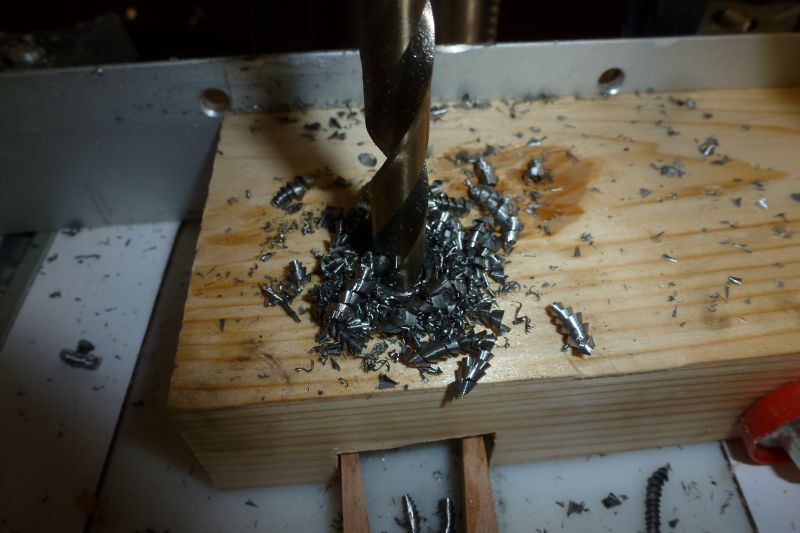
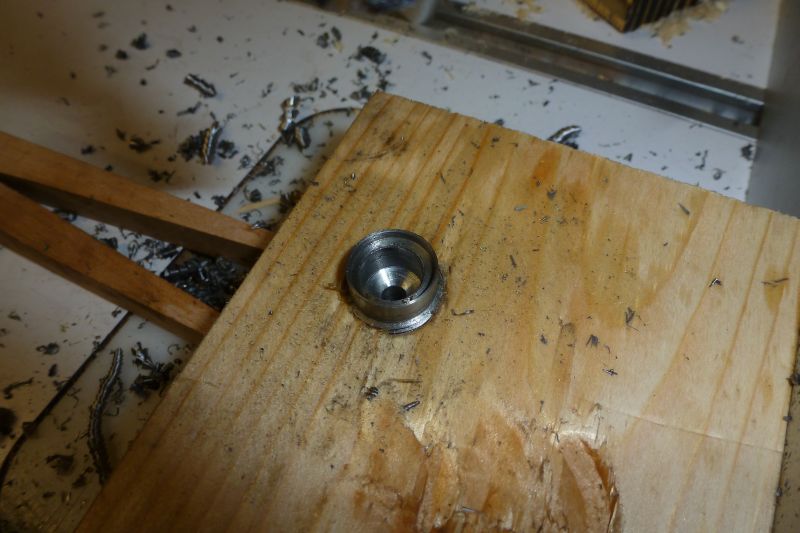
After the 3/8" was made 1/4" deep the drill was replaced with a # 4 1/2 center drill. This drill cuts so the slope of the cut is 82 degrees which is what the slope of the head of standard vent liner is.
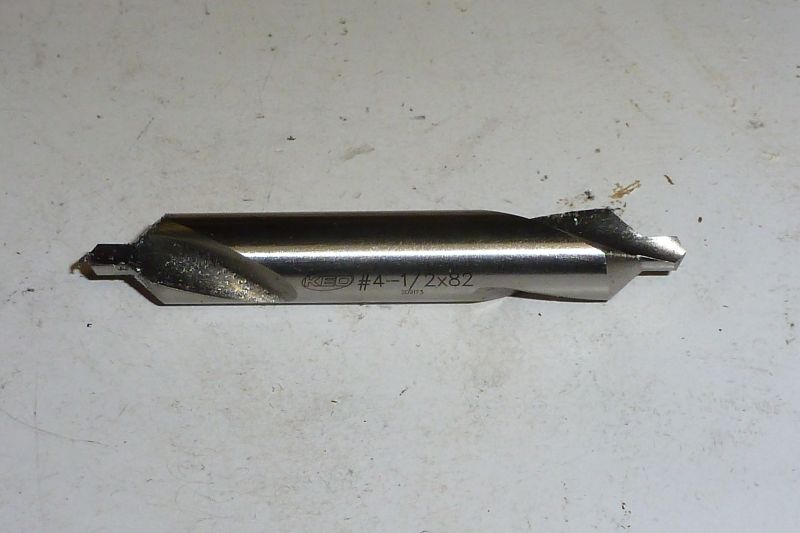
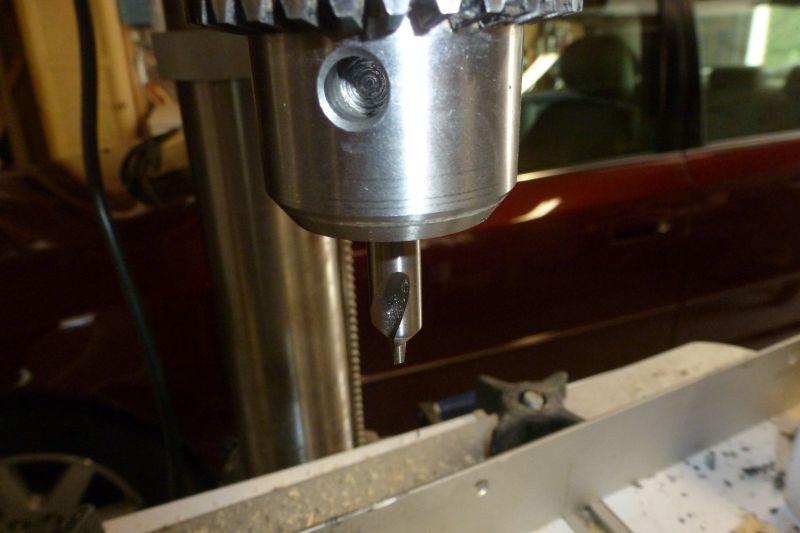
The center drill was lowered into the plug, and the depth stop was set at 1/8" cut.

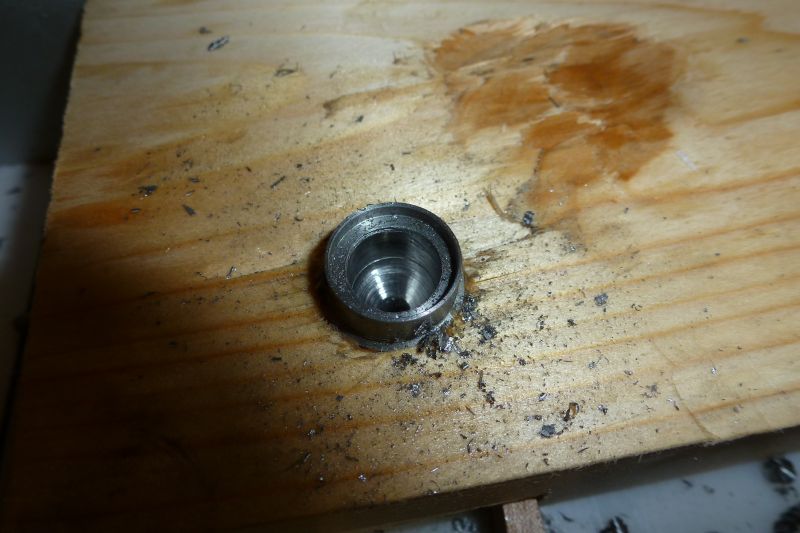
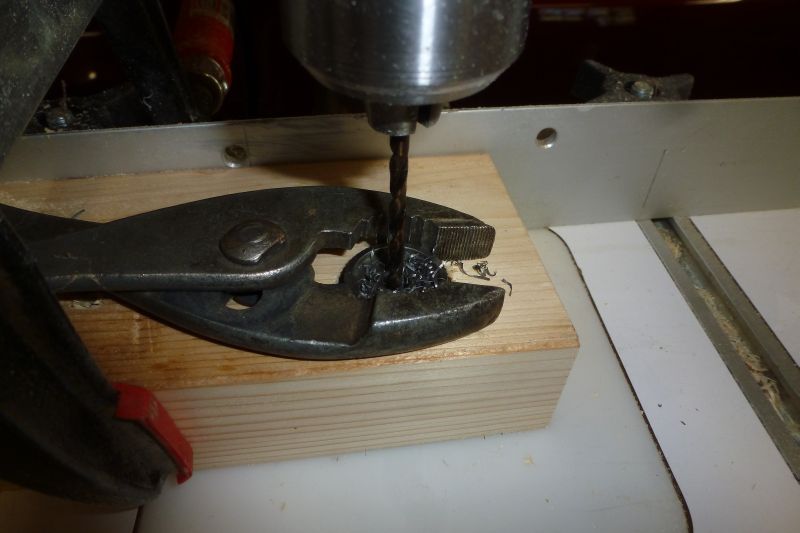
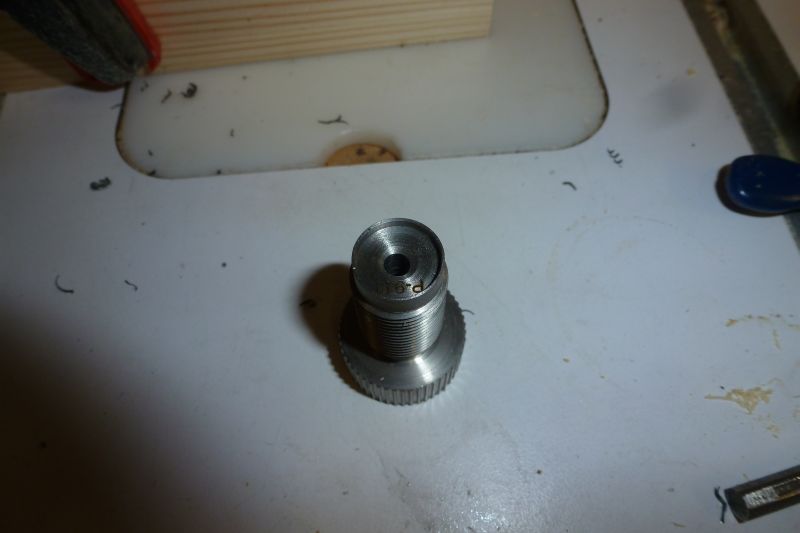
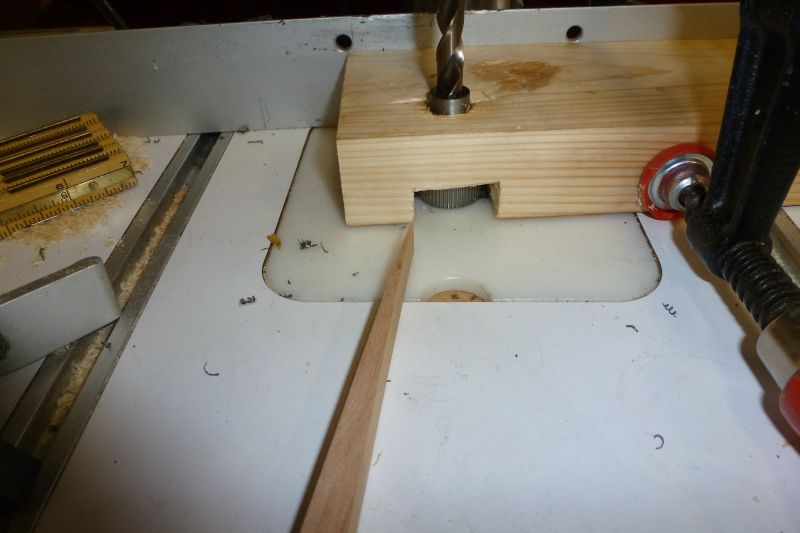
Then the plug was ready to tap the threads for a vent liner. The belts were removed from the motor, and a 10-32 tap was chucked and about 8 revolutions of thread were cut.
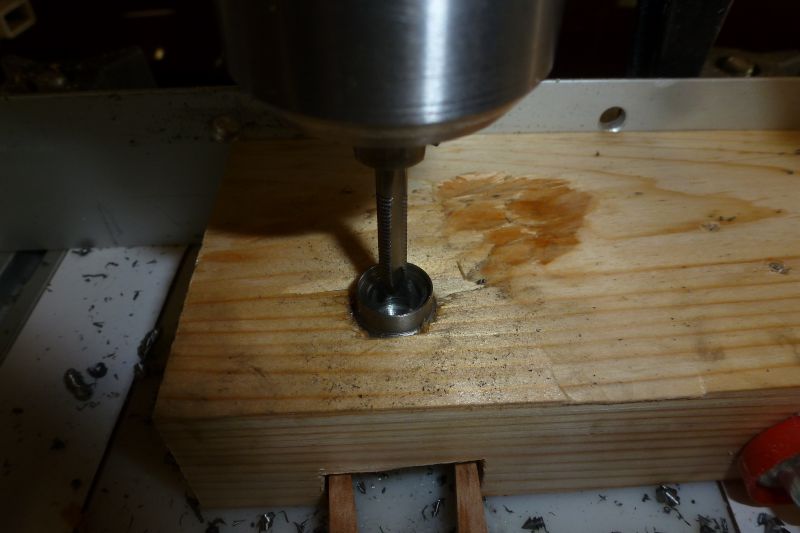
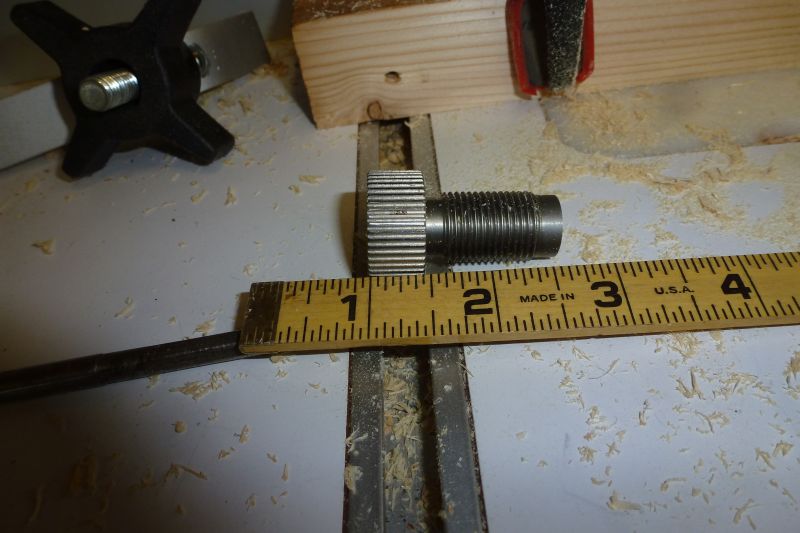
The plug was finished and tested with a couple of vent liner.
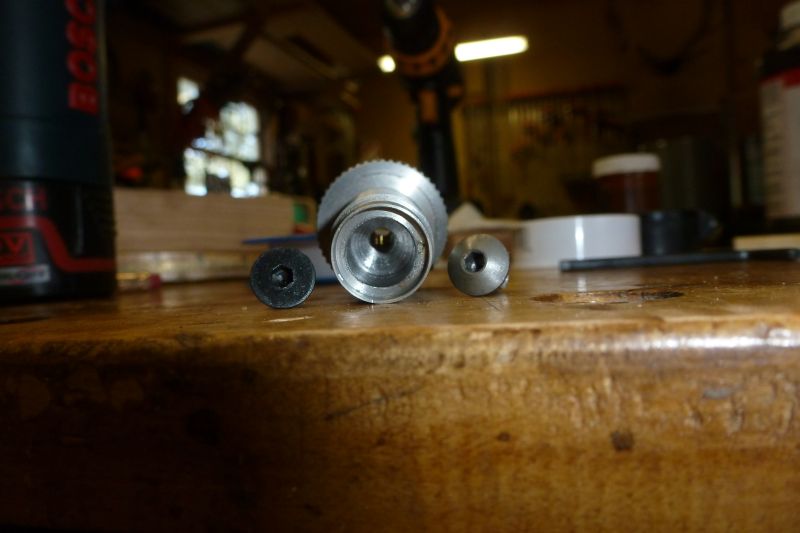

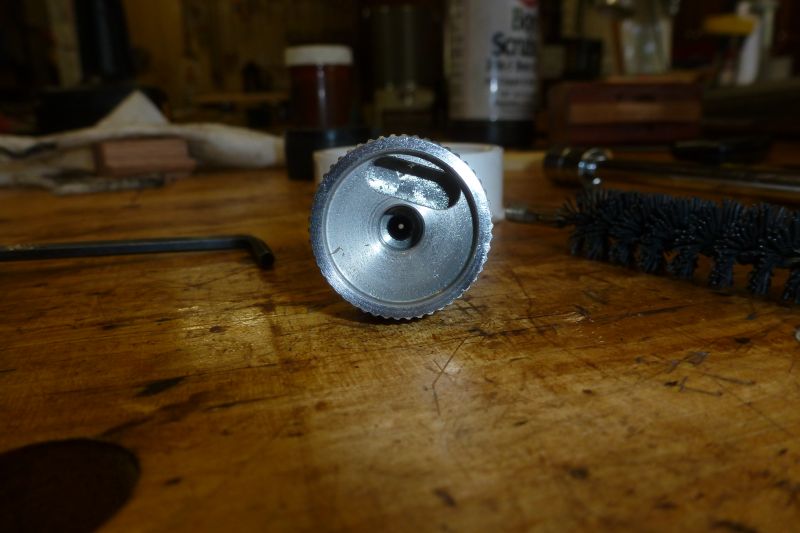
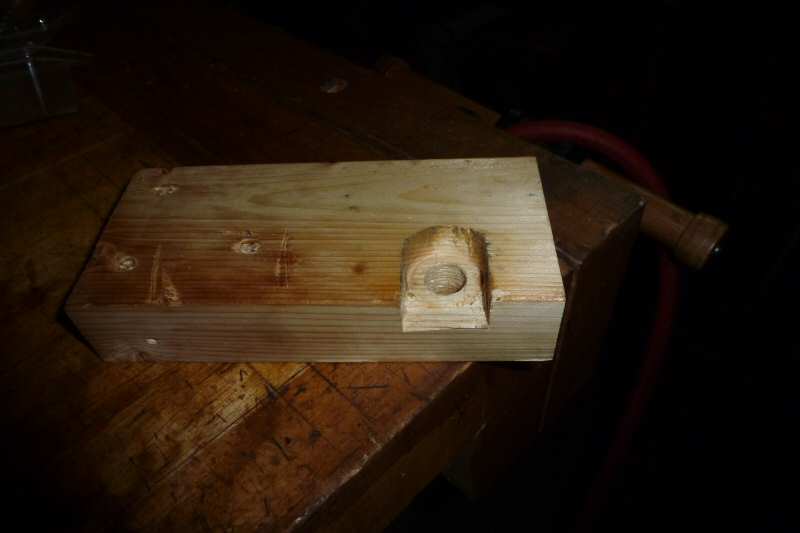
The use of wedges to keep the plug from spinning wasn't so very good. Perhaps a larger mortise so a wrench could be used?
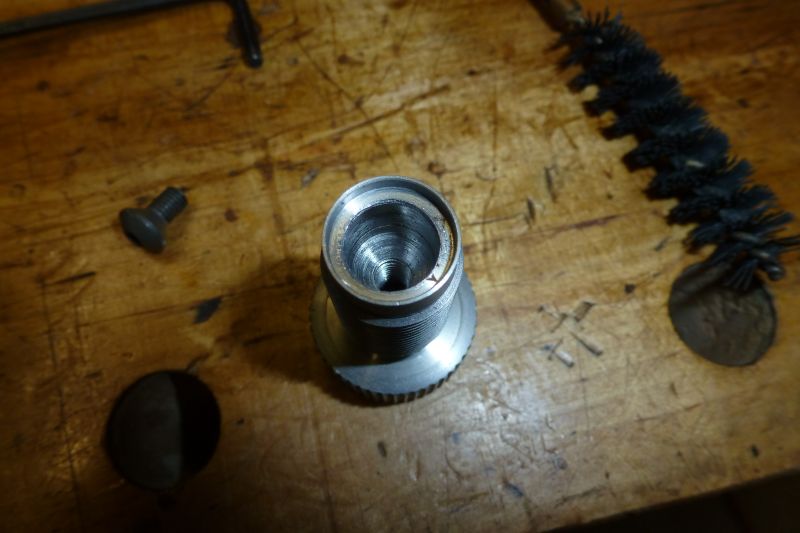
This plug is better than the factory made for Blackhorn QRBP. Other QRBP made the same, have never failed to ignite BH209, ever. This plug ignites BH in sub-zero weather. It has a flash hole that won't wear out. When flash hole in the vent liner erodes, it is readily replaced. The flame channel of the factory Blackhorn plug is short and narrow. The flame channel of this plug, has more volume than the purchased plugs; it is longer and is a larger diameter. This added volume reduces the pressure on the primer, and helps keep the primer from leaking. The added volume will allow more shots at the range before the channel gets choked.
Started with a 1 1/8" drill, and made the hole deep enough to hold the head of the QRBP. Then switched to a 5/8" drill and drilled all the way through the 2 X 4.
A 5/32" drill was chucked, the QRBP placed in the jig, lubricated, and the flame channel was enlarged and drilled the full length of the plug.
The clamp was removed holding the 2by to the drill press. The edge of the 1 1/8" hole was chiseled away.
The QRBP was installed into the 2by and the shebang was placed on the drill press table with the powder end of the plug up. The 5/32" drill was used to center the plug before the 'jig' was clamped to the fence.
A 3/8" drill was chucked and lowered to the QRBP. The depth stop was set to 1/4". Wedges were used to stop the plug from spinning. This turned out to be a struggle.
After the 3/8" was made 1/4" deep the drill was replaced with a # 4 1/2 center drill. This drill cuts so the slope of the cut is 82 degrees which is what the slope of the head of standard vent liner is.
The center drill was lowered into the plug, and the depth stop was set at 1/8" cut.
Then the plug was ready to tap the threads for a vent liner. The belts were removed from the motor, and a 10-32 tap was chucked and about 8 revolutions of thread were cut.
The plug was finished and tested with a couple of vent liner.
The use of wedges to keep the plug from spinning wasn't so very good. Perhaps a larger mortise so a wrench could be used?
This plug is better than the factory made for Blackhorn QRBP. Other QRBP made the same, have never failed to ignite BH209, ever. This plug ignites BH in sub-zero weather. It has a flash hole that won't wear out. When flash hole in the vent liner erodes, it is readily replaced. The flame channel of the factory Blackhorn plug is short and narrow. The flame channel of this plug, has more volume than the purchased plugs; it is longer and is a larger diameter. This added volume reduces the pressure on the primer, and helps keep the primer from leaking. The added volume will allow more shots at the range before the channel gets choked.
 08-17-2012 | 11:58 AM
#3
Typical Buck
Joined: Jun 2006
Posts: 882
Likes: 0
http://imageshack.us/photo/my-images...chplug002.jpg/
Well I did play with the original plug that came with the CVA Optima
I did buy the new plug for the BH209 powder so what the heck
I did notice the original plug was hollow after drilling into it from the center hole made at the factory.
I then added a piece of round stock and drilled a .033 hole which I used a hydraulic press for a super tight fit,I yet to try it I think it will work
08-17-2012 | 02:45 PM
#4
Thread Starter
Nontypical Buck
Joined: Aug 2008
Posts: 3,732
Likes: 0
From: Rapid City, South Dakota
I think it will work too. Looks nice. It appear you used a lathe to bevel the chamber at the mouth. Is that how you managed such a nice fit? Seems you would have had to turn the hole some or the round some? Perhaps you were able to use a 5/16" round and a letter P drill?
Just so you know, now that you have the breech plug looking like it does, a 0.028" hole is large enough to provide reliable ignition in sub-zero weather of BH powder. That way, you can have more shots as the hole erodes. Another thing that is helpful, is to increase the size of the flame channel from 3mm to 5/32". Sabotloader first showed us this a couple of year ago. What this does is reduce the pressure on the primer. This also allows more shooting before the flame channel gets clogged by burnt carbon.
Hopefully you don't think me presumptuous making these suggestions; obviously you don't need my help to make a nice looking breech plug. Your work looks as though it were done by a real machinist, not a carpenter somehow getting by.
08-17-2012 | 03:22 PM
#5
Typical Buck
Joined: Jun 2006
Posts: 882
Likes: 0
I did used a lathe to bevel the chamber at the mouth.
I did not have anything smaller then .033 for a center hole
the steel spacer I turn down on the lathe then use a press to fit into the channel, I was my surprise to see the cva plug is hollow.
all suggestions are welcome
I did not have anything smaller then .033 for a center hole
the steel spacer I turn down on the lathe then use a press to fit into the channel, I was my surprise to see the cva plug is hollow.
all suggestions are welcome
08-24-2012 | 12:20 PM
#7
Thread Starter
Nontypical Buck
Joined: Aug 2008
Posts: 3,732
Likes: 0
From: Rapid City, South Dakota
I make them.
http://www.huntingnet.com/forum/blac...ventliner.html
The method used in the link, i just did to see if one could readily make them vent liner without much in the way of machinery.
http://www.huntingnet.com/forum/blac...ventliner.html
The method used in the link, i just did to see if one could readily make them vent liner without much in the way of machinery.
 02-04-2014 | 04:01 AM
#9
Thread Starter
Nontypical Buck
Joined: Aug 2008
Posts: 3,732
Likes: 0
From: Rapid City, South Dakota
In the shop there is normally a 5/32" drill chucked in a drill motor, close to where i clean the rifles. What i do is remove the vent liner, and run the 5/32" drill all the way through the breech plug, from the primer end. Most of the flame channel is not threaded, and seems to guide the drill past the threads so that neither the threads nor the drill 'knows' the other is there.
After the breech plug is soaked, and wiped off, the vent liner has always been re-installed, without an issue. Never once have i damaged threads using the described method. However, if somehow the threads were damaged, it would be a trivial matter to 'chase' the threads with a 10-32 tap. At least i think it would be trivially easy, but cannot say for sure, because i have never done it.
The flame channel could probably be cleaned with the vent liner in place with no problem, but i have never done so. Myself, i don't think it matters how one goes about removing the carbon from the flame channel.
