I don’t have the tools (tall drill press) to pull off drilling a 16 inch deep hole through the entire butt stock for the mounting bolt that attaches the stock to the receiver so I need an alternate way to make a butt stock with a way to access the bolt for assembly.
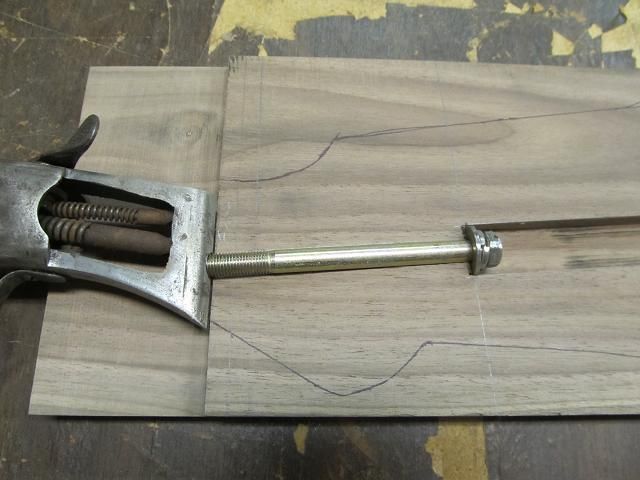
The long bolt that holds the gun to the stock was not with the gun so I need a replacement. My hardware store did not carry a 5/16 fine thread machine screw as long as I need note with a straight slotted head for a screwdriver so I bought a bolt and slotted it myself.
It dawned on me while looking at some of the knives I’ve made and the bows I have made that there might be a way to make the stock that fits with the simple tools I have and things I have built in the past. Then I got to thinking about the trend in gun stocks being laminated from many layers of wood and epoxy (some seem to have more epoxy than wood). I will make a laminated stock with only two laminations. I will split the stock in half to pocket out for the long bolt then epoxy it back together.
Today’s epoxies are very strong and I have had great luck with them for knife handles and laminated bows I have built so I have no concerns that it will bond this walnut with strength matching a solid piece of wood.
Back to the Walnut beam. This looks like a good section. Yes that is dried blood on the beam. I hauled the beam home with my gun season buck in the back of my truck and blood got on the beam.
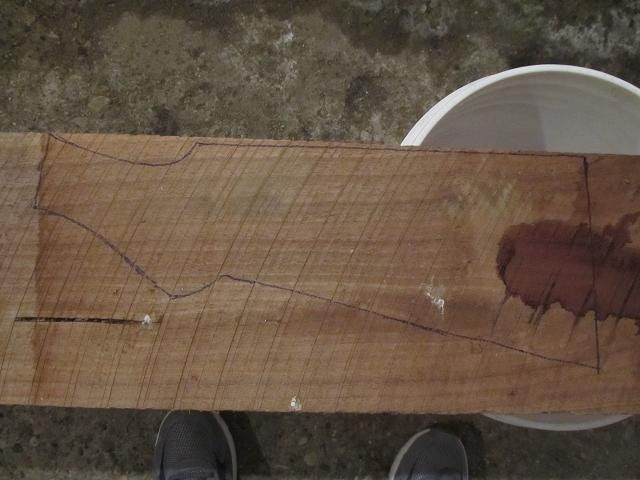
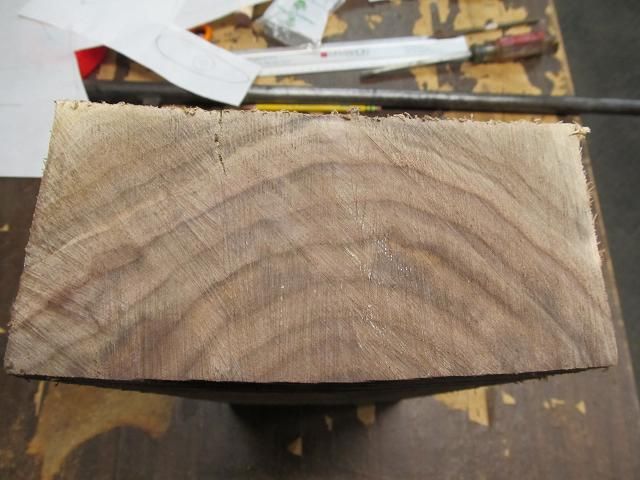
Here is a view of the end grain. Perhaps there wont be any blond streaks in this piece. I am at the complete opposite end from where I got the forearm grip.
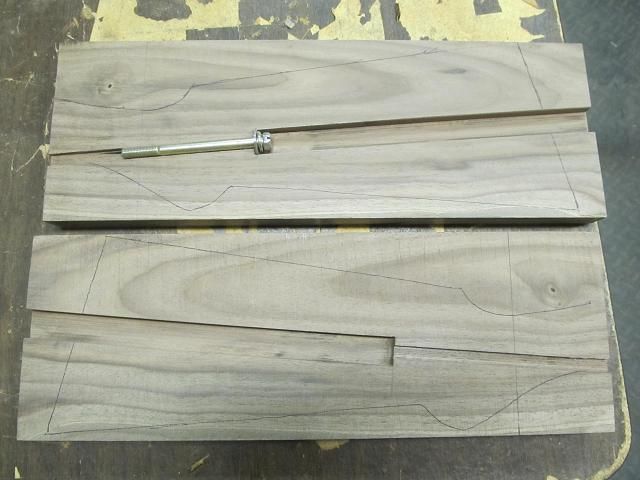
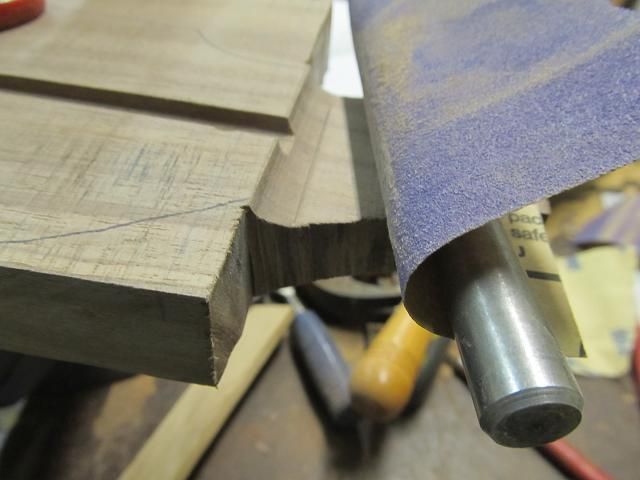
I cleaned up the beam and then sent it through my table saw creating a book end, matched set of slabs with one slab being slightly thicker than the other which will make sense later on. I dont have a planer but I was able to sand the two surfaces down to get rid of the saw marks so that the glue line will be very thin and clean.

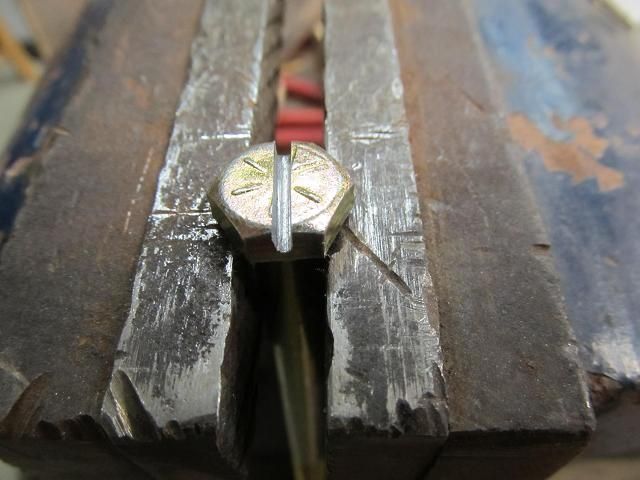
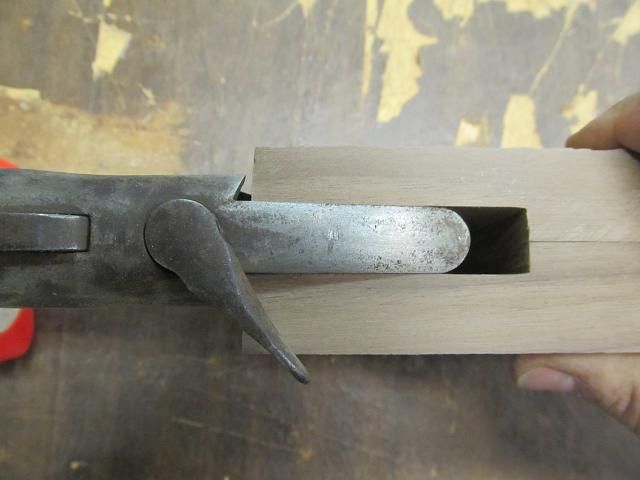
I used the table saw to cut a slot for the screw and another for the washer under the head of the bolt. I had to repeat it for both halves. Then I used a chisel to square up where the curve of the blade did not cut away the wood.
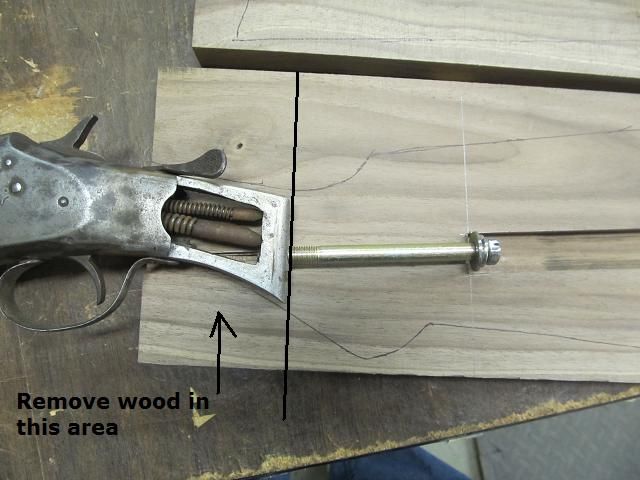
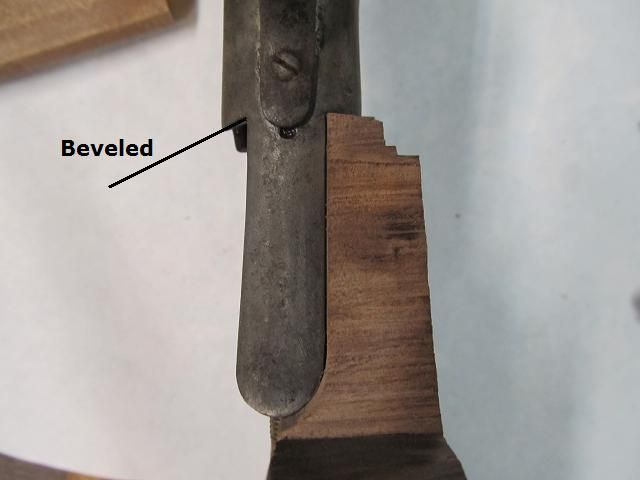
Then I needed to remove the wood where the shoulder of the receiver will fit. That part is about a � thick. This will leave a square shoulder but the back of the receiver is a full round.
Using chisels and carving tools I removed the bulk of the material and then went back to the broom handle trick but scaled down to a stainless rod that was close to the diameter I needed. I wrapped it with a few extra wraps of sandpaper to get to the proper curve.
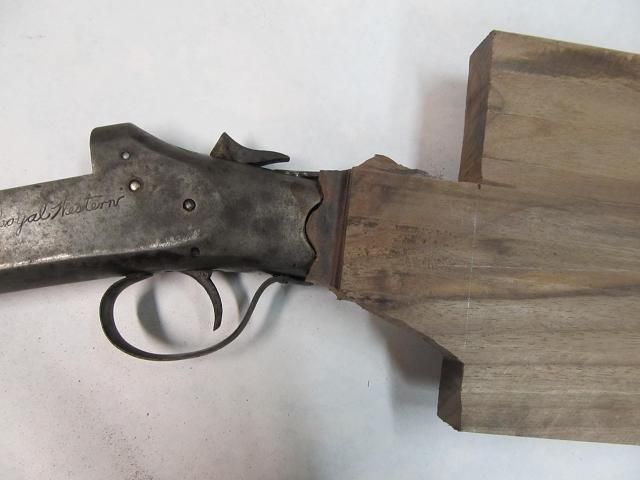
This is where is gets rough. There are timing issues. The new radius at the back must match on each side. That’s easy enough but at the exact time the wood and metal meet at the back, the wood and metal at the end of the stock must also match or there will be a gap at one end or the other. This has to be addressed on each half. I can rough out the profile with a coping saw but then the detail work will come from chisels, knives and sandpaper.
To make things more difficult, the conture at the receiver end is not a square cut. Its beveled backwards. Who came up with this design????? Its like they said, “lets make this as difficult as possible so that in 100 years the guy making a replacement stock will have to pull out his hair to duplicate this work”.

The hand saw gets me close and then carving tools and sandpaper take it the rest of the way.

To be continued……………………..