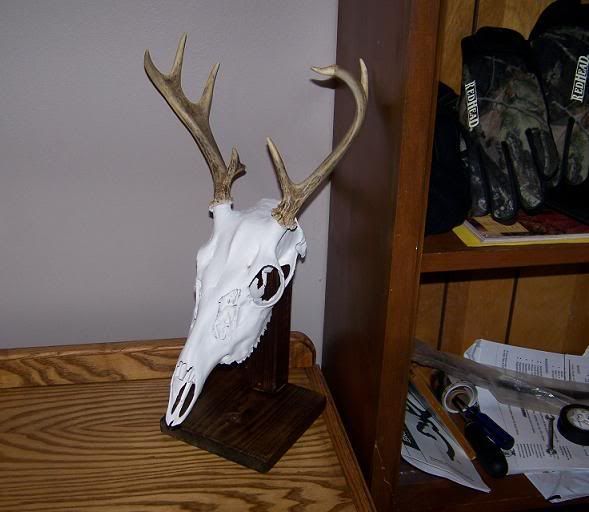
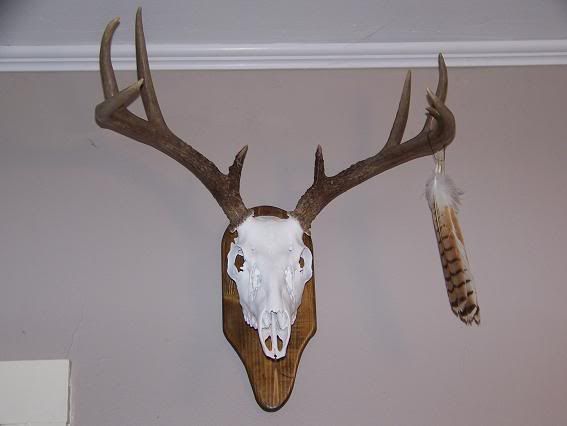
Here ya go. I hope this helps
 OKbowhunter’s Euro Mount
[/b]
[/b]
Step 1: Kill a buck.[/b]
[/b]
Step 2: Remove the Head[/b]
Once you take a buck, you will need to remove the head. It makes it easier if you remove the hide from the area that you are going to cut off. The place to cut is around the very last vertebrae, where it pivots on the skull. Cut the meat all the way around and you should be able to pull it off, with a little force. The bones are not actually connected, it is just a joint.
Step 3: Skin and Meat Removal[/b]
Once the head is detached, it is time to prepare it for boiling. Begin with skinning the head. The easiest way to do this is to skin the area from the antlers forward, then do the area from the antlers back. A good sharp knife will be invaluable in this step. Use the gum line as a place to start and it makes it easier to separate the skin from the skull.
It should start looking like this.
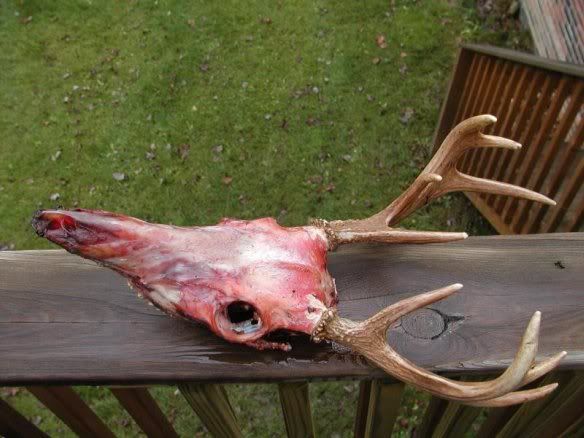
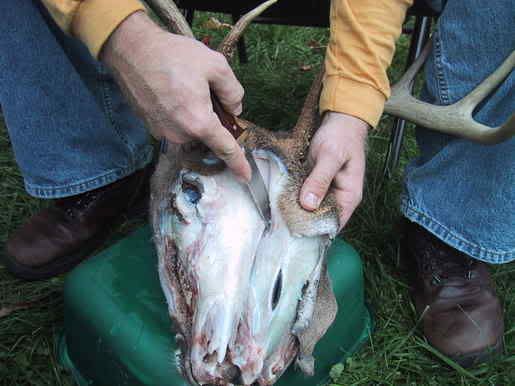 Once you have the hide removed there are a couple more things to do before you can boil it. Remove the bottom jaw, tongue, and eyeballs. This will make the boiling process go a lot faster. Also, make sure you get all the little patches of fur around the base of the antlers.
It will look like this. Now you are ready to boil!
Once you have the hide removed there are a couple more things to do before you can boil it. Remove the bottom jaw, tongue, and eyeballs. This will make the boiling process go a lot faster. Also, make sure you get all the little patches of fur around the base of the antlers.
It will look like this. Now you are ready to boil!
[/b]
Step 3: Boiling[/b]
Now you are ready to boil the head and start making it look good! You have to do this outside. I cannot even imagine doing this indoors. It is messy and it stinks to high heaven. The only way that I have ever seen it done is with a propane cooker and a big pot. There may be another way, but I am not aware of it.
Here is the setup I am talking about.
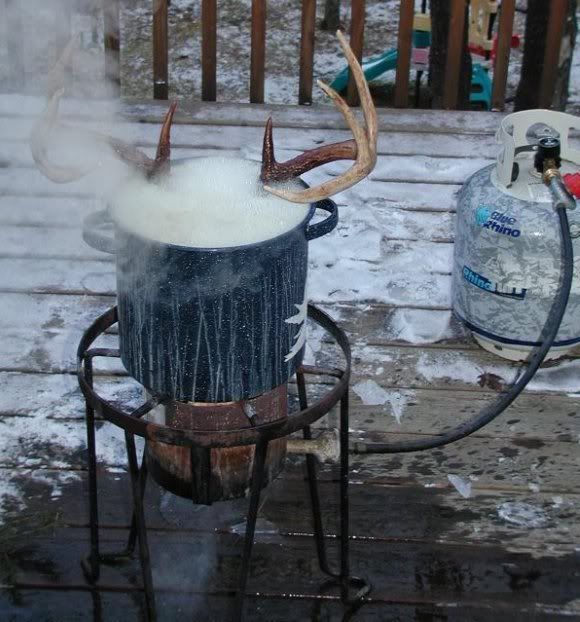 Fill the pot with water and bring it to a healthy boil and put the skull in. Let it sit in the boiling water for ~10, then pull it out. You will notice the little spots of meat and fat that you couldn’t get earlier start to come loose. Scrape or pull off what you can see is loose and put it back in the pot. The best tools I have found for doing this is a dull knife and some needle nosed pliers. A really sharp knife will leave gashes in the skull if you are not careful, the bone is pretty soft by now. Repeat this process over and over until the skull is clear of all meat and fat. Be prepared to take your time on this step. I have spent up to 10 hours just scraping, boiling, scraping, boiling. This is the step that will determine how good the finished product will look. All you should be left with is bone. The skull may loose a few teeth while it is boiling. If it does, you can get them out of the pot when you are done and simply glue them back in.
Step 4: Finish it Up
Fill the pot with water and bring it to a healthy boil and put the skull in. Let it sit in the boiling water for ~10, then pull it out. You will notice the little spots of meat and fat that you couldn’t get earlier start to come loose. Scrape or pull off what you can see is loose and put it back in the pot. The best tools I have found for doing this is a dull knife and some needle nosed pliers. A really sharp knife will leave gashes in the skull if you are not careful, the bone is pretty soft by now. Repeat this process over and over until the skull is clear of all meat and fat. Be prepared to take your time on this step. I have spent up to 10 hours just scraping, boiling, scraping, boiling. This is the step that will determine how good the finished product will look. All you should be left with is bone. The skull may loose a few teeth while it is boiling. If it does, you can get them out of the pot when you are done and simply glue them back in.
Step 4: Finish it Up[/b]
Here is where you can make your own choice about how you want it to look.
You have 2 options:
1. Use peroxide to bring out the white in the bone and leave it natural.
2. Use a white paint to make the skull white.
I’ll explain both:
Peroxide method[/b][/ol]
IMPORTANT: You need to use 40% peroxide for this process. 3% will not change to color enough for you to even notice. You can purchase 40% peroxide at your local beauty shop or taxidermy shop.
Place the skull in a pan or shallow bucket that will hold it and the bottle of peroxide. With the skull in the bucket, pour the peroxide in. Usually 3 or 3 ½ inches deep is enough. Do not get any on antlers, it will discolor them. An easy way to get the peroxide all over the skull is to wrap it in strips of cloth, so it will soak into the cloth and saturate the entire skull. Leave it like this until you feel it is white enough to suit your needs. It may take a day, it may take 2 weeks. Just take a peek under the cloth once in a while and see how it is progressing. Once you like the way it looks, dry it off and hang it on the wall!
White Paint Method[/b][/ol]
This method is my personal favorite, and it is the method I use on my deer.
Once the skull is done boiling, set it out and let it dry really well (overnight is best). To prepare it for painting just tape off the antlers to protect them from spray and overspray. If you have big antlers, just wrap them in some sort of cloth and tape that on tight. Make sure to tape around the burrs really good, that area will determine if it looks good or looks great. Once it’s taped off, it’s ready to paint. I use KILZ spray paint because it absorbs stains and reduces odor. Make sure you spray in the nasal cavity and eye sockets so the coat looks even. 2 or 3 LIGHT coats look best. Also, while you’re at it, spray a little into the brain cavity. It might soak up a little smell. Let it dry, and hang it on the wall!
Here is a couple I have done with this method.