


Let's see pics of your hunting blinds!

 07-18-2015, 06:44 PM
#103
Nontypical Buck
Join Date: Oct 2009
Location: WI
Posts: 1,089
Thanks Dampland, it keeps warm all day I fill the left side of the stove up with good dry Oak and get it going good, the coals keep it warm for most of the day. No problems with deer passing by, as they are used to woodsmoke around here also, just like in alleyyooper's neck of the woods.
07-28-2015, 07:15 AM
#104
Spike
Join Date: Jul 2015
Posts: 10
Bail blinds have been my ticket for success in recent years. While eastern Ohio offers plenty of tree stand options, sometimes the only way to really get up close and personal with some buckeye booners are on the ground. Here's a pic of one i made last year that im getting some great pics near and plan to hunt early season this year. Ill be doing a writeup and video how to for the Buck Advisors in the coming weeks. If you like the look of it, check out some of the other content on the Buck Advisor website. I hope this inspires you to try and build your own bail blind this year!
 08-15-2015, 02:42 AM
#109
Nontypical Buck
Join Date: Dec 2005
Location: MICHIGAN
Posts: 2,568
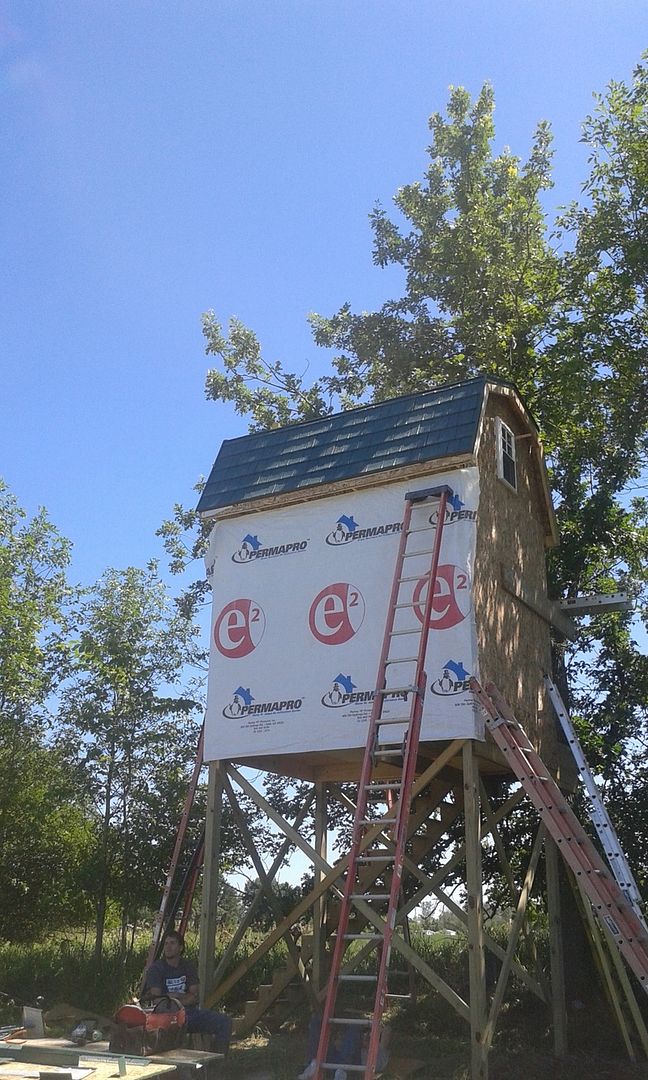
Fellow in Wi did this for a deer blind It is elevated too. Sorry no pictures but imagine
Step one: get your self a "box" I chose the standard Port-a potty.
I purchased mine used (but clean) from a port-a-potty place.
Prices started at $25 bucks (depending on condition), this one was $75 bucks as it was in pretty good over all condition, and easy to get at.
Step two, clean up and remove any thing that you don't want to hunt with.
Sawzall works well, (fiberglass hard on blades), I built a floor by tracing out the bottom on a piece of plywood, then cutting it out. Added bracing (2X4's)
Step three, build stand, (don't need to, but I chose to build one, this can be anything you want, or as tall as you want).
Stand is 10 ft tall as I wanted to get a good view of my river bottom.
Lumber was about $85 bucks and another $50 buck for bolts.
Step four, add amenities. Cut in windows, added Plexiglas, interior shelf/shooting rest, carpet (picked up from the rich side of town on the curb)(noise), office chair, (swivels and goes up and down, rummage sale $20 bucks)
Step five, decorate, DW loves to paint stuff, so I let her have at. Figured all the deer around will say, "Hey, check out the camo job on that blind, I can't even see it!
Step six, transport to location, (lots of help, luck and bad words), set up, (again, lots of help, luck and bad words), and enjoy to new "Office".
I was surprised with how well it looked when finished. I will see if I can get pictures.
 Al
Al
Step one: get your self a "box" I chose the standard Port-a potty.
I purchased mine used (but clean) from a port-a-potty place.
Prices started at $25 bucks (depending on condition), this one was $75 bucks as it was in pretty good over all condition, and easy to get at.
Step two, clean up and remove any thing that you don't want to hunt with.
Sawzall works well, (fiberglass hard on blades), I built a floor by tracing out the bottom on a piece of plywood, then cutting it out. Added bracing (2X4's)
Step three, build stand, (don't need to, but I chose to build one, this can be anything you want, or as tall as you want).
Stand is 10 ft tall as I wanted to get a good view of my river bottom.
Lumber was about $85 bucks and another $50 buck for bolts.
Step four, add amenities. Cut in windows, added Plexiglas, interior shelf/shooting rest, carpet (picked up from the rich side of town on the curb)(noise), office chair, (swivels and goes up and down, rummage sale $20 bucks)
Step five, decorate, DW loves to paint stuff, so I let her have at. Figured all the deer around will say, "Hey, check out the camo job on that blind, I can't even see it!
Step six, transport to location, (lots of help, luck and bad words), set up, (again, lots of help, luck and bad words), and enjoy to new "Office".
I was surprised with how well it looked when finished. I will see if I can get pictures.
Al
08-17-2015, 09:29 AM
#110
Typical Buck
Join Date: Dec 2013
Location: SW, missouri
Posts: 822
Finished my pallet blind this weekend. High tech I know... Ive now got camo wrap all the way around, when I took the pic tho, I just had half. I'll brush it in before the season starts. Gonna camo burlap the outside as well. Im pretty pleased with it.
Last edited by buckman11; 08-17-2015 at 09:42 AM.

