
|
Restoring a rusty Remington Speedmaster
This gun is a Remington Speedmaster .22 cal . This one was made in 1963. It is in far worse shape than the old Mossberg I recently restored. It has a lot more rust and the stock is broken. It is also a semi-auto so there are far more pieces to deal with. Like the last gun, this one is also in throw-away condition except that the bore is clean and without rust. the receiver is aluminum and a lot of the finish is gone and there are deep scratches and some deep dents in the metal. This gun is a real disaster. The action does not cycle but I suspect that is just due to crud and dirt. Its been in my shop for a while while I worked on other gun allowing me to order a replacement stock
Here is the announcement (in 1961) for the release of the model 552 in a carbine. 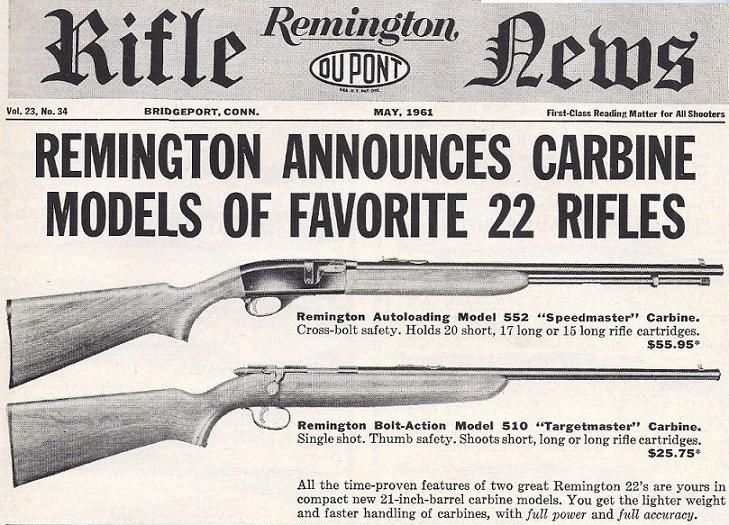 I thought this ad funny and still true today.  Here are some pics of the gun in the condition it arrived at my door.  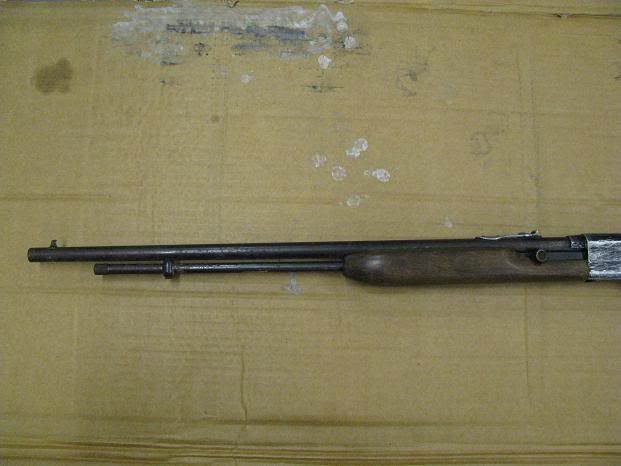 It has a tubular magazine that is also pretty rusty and the brass rod is gunked up with patina.. 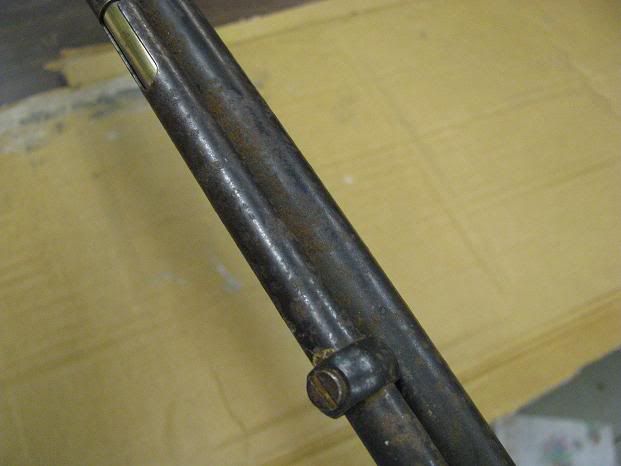 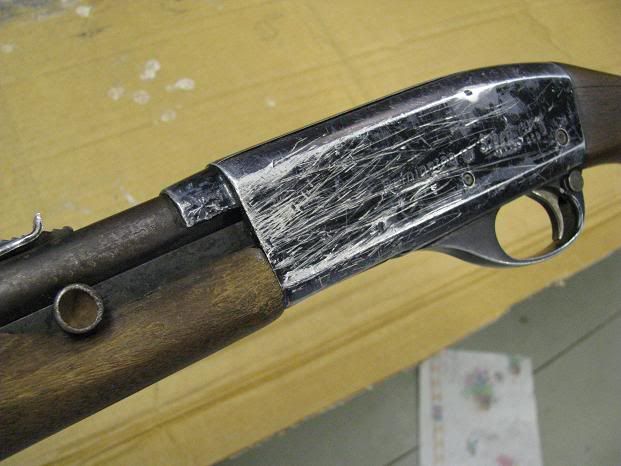 Lots of deep scratches and deep dents in the aluminum receiver. Some of the dents are over a 1/16 of an inch deep. This gun was abused. 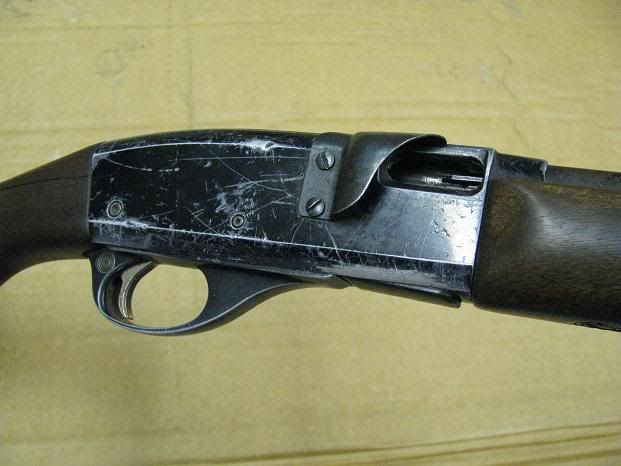 The stock is broken where it meets the receiver. 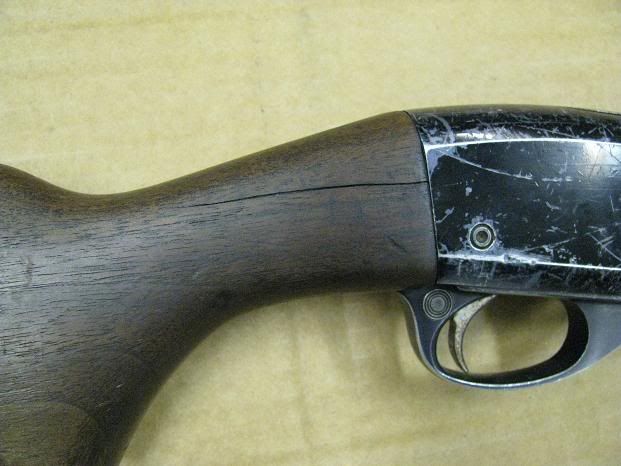 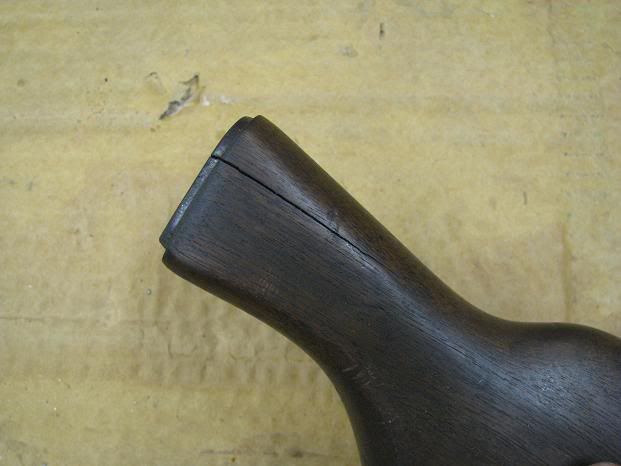 As well as having a broken butt plate and missing pieces of wood. 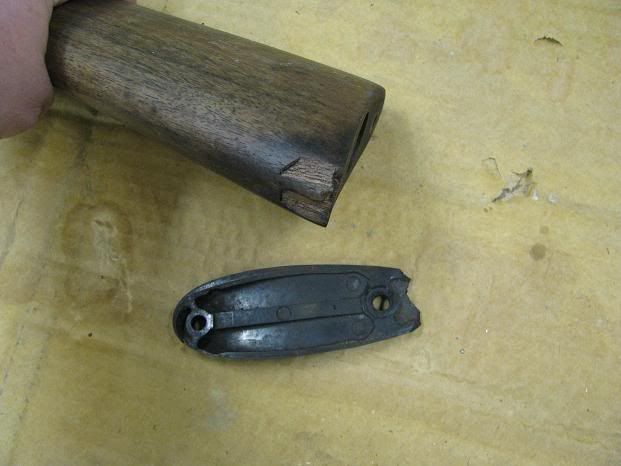 I wonder if this is how Remington built the gun 56 years ago?  This one is going to be a real challenge but it can be saved. Once again the work begins with the wood. As soon as I took possession of this gun, I did a search for replacement parts for the wooden stock because I knew I couldn't fix what I had. I went online to Remington's website and they had both pieces of wood (without the butt plate) for $180. (3 times as much as this gun cost new) and since I can buy a new .22 for that much, I looked elsewhere. Boyds wanted almost $100 with shipping. The gun sat in my shop until I could find a stock at a better price. As luck would have it, I found not only both pieces of wood but also the butt plate being sold on EBay with only one day left in the auction. It was listed as a buy it now for $25 so I did. The wood was in good shape except for some scratches and finish missing so I stripped and sanded and found that it was made from hard rock Maple. 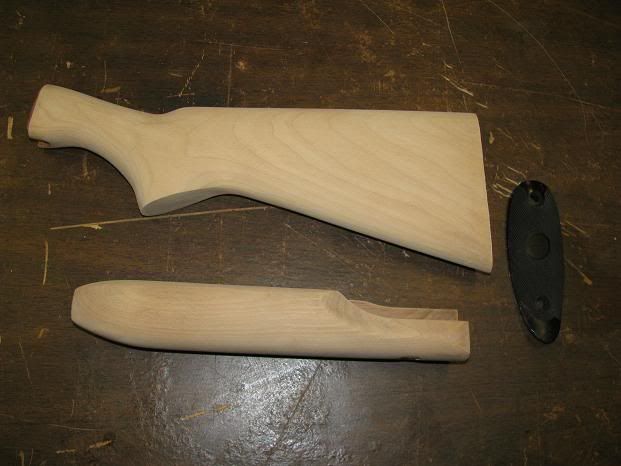 The wood will be stained with a dark American walnut stain and be given several coats of spar urethane (semi gloss). I always start with the wood because of the days of dry time. Thi gun requires detailed inspection to see if any replacement parts need to be ordered because the action does not cycle. To be continued |
Makes me sick to see the way some guns like this one you're working on now have been mishandled!
|
This and the Mossberg I recently posted came as a pair from an abandoned farm. They were found in the back seat of an old car that was sitting behind the barn with all the windows busted out. The last time the car had been registered (based on the lic pate sticker) was 1970. The two guns were on the back seat under an old coat. Who put them there and why will never be known but they weathered many WI winter and rainy spring and summer heat.
|
Man, that receiver is ugly. Had to be used a lot and slid in and out of some hard "rack" a lot (unidirectional gouges).
Nice looking stock set you found for it though, and at a heck of a deal. As ugly as it is now, I'm betting it cleans up real nice after a LOAD of elbow grease. |
From following all your previous projects, I expect to see as good as new in a short time.
|
Originally Posted by rich e
(Post 4131057)
From following all your previous projects, I expect to see as good as new in a short time.
So true...................thank you for posting here DIY :party0005: |
With the first coats of spar on the stock its time to move onto metal parts. I started with the low hanging fruit. In this case the brass magazine tube.
To say it was tarnished is an understatement. 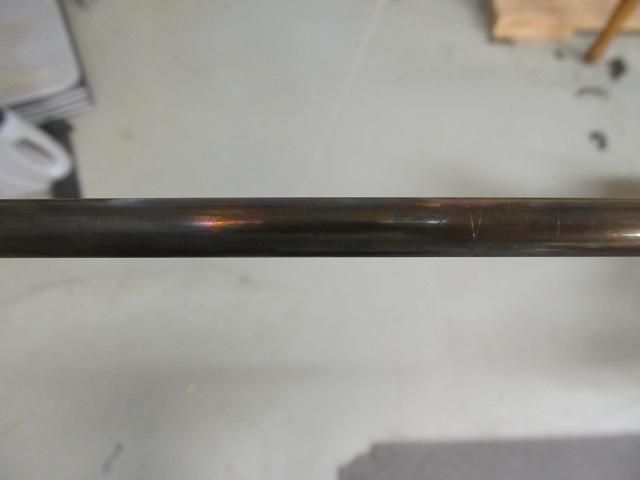 Brasso to the rescue. as well as rebluing the knurled tube end. 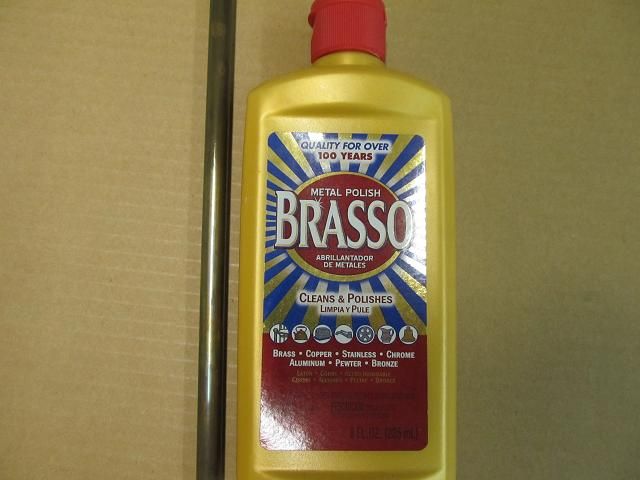 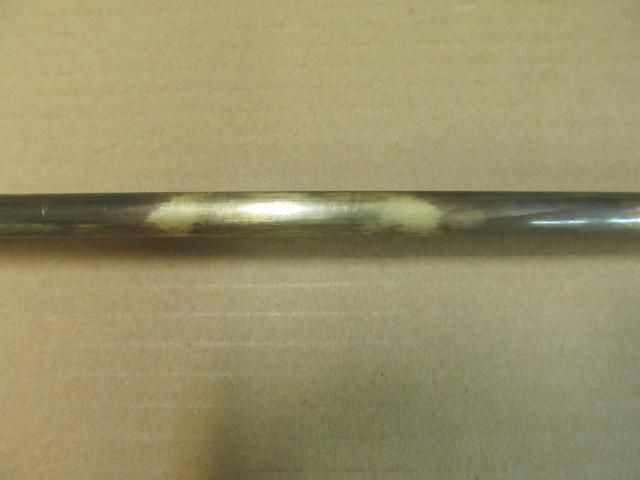 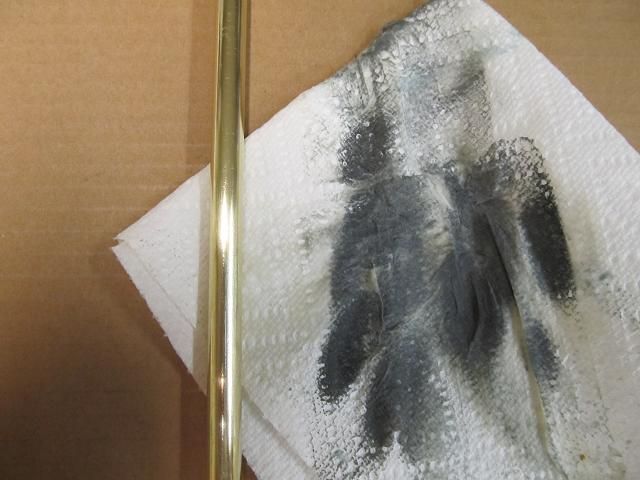 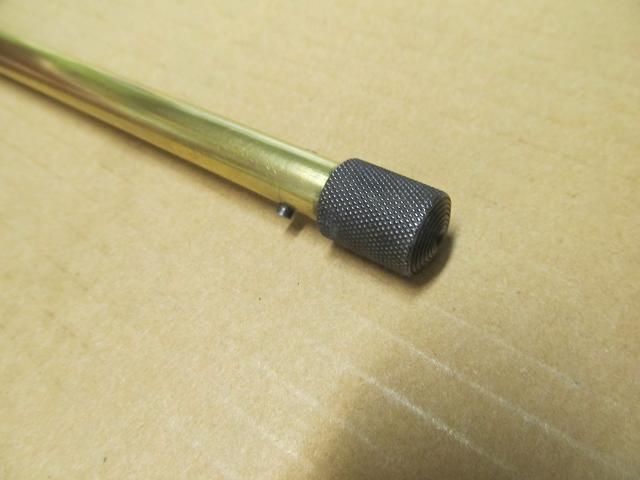 Then the outer tube was stripped, buffed and reblued. 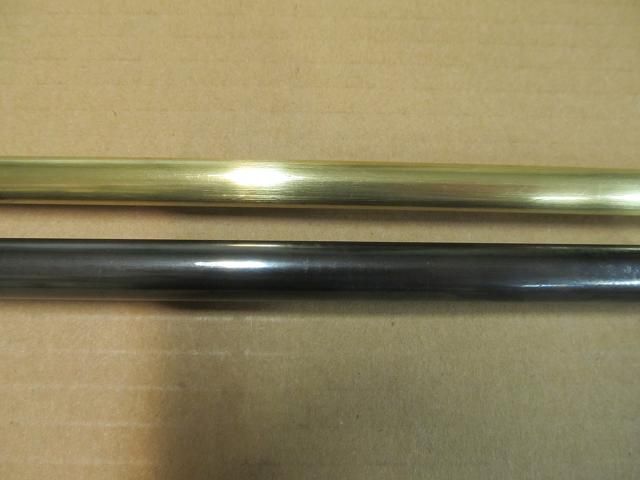 I don't think this gun has ever been disassembled or cleaned and I found a lot of grit and grime impacted in all the crevices. Areas that I thought were solid metal were just hardened gunk and once I used solvents and a pick was able to get the parts clean. Only two pins hold the entire trigger mechanism in place. The reason the action would not cycle was as I suspected. It was so impacted with crud that all the moving parts would not move. 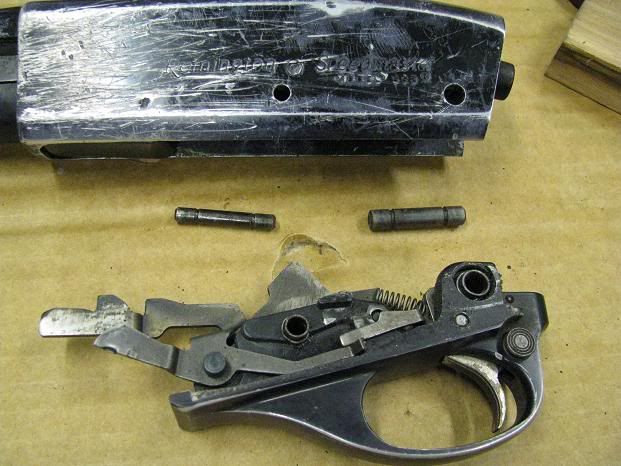 the whole gun can be disassembled with a screwdriver and a pin punch. 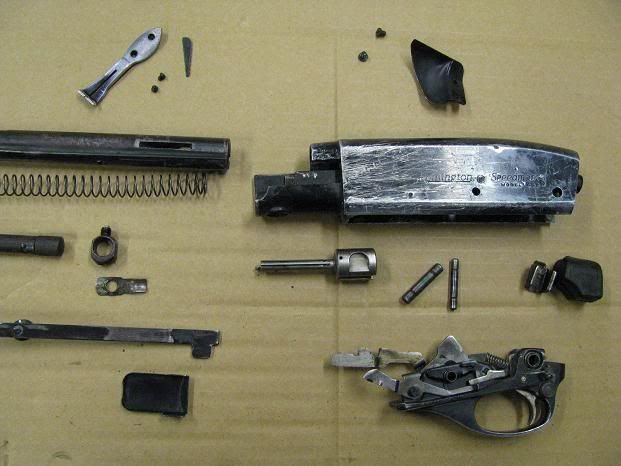 There seems no end to the level of parts that this gun can be broken down into. The large round piece at the bottom is the safety. There was no bluing on it at all and the red (Fire) paint was gone as well. 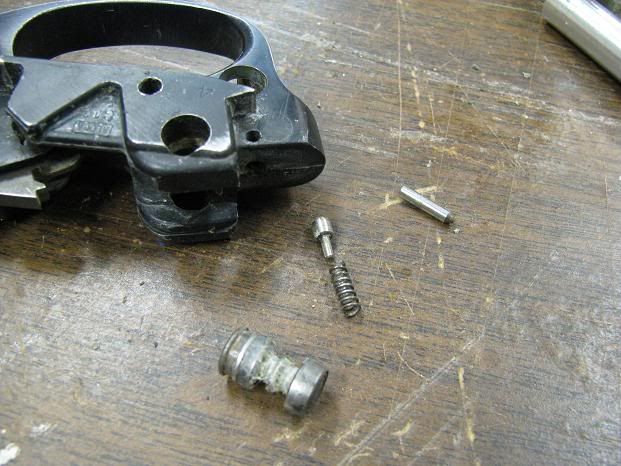 With a little TLC, it looks like new. 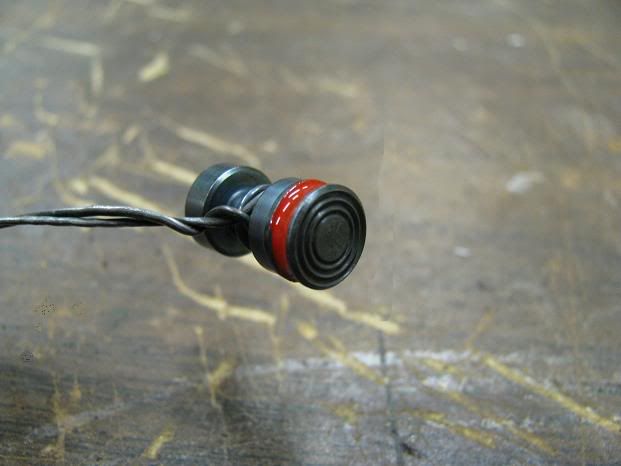 To remove the black anodizing from the aluminum, I used fine grit sandpaper and steel wool. I won't be able to remove a lot of the deep dings and scratches and I'm ok with that. It only has to be a functional working gun and not a show piece. 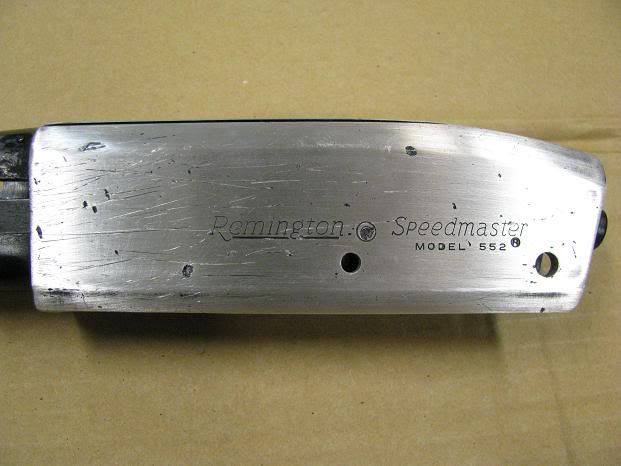 Here it is after the spray on gun coat was applied and baked. 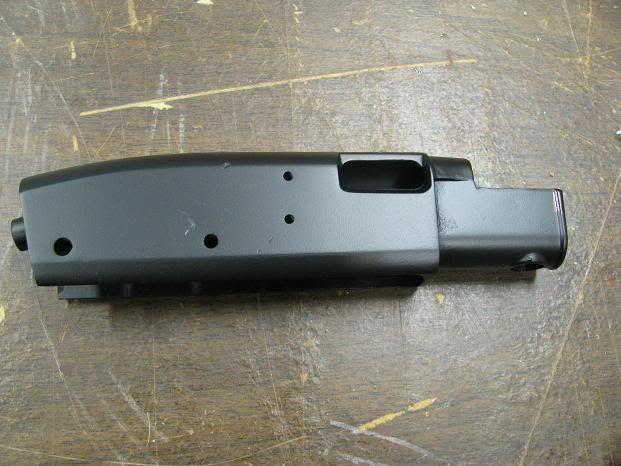 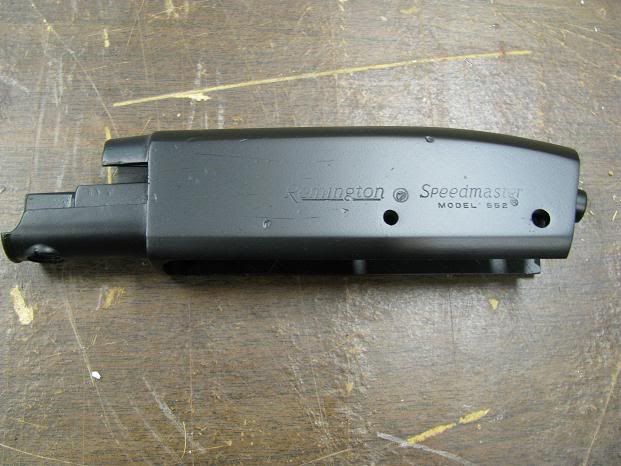 And the re-assembled trigger mechanism is clean and lubed and all the parts move in proper order. 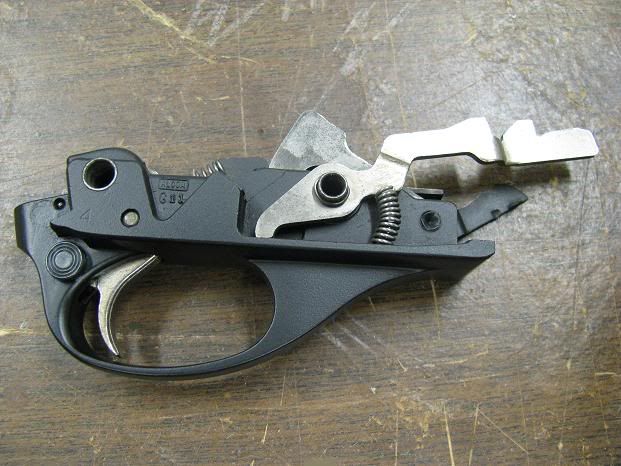 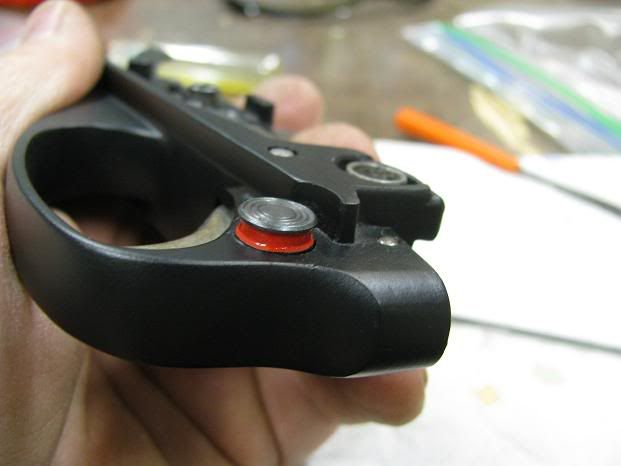 The rest of the steel parts will need the bluing removed and then I will re-blue and hit them with Barricade. To be continued....... |
Awesome thread. My first rifle was a 552, still have it. Mine's in a little better shape than yours!:wink: My son gets it in a few more years.
The gun is nicely set up with the entire trigger mechanism removeable after popping out those two pins. Shoots .22 shorts, longs and LR equally well. |
Refinishing the barrel of this old gun was a chore. The rust had pitted the metal pretty deep. There's nothing really that I can do about it so I just have to deal with it. Here is the barrel after all the rust and blue was removed with navel jelly.
 Then I went after it with 220,320,400 and finally 600 grit and then steel wool. 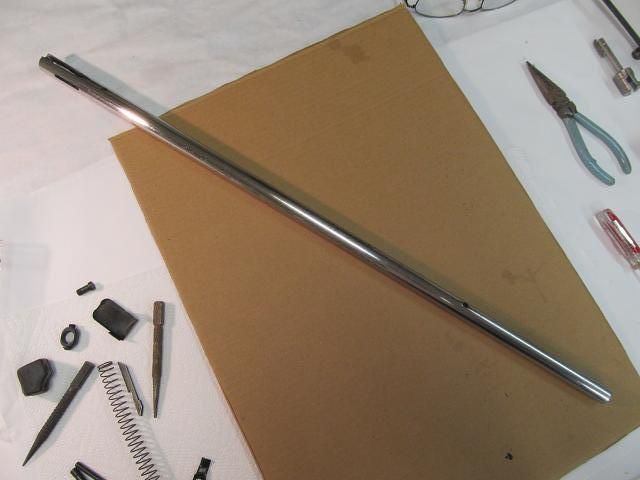 Then blued several times and buffed with steel wool. 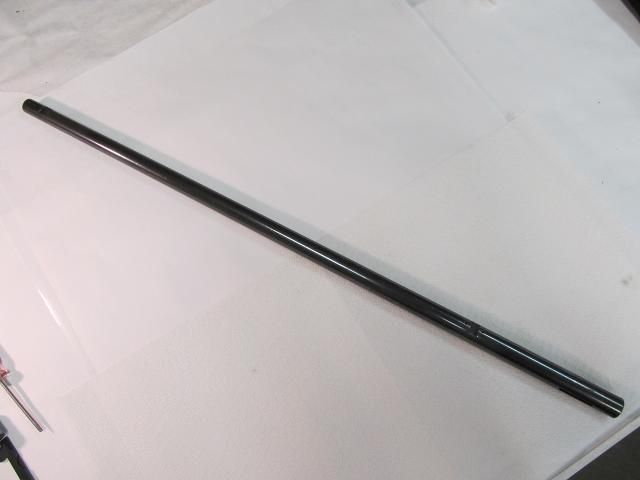 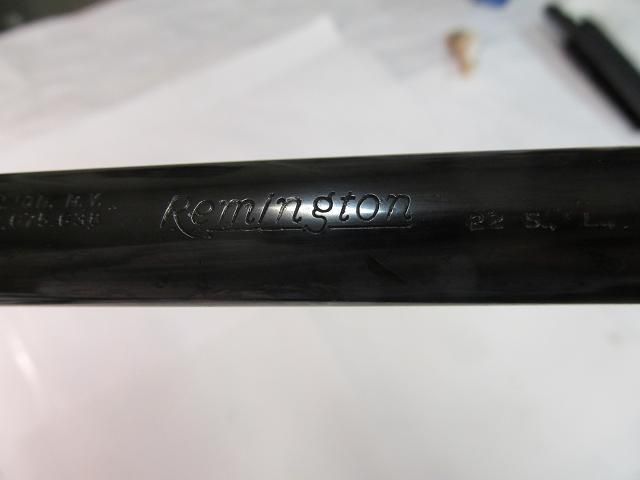 With all parts refinished, it's time to reassemble this mess of parts. I hope I don't have left over items when finished. 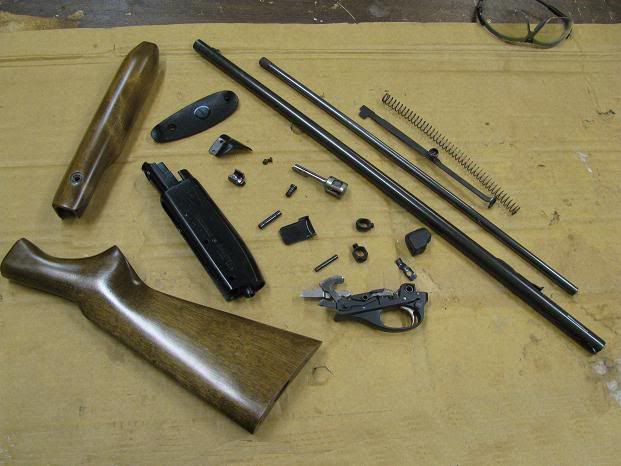 The last thing I added to this gun was a new set of scope mounts and an old fixed 4 power scope. This will make it a good squirrel gun. I also added a white spacer between the butt plate and stock. I like how it dresses up the look of a gun. 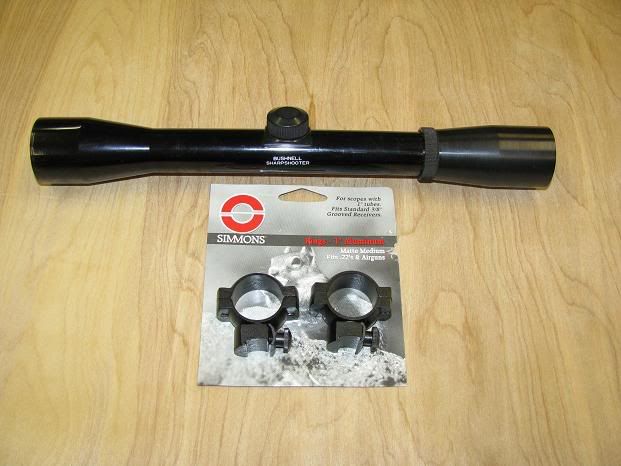 Here it is all finished and ready for plinking and samll game. 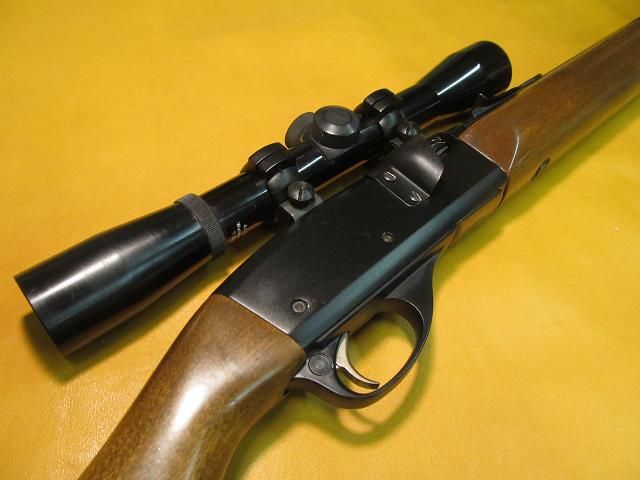 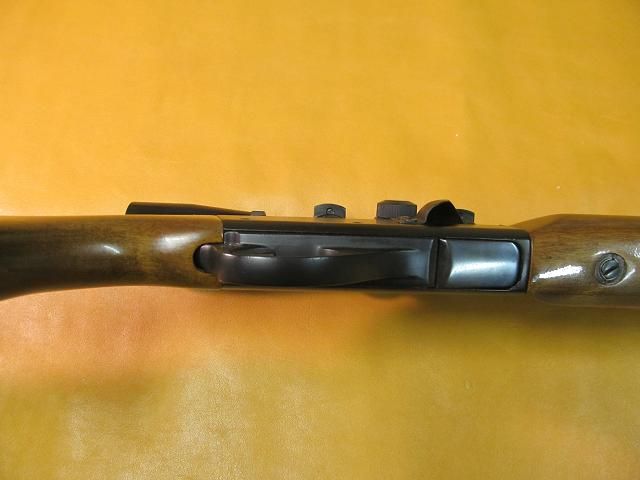 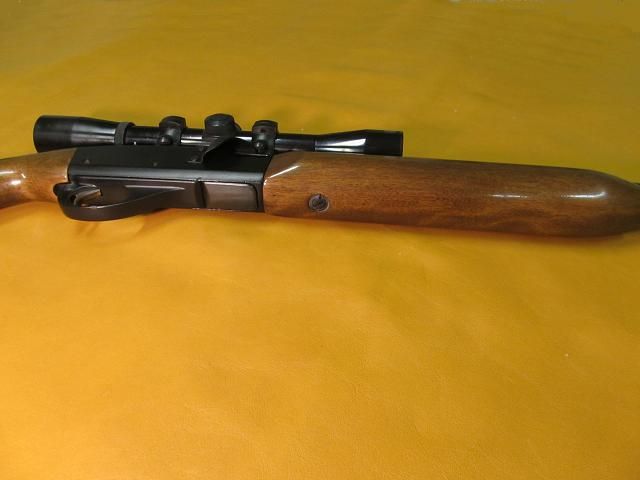 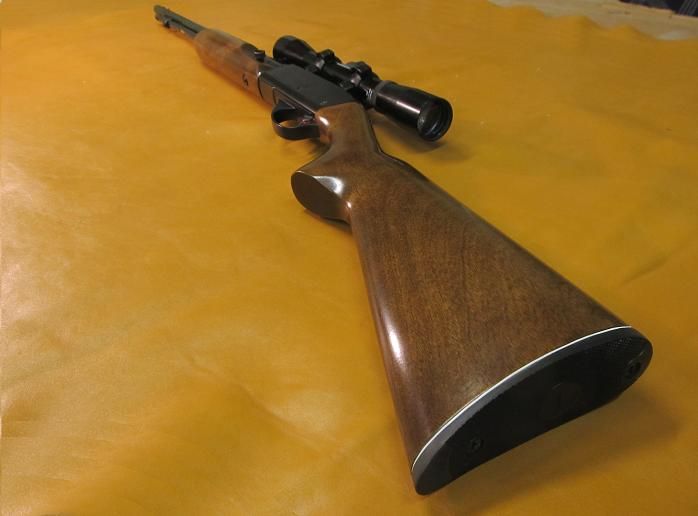 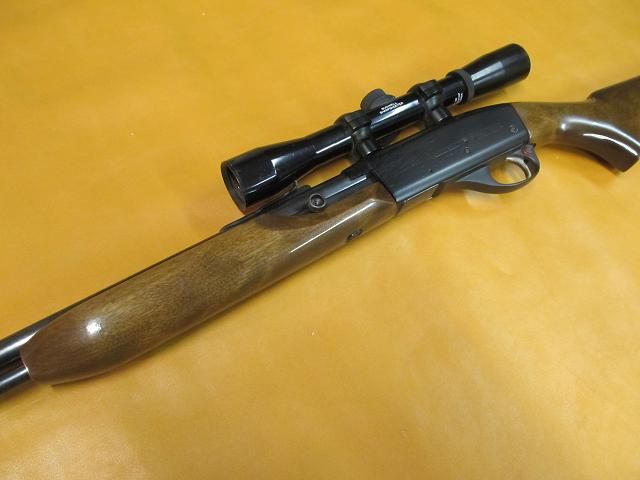 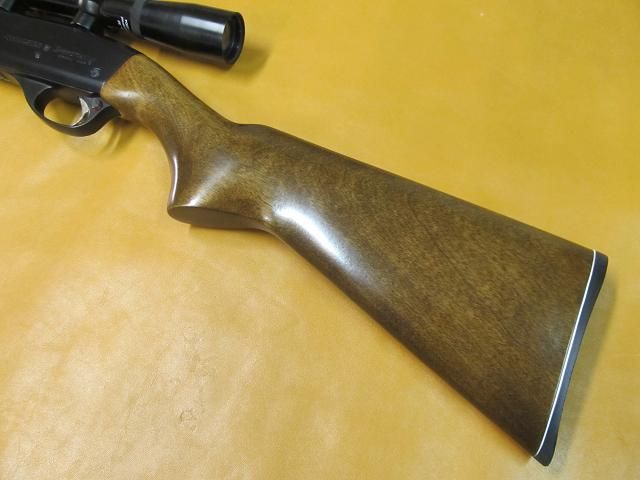 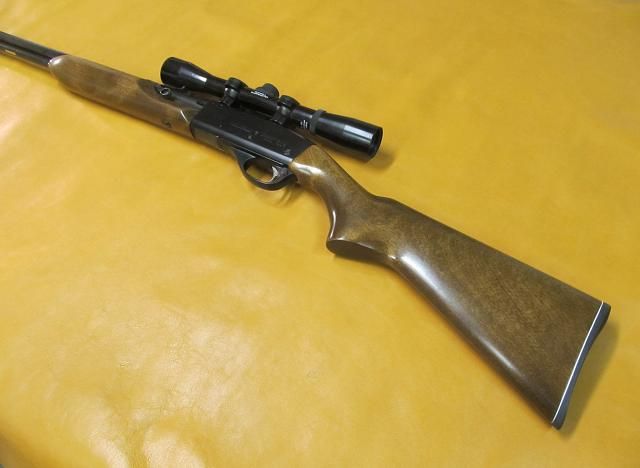 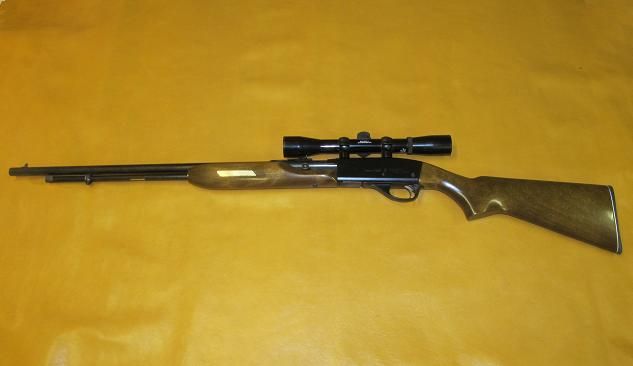 |
Amazing! You're sure cranking out the work for a part timer!!!
|
| All times are GMT -8. The time now is 09:32 PM. |
Copyright © 2024 MH Sub I, LLC dba Internet Brands. All rights reserved. Use of this site indicates your consent to the Terms of Use.