


Mounting a Lyman 57 SML peep on a TC Renegade
 01-13-2012, 08:32 PM
#1
Nontypical Buck
Thread Starter
Join Date: Mar 2008
Posts: 1,181
Putting a Lyman 57 SML peep on a TC has two options. One is some of them were already drilled and tapped for the sight, I have seen several. Option #2 is drilling the tang your self. I have done four now and if I can do it anyone can.
What I wanted to do was give you the idiots view of how to install the Lyman 57 SML sight. I took one of the plastic cases I got with one of my Lyman sights and made it a sight installation kit.
It has a # 29 S drill bit, S stands for short in the Brownells catalog.
Also the kit has an 8-32 tap.
And it has a small Tap Wrench.
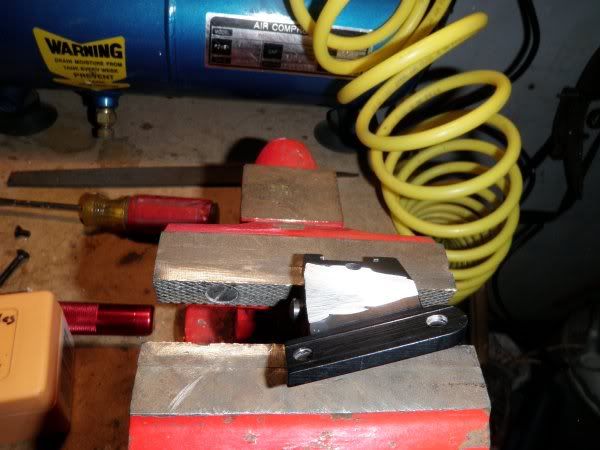
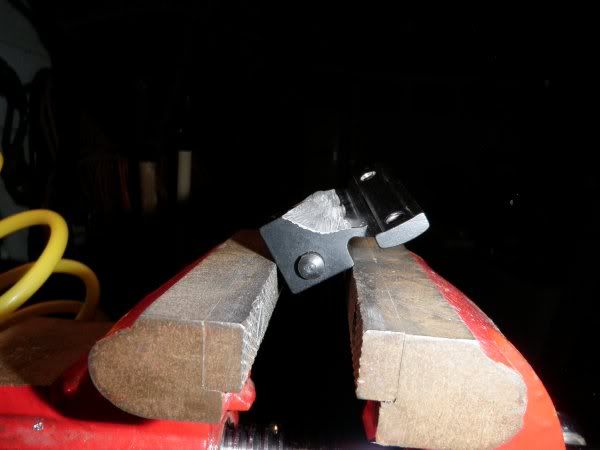
On The TC�s, and the Cabelas Hawken the sight base is too thick where it meets up with the wood next to the tang. I have seen this problem solved two ways. I have seen guys remove the wood and the way I do it. I remove some of the aluminum from the base so it will sit down all the way without touching the wood. I take the slider out of the base and gently sit the base in a vise and tighten it down. I use an Angle grinder to remove the metal. You can also use rat-tail files and bastard files. After I am done taking the metal away it looks like this.
Now to put the base on.
I start out by removing the rear screw and I set the sight base on the tang and then I put the screw back in but not tight. I line the sight up, and use a small punch to go through the front screw hole in the sight base to make a dent in the tang to start the hole to be drilled.
You can also put masking tape on the tang and draw a line through the holes. This will give you your strait line to make sure that the hole is drilled in a strait line with the other two holes in the tang. Then put the base on like I said above and mark the spot to be drilled.
Then I take the tang off the stock and lock the tang into a vise. Make sure you are drilling straight down. Then I use the tap to make the threads. Make sure you have the tap lined up like you just did the drill bit. Start the tap in, go a little ways and back it up. Then go forward again and back it up. Do this several times until the threads are cut. You MUST back up once and a while or you will break the tap. Also make sure you apply lube to help the tap cut.

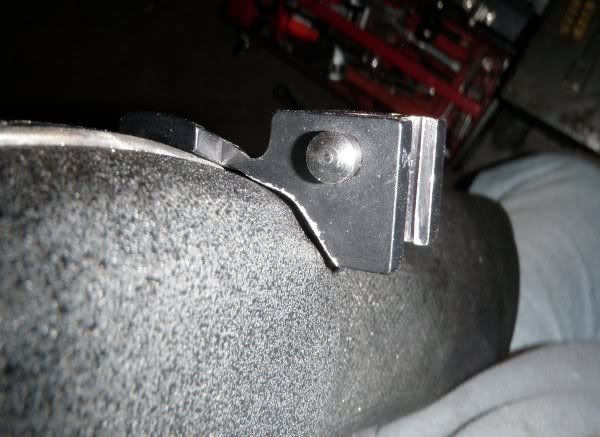
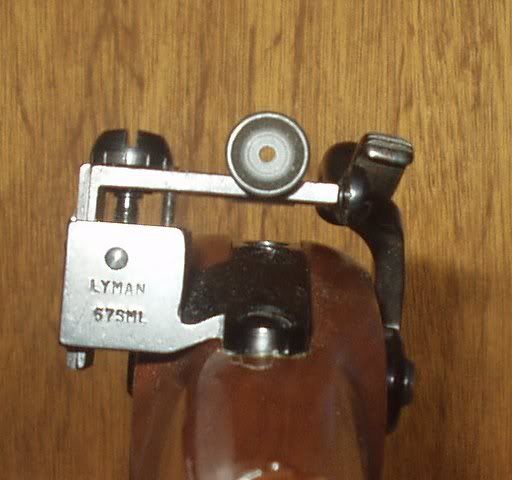
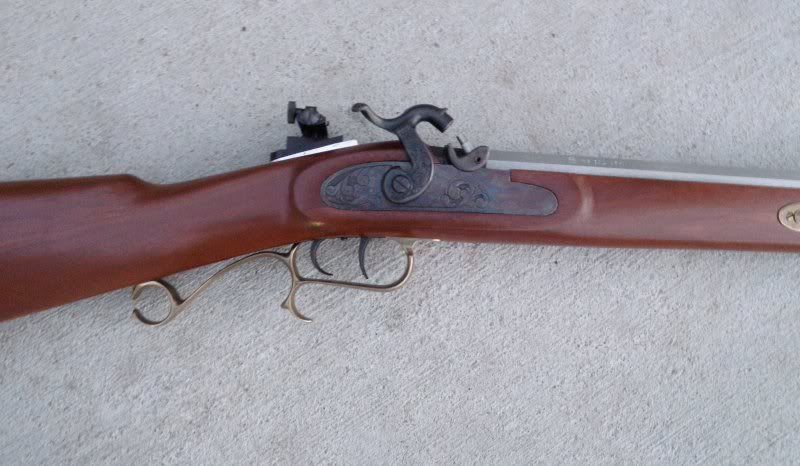
After I thread the screw hole in the tang I install the tang on the stock. I put the rear screw into the sight base, but not tight. Then I use a small shim to raise the front of the sight base. I used galvanized metal that was .0035 � thick and a little narrower than the sight base. I didn�t like the way the sight tended to �lean forward� on the tang. After the shim the sight to me tends to move more vertical. After I got the shim under the screw I lined the hole, added lock tight to the screw and installed the 8-32 screw to the front of the sight base. Here is what the sight base looks like installed.

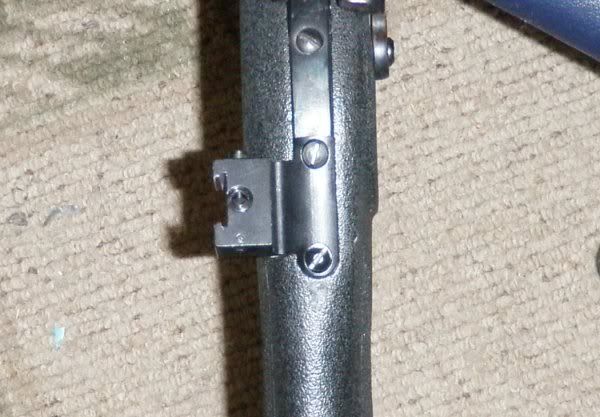
A picture with the slider installed. Notice I added white paint to the 0 to make it stand out. Also I took the scale off the slider and used a drill bit to increase the length to give me a little more range.
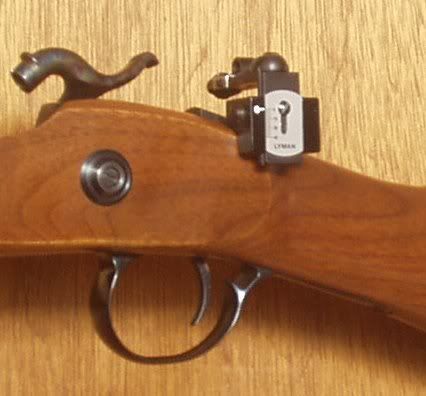
Sorry about this picture being a little cockeyed.

OK, What happens if I screw up and drill the hole in the wrong place?
Well several things can happen.
1� If the hole is drilled left or right of the centerline the windage will not move at the right angle.
2� if the hole is not drilled with the right amount of distance between the holes it will not sit down right. Even to the point of not being able to install with this hole.
If you drill in the wrong place DON�T WORRY!!!! Anything can be fixed.
First if you have a welder weld the hole closed. If you don�t have a welder most towns have a place that can do this. After it is closed smooth down the weld with a grinder and a file. Round two. Really watch what you are doing on round two. Check everything several times and drill again. After the hole is drilled in the right place and the metal is filed or grinded down. Apply cold blue to cover up the repair.
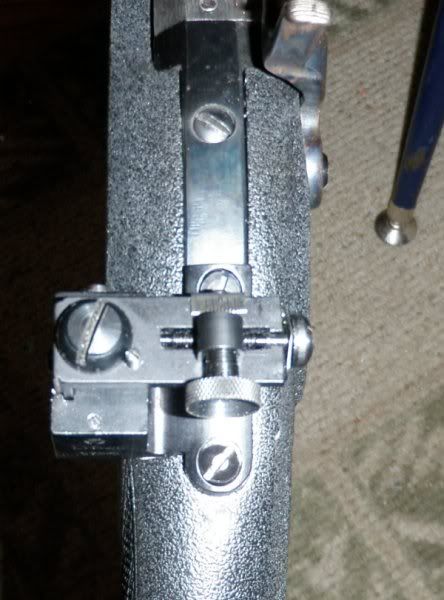
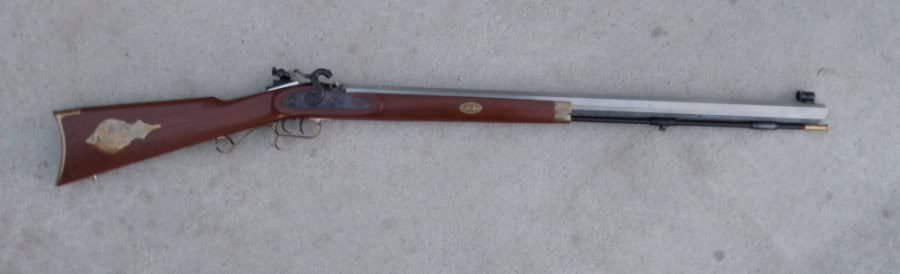
I have messed up plenty of times. In the end it is not that hard to install these sights.. Make sure to check everything and don�t get in a rush. I know I have probably forgotten something. If you are going to try this for your self and have any questions feel free to ask. These last pictures are my latest rifle. I used a spacer under this sight to give me some extra yardage. In the case of this Hawken I didn't need to grind the base of the sight because it was tall enough to clear. Feel free if you have any questions. Ron

What I wanted to do was give you the idiots view of how to install the Lyman 57 SML sight. I took one of the plastic cases I got with one of my Lyman sights and made it a sight installation kit.
It has a # 29 S drill bit, S stands for short in the Brownells catalog.
Also the kit has an 8-32 tap.
And it has a small Tap Wrench.
On The TC�s, and the Cabelas Hawken the sight base is too thick where it meets up with the wood next to the tang. I have seen this problem solved two ways. I have seen guys remove the wood and the way I do it. I remove some of the aluminum from the base so it will sit down all the way without touching the wood. I take the slider out of the base and gently sit the base in a vise and tighten it down. I use an Angle grinder to remove the metal. You can also use rat-tail files and bastard files. After I am done taking the metal away it looks like this.
Now to put the base on.
I start out by removing the rear screw and I set the sight base on the tang and then I put the screw back in but not tight. I line the sight up, and use a small punch to go through the front screw hole in the sight base to make a dent in the tang to start the hole to be drilled.
You can also put masking tape on the tang and draw a line through the holes. This will give you your strait line to make sure that the hole is drilled in a strait line with the other two holes in the tang. Then put the base on like I said above and mark the spot to be drilled.
Then I take the tang off the stock and lock the tang into a vise. Make sure you are drilling straight down. Then I use the tap to make the threads. Make sure you have the tap lined up like you just did the drill bit. Start the tap in, go a little ways and back it up. Then go forward again and back it up. Do this several times until the threads are cut. You MUST back up once and a while or you will break the tap. Also make sure you apply lube to help the tap cut.
After I thread the screw hole in the tang I install the tang on the stock. I put the rear screw into the sight base, but not tight. Then I use a small shim to raise the front of the sight base. I used galvanized metal that was .0035 � thick and a little narrower than the sight base. I didn�t like the way the sight tended to �lean forward� on the tang. After the shim the sight to me tends to move more vertical. After I got the shim under the screw I lined the hole, added lock tight to the screw and installed the 8-32 screw to the front of the sight base. Here is what the sight base looks like installed.
A picture with the slider installed. Notice I added white paint to the 0 to make it stand out. Also I took the scale off the slider and used a drill bit to increase the length to give me a little more range.
Sorry about this picture being a little cockeyed.
OK, What happens if I screw up and drill the hole in the wrong place?
Well several things can happen.
1� If the hole is drilled left or right of the centerline the windage will not move at the right angle.
2� if the hole is not drilled with the right amount of distance between the holes it will not sit down right. Even to the point of not being able to install with this hole.
If you drill in the wrong place DON�T WORRY!!!! Anything can be fixed.
First if you have a welder weld the hole closed. If you don�t have a welder most towns have a place that can do this. After it is closed smooth down the weld with a grinder and a file. Round two. Really watch what you are doing on round two. Check everything several times and drill again. After the hole is drilled in the right place and the metal is filed or grinded down. Apply cold blue to cover up the repair.
I have messed up plenty of times. In the end it is not that hard to install these sights.. Make sure to check everything and don�t get in a rush. I know I have probably forgotten something. If you are going to try this for your self and have any questions feel free to ask. These last pictures are my latest rifle. I used a spacer under this sight to give me some extra yardage. In the case of this Hawken I didn't need to grind the base of the sight because it was tall enough to clear. Feel free if you have any questions. Ron
 01-14-2012, 05:05 AM
#3
Fork Horn
Join Date: Jan 2010
Location: Ontario, Canada
Posts: 414
Excellant info, thanks.
Have you or anyone else, mounted this style of peep sight on a gun with a short tang? The reason my Traditions Hawken has a short tang, therefore the peep would be mounted directly to the stock. Is this do able?
Have you or anyone else, mounted this style of peep sight on a gun with a short tang? The reason my Traditions Hawken has a short tang, therefore the peep would be mounted directly to the stock. Is this do able?
01-14-2012, 06:02 AM
#4
Nontypical Buck
Join Date: Nov 2005
Location: Bandera, Texas
Posts: 1,636
But again, great pictures and great directions and I will let you know how it goes. I figure if I can fix million dollar radars for the Army I can do a simple drill and tap!
 01-14-2012, 08:10 PM
#6
Nontypical Buck
Thread Starter
Join Date: Mar 2008
Posts: 1,181
01-14-2012, 08:16 PM
#7
Nontypical Buck
Thread Starter
Join Date: Mar 2008
Posts: 1,181
Yes same for me Ron, thanks a whole bunch. I will be finding what I need to install the peep. The only thing I really got to find is a vice and figure where to install it in the apartment. lol.
But again, great pictures and great directions and I will let you know how it goes. I figure if I can fix million dollar radars for the Army I can do a simple drill and tap!
But again, great pictures and great directions and I will let you know how it goes. I figure if I can fix million dollar radars for the Army I can do a simple drill and tap!
My favorite way to get dead center is use a piece of masking tape to get the center right. Then when I put the sight on the tang with just the rear screw I swing the sight over and use a punch to get the hole in the right place. I have screwed a couple up before. I welded them shut and tried it again. Ron