


Ipe, boo, trilam build along.
 01-23-2009, 05:14 AM
#1
Dominant Buck
Thread Starter
Join Date: Feb 2003
Location: land of the Lilliputians, In the state of insanity
Posts: 26,274
Last night I got home and pulled out the material for this bow and got started.
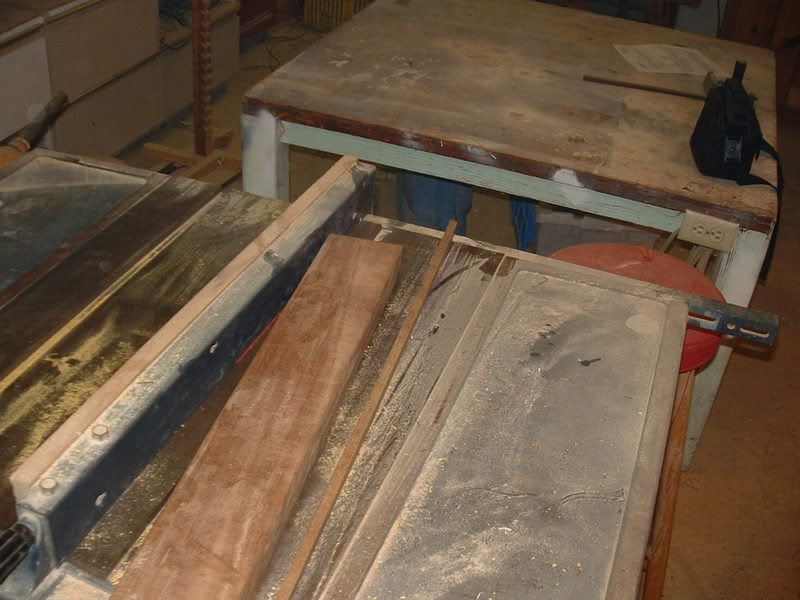
Here are the materials Ill be using. Ipe board, bodarc post, a bamboo pole, and a whitetail deer antler.
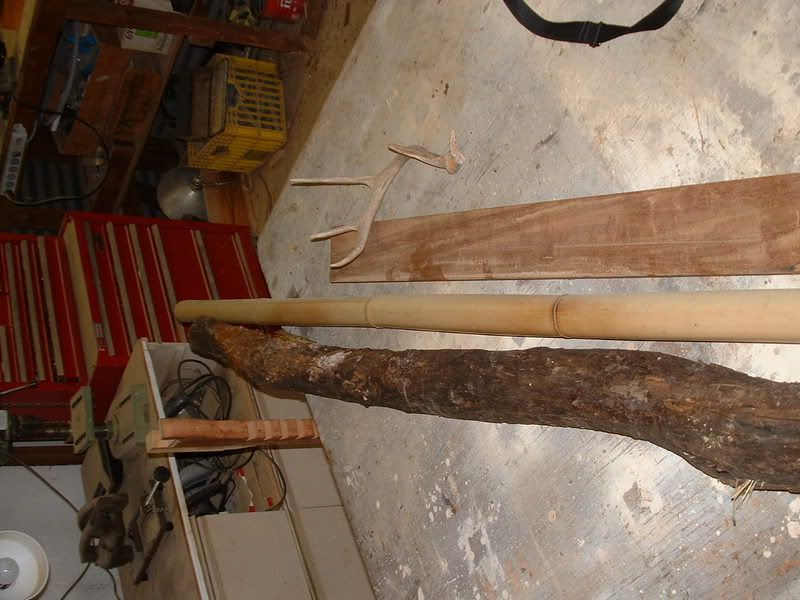
First thing I did is split the bamboo. Bamboo will naturaly split (which I dont like), so I found one of the natural splits and followed it with a knife.
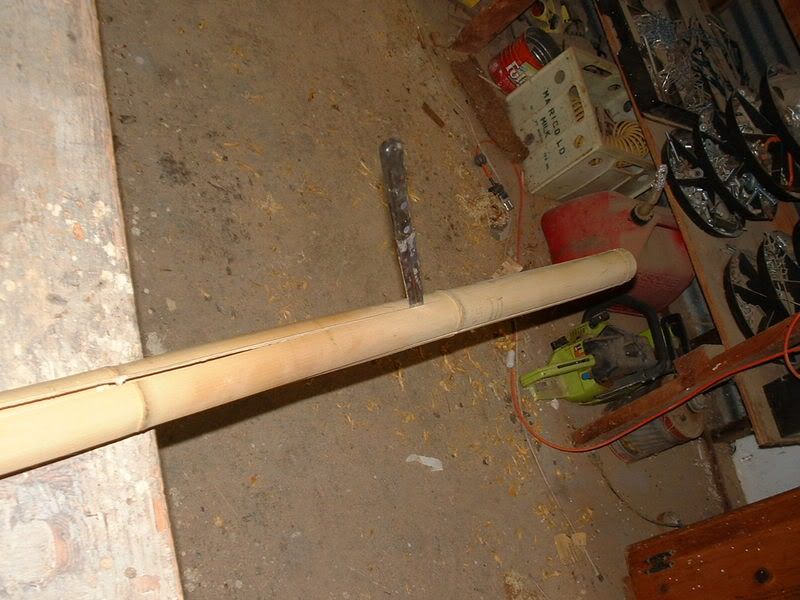
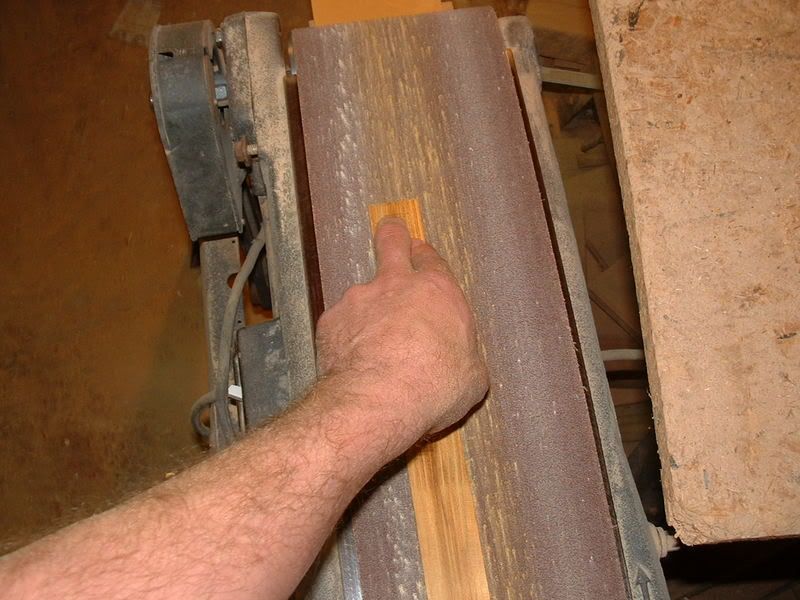
Now to flatten the piece I cut out of the pole. Ill do it free hand on the belt sander.
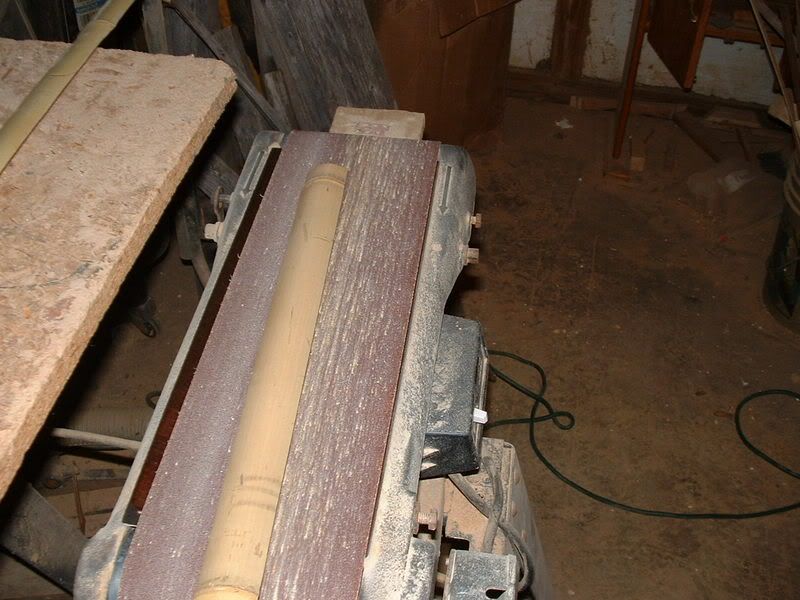
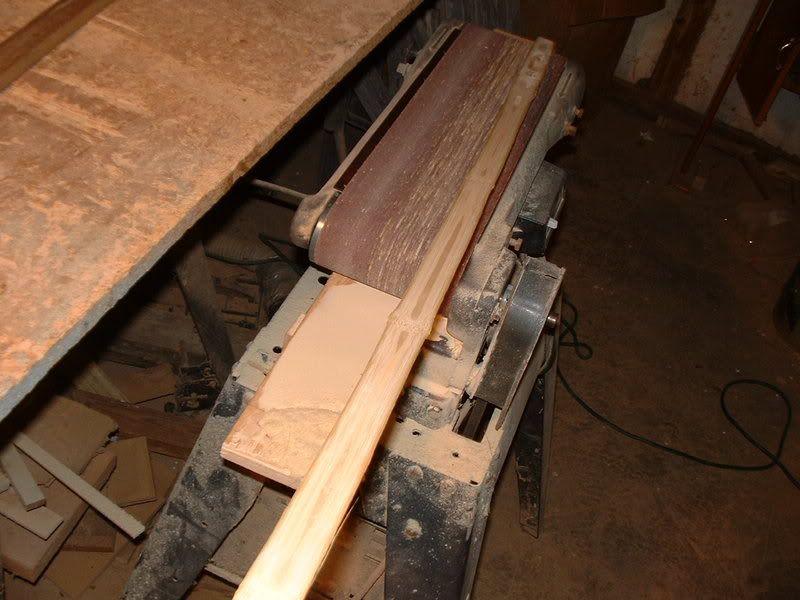
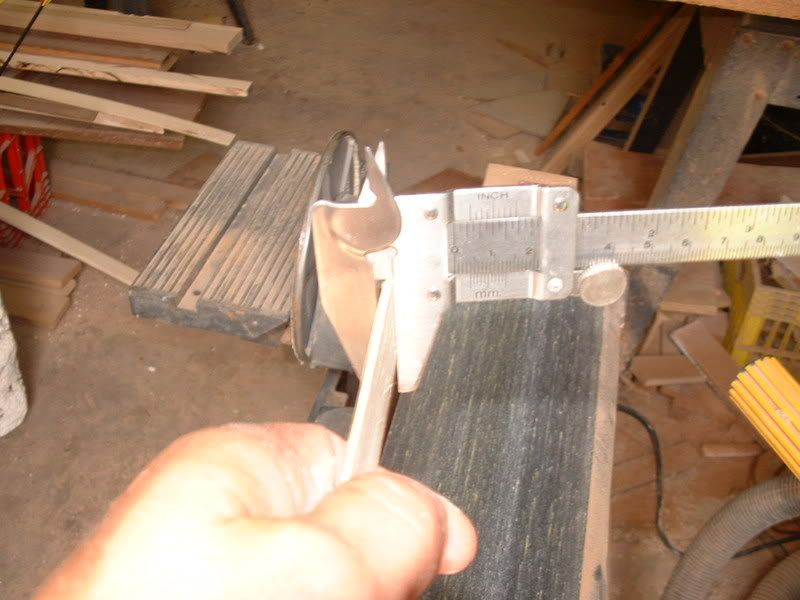
I keep up with the thickness by using my calipers and measuring between the nodes. I keep the middle 1/8" thick and tapper it to 1/16 thick at the tips. Once I have the boo flat, I simply tapper it by making passes over the belt sander in a progressive order. Sand up to the first node, then lift the boo and start agian going up to the second node, lift and start agian until I hit the middle. I do this on both sides and keep up with the thickness as I go with my calipers.
Here are the materials Ill be using. Ipe board, bodarc post, a bamboo pole, and a whitetail deer antler.
First thing I did is split the bamboo. Bamboo will naturaly split (which I dont like), so I found one of the natural splits and followed it with a knife.
Now to flatten the piece I cut out of the pole. Ill do it free hand on the belt sander.
I keep up with the thickness by using my calipers and measuring between the nodes. I keep the middle 1/8" thick and tapper it to 1/16 thick at the tips. Once I have the boo flat, I simply tapper it by making passes over the belt sander in a progressive order. Sand up to the first node, then lift the boo and start agian going up to the second node, lift and start agian until I hit the middle. I do this on both sides and keep up with the thickness as I go with my calipers.
 01-23-2009, 05:26 AM
#2
Dominant Buck
Thread Starter
Join Date: Feb 2003
Location: land of the Lilliputians, In the state of insanity
Posts: 26,274
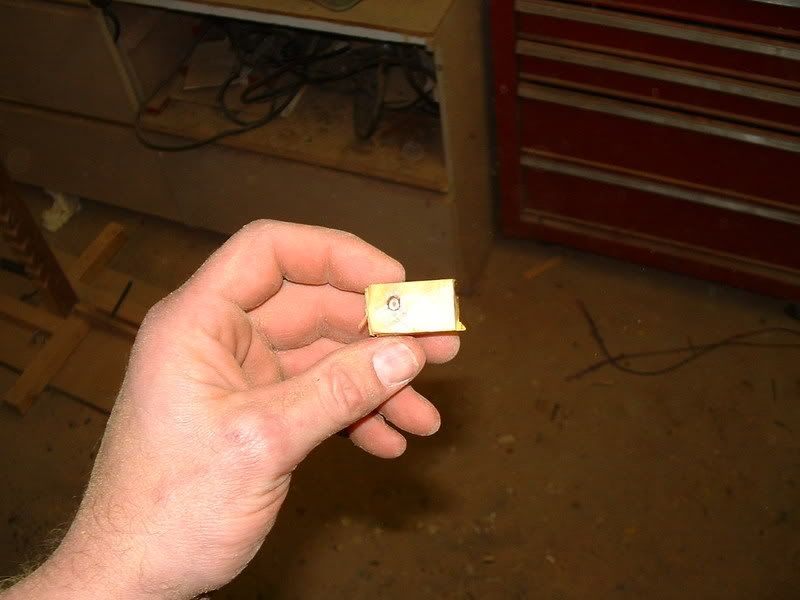
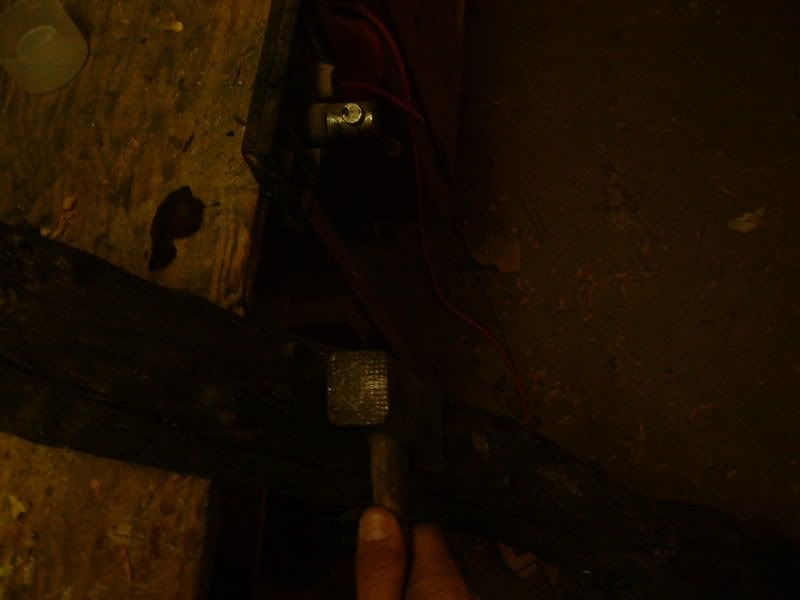
Now for that post. First I have got to see if the wood is dry enough to use. Ill do this by cutting a piece out of the middle and calculating its specific gravity. I simply use displacement of water to get the volume, then a grams scale to get mass. The gravity on this post is .81 which is perfect. Osage, on the average, when dried, is .82.
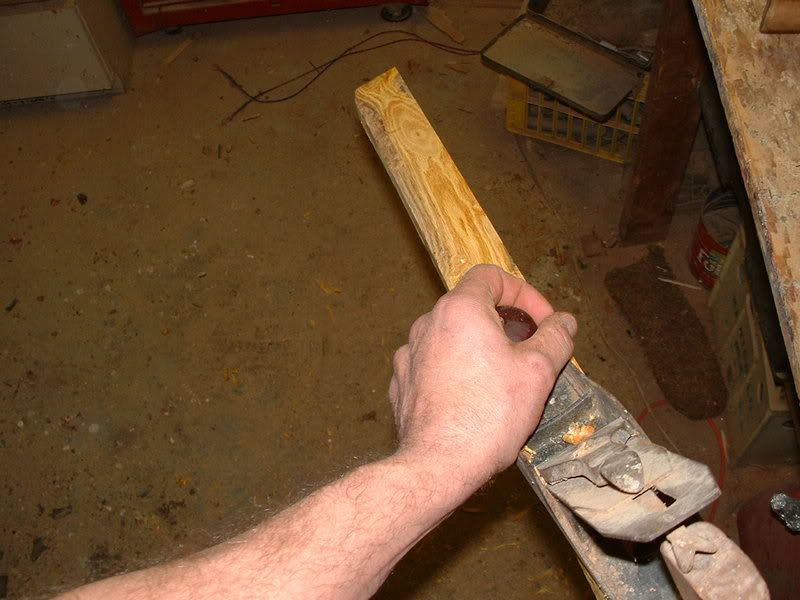
Now to clean it up. Im going to make the riser out of osage, so ill need to clean it up before I can use it. This is one of the posts Rloving (Rowell) brought to me. Thanks Rowell. Im going to get the bark off with an axe to see how much wood I can get from it. This post had been setting on the ground for a while and some carpenter ants had taken up residents in it. So im going to clean it up and cut out all the ant, hole wood.
After the bark is off, ill hit it with a plane to get a flat side to tac to a board so I can cut a straight edge with my table saw. I really need to get a jointer.
Post cleaned up and looks like ive got plenty of good wood for a riser.
01-23-2009, 05:36 AM
#3
Dominant Buck
Thread Starter
Join Date: Feb 2003
Location: land of the Lilliputians, In the state of insanity
Posts: 26,274
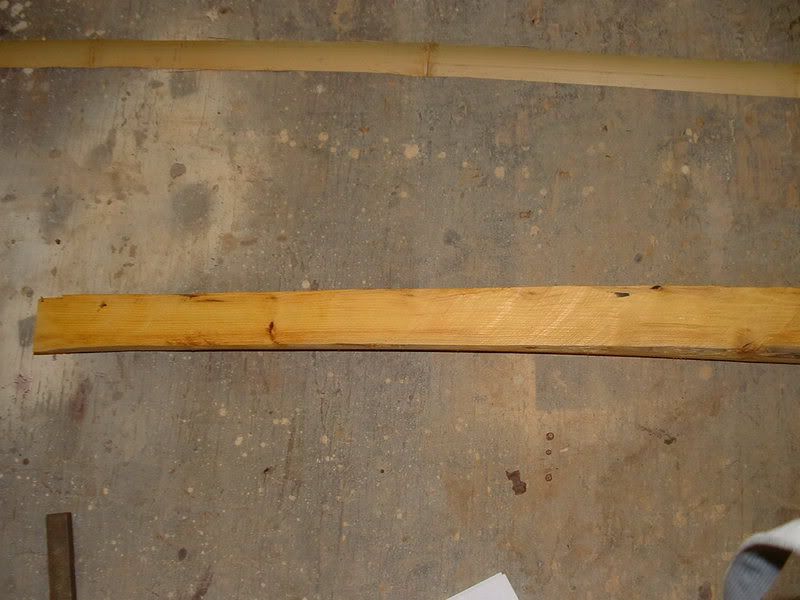
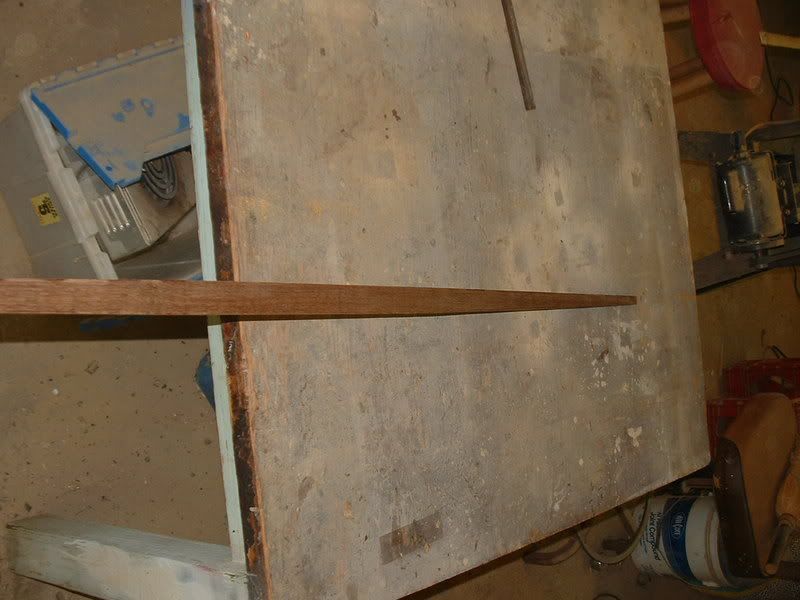
I have decided to put a power lam on this bow. Since it is a trilam with a belly lam up the riser, there really is no need for the power lam. Im putting it on for ascetics and nothing more. Usually a power lam is used to stiffen the handle area, on static grip bows to keep from popping off a handle. It is placed between the backing and the belly in the middle of the bow. Im going to cut this lam from the osage I just cleaned up. My design is going to call for 6" grip with two " fades. Your power lam needs to be at least 1" longer than your gip and fades combined. This way the lam will go 1/2 inch passed your fades. Here is the power lam. I simply riped a 1/8" strip from the Osage I just cleaned. Since my riser is going to be 10" total, I cut this lam 11 1/2". I put the extra 1/2" on so when I grind it down, it will retain at least 11".
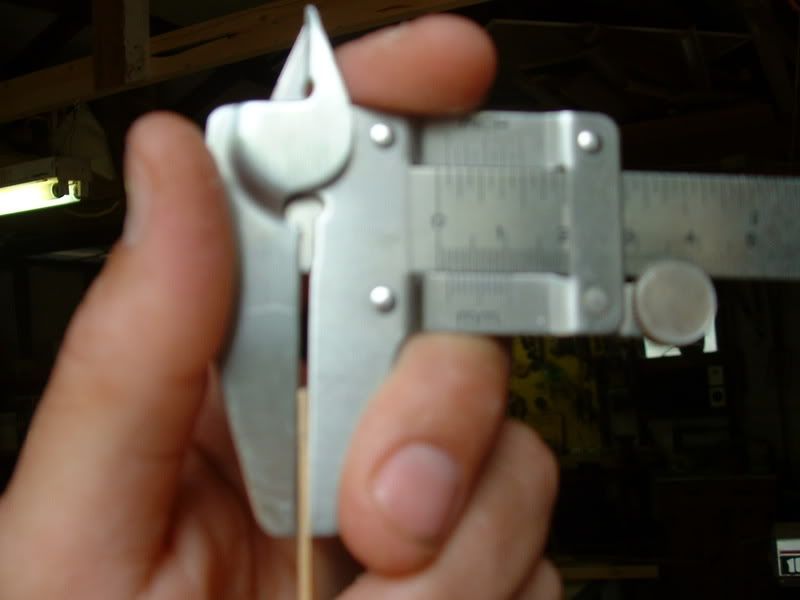
I marked the center of the lam and went to the belt sander to tapper it to a paper thin on each end. Power lams can drive you nuts because they have to tapper down real thin so that the backing will not have a gap between it ,the lam, and core.
Power lam done. I took a pic of the profile so you could see how it tappers from about 1/8" down to paper thin edges, but the pic did not come out.
01-23-2009, 06:18 AM
#5
Dominant Buck
Thread Starter
Join Date: Feb 2003
Location: land of the Lilliputians, In the state of insanity
Posts: 26,274
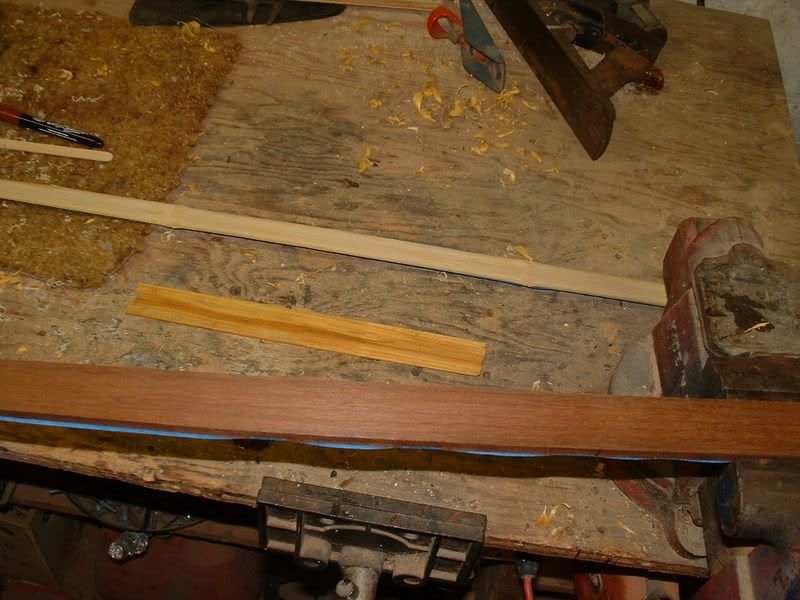
Boo done and power lam cut, im going to now work on theipecore.
Since this bow is going to be a trilam, im going to cut the core 1/8" shy of my board bow design. Reason im doing this, is to compensate for the 1/8" belly lams Ill be putting on later. Since I want to have a 5/8" total at the fades and 3/8" at the tips (belly tapper that is), Im going to cut the core 3/8" and tapper it down to 1/4". 3/8" + 1/8"belly lam + 1/8"boo = 5/8".
Im going to rip a 3/8" strip 70" long. The stock I have is 1 3/4". I want a narrow limbs, after I rip the 3/8" strip, ill rip off a light 3/4" from the sides to make it a heavy 1" thick.
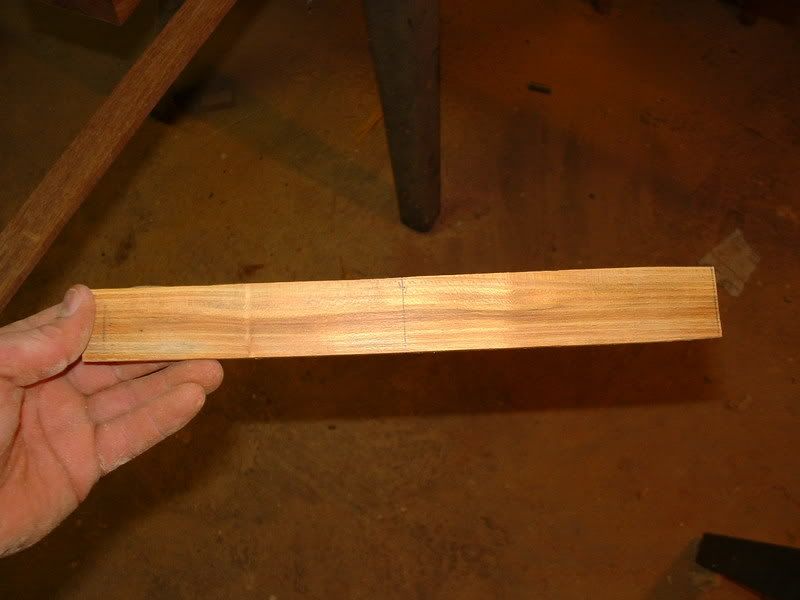
Here is the core after cutting out with the table saw.
Time now to put on the belly tappers and limb tappers and get ready to glue up.
I first use the belt sander and make sure the back of the core is smooth and perfectly flat. (agian, I sure could use a jointer). After this, I mark off what would be the grip area and the fades on the board.
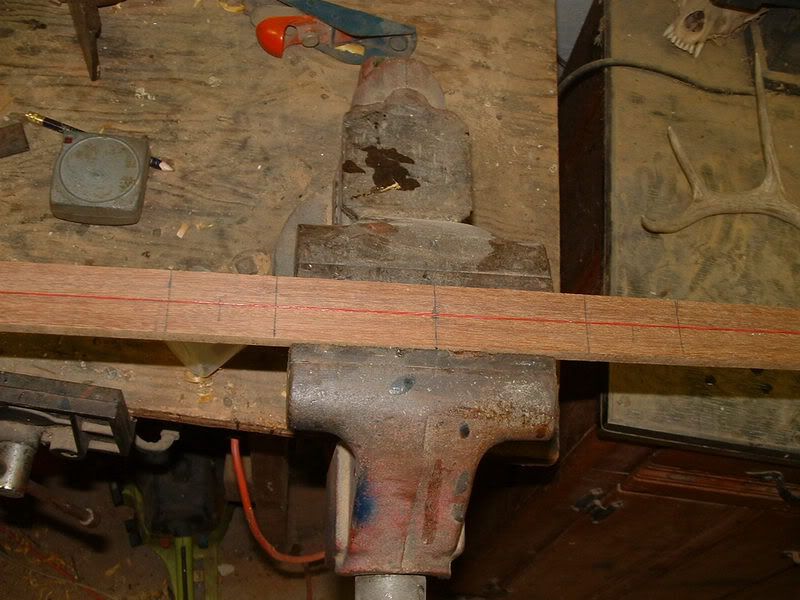
That little red line is a long piece of Dacron 50 im useing to run a midline down the core. I dont have it in the pic, but I found the center of the tips and ran the line from the center point of the end to see if my board was perfectly square. It was, thank goodness. If it is not square,I would haveto cutmy limbtappers accordingly and keep the middle of the tips inline with the middle of the handle area.
I dont have the pics, because I wanted to get the back and core glued up last night, so ill just explain how I did my belly tapper and limb tapper. For the limb tapper, I measured 4" from my fades and marked a line perpendicular across the boards bellyon both ends of the board. I then made a mark 1/4" on each side of my midline mark on the tips. This way Ill have a total 1/2" tip. I like thick tips because it gives me plenty of material to remove during the fine tuning. I then make a few reference lines perpendicular along the limb so I could measuer the tapper on each side to insure they are the same. To get my tapper, I simply connect the line I made 4" off the fade (on theedge of the board)to the markes I made on the tips (1/4" from midline), with a straight yard stick and drew a line connecting the two. Did this on both sides. After drawing the line, I use my reference marks and measure the distance from the limbtappers to the edge of the board on both sides, just to insure my tappers are the same on both sides of the limb. I do this for both limbs. Then cut out the tappers with my bandsaw. I cut near the line, not on it, and use the belt sander to sand it down to my line.
Belly fade; I place my board sideways in my vice so I can draw my belly fade on the core. I measure 1/4" from the back of the core at the tips. I then use a yard stick to make a line for my belly fades. I do this by placeing the yard stick on the side of the core (on my fade line at the belly edge) connecting it to the 1/4" mark I just drew at the tips. I then connect the two dots with a pencile. I now have a line the runs from the belly of the core, at the end of the fade, slopeing down to the 1/4" mark. I do this on the other three sides of the bow and cut out the belly fade with my bandsaw. I then use the sander to grind it down to the line. I also keep up with the thickness with my calipers to make sure my tapper lines are true as I grind it. I also use the calipers to insure my limbs are flat so when I glue on the belly lams, I will have to have a perfectly smooth matting surface. As Im doing this, I floor tiller it to a smooth arch, this will help me bend it into the R-D shape and make tillering a bit easier.
Here is the cut out core when was all done.
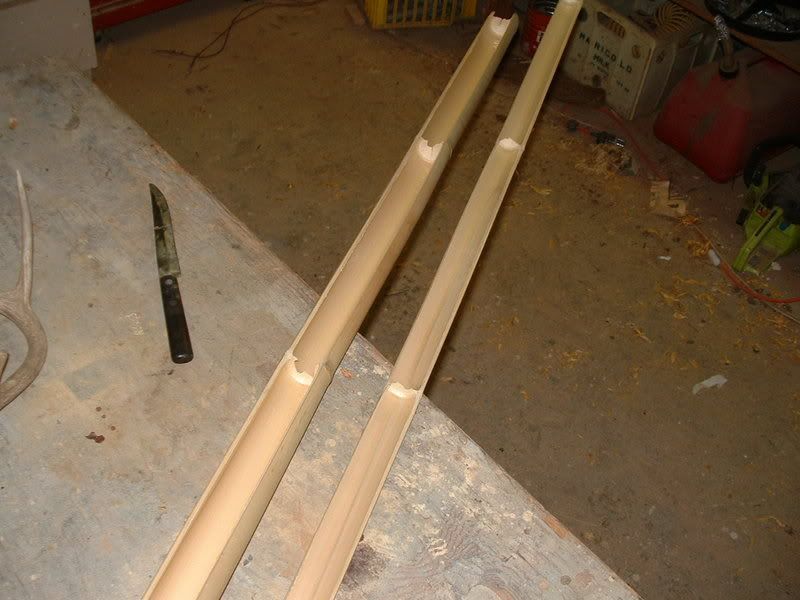
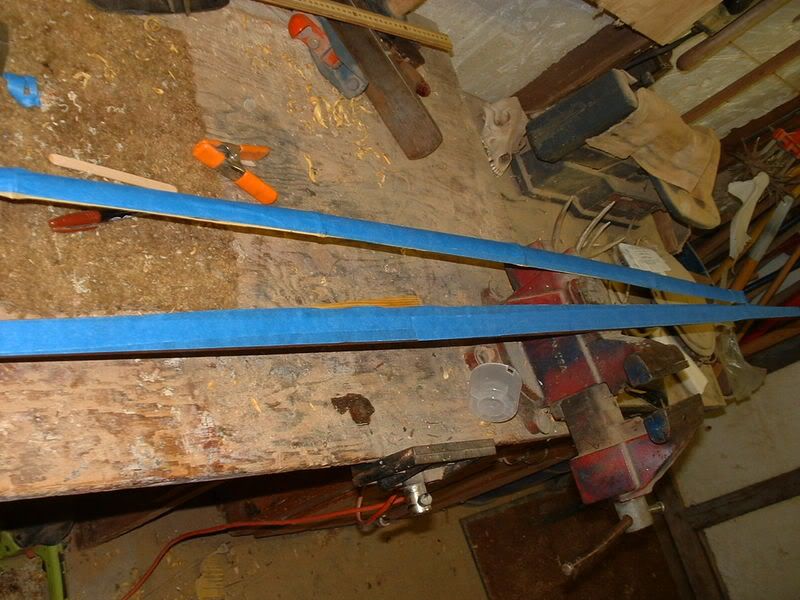
Oh, let me digress. Some thing important about the boo, I forgot to mention. When you cut your boo, you want to make sure your last nodes on either end. line up at equal distances on the two limbs. Here is a pic so you can see how my last nodes end up equal on each end of the core.

The nodes do not have to be on the ende exactly, it just happened with this piece of boo.
Since this bow is going to be a trilam, im going to cut the core 1/8" shy of my board bow design. Reason im doing this, is to compensate for the 1/8" belly lams Ill be putting on later. Since I want to have a 5/8" total at the fades and 3/8" at the tips (belly tapper that is), Im going to cut the core 3/8" and tapper it down to 1/4". 3/8" + 1/8"belly lam + 1/8"boo = 5/8".
Im going to rip a 3/8" strip 70" long. The stock I have is 1 3/4". I want a narrow limbs, after I rip the 3/8" strip, ill rip off a light 3/4" from the sides to make it a heavy 1" thick.
Here is the core after cutting out with the table saw.
Time now to put on the belly tappers and limb tappers and get ready to glue up.
I first use the belt sander and make sure the back of the core is smooth and perfectly flat. (agian, I sure could use a jointer). After this, I mark off what would be the grip area and the fades on the board.
That little red line is a long piece of Dacron 50 im useing to run a midline down the core. I dont have it in the pic, but I found the center of the tips and ran the line from the center point of the end to see if my board was perfectly square. It was, thank goodness. If it is not square,I would haveto cutmy limbtappers accordingly and keep the middle of the tips inline with the middle of the handle area.
I dont have the pics, because I wanted to get the back and core glued up last night, so ill just explain how I did my belly tapper and limb tapper. For the limb tapper, I measured 4" from my fades and marked a line perpendicular across the boards bellyon both ends of the board. I then made a mark 1/4" on each side of my midline mark on the tips. This way Ill have a total 1/2" tip. I like thick tips because it gives me plenty of material to remove during the fine tuning. I then make a few reference lines perpendicular along the limb so I could measuer the tapper on each side to insure they are the same. To get my tapper, I simply connect the line I made 4" off the fade (on theedge of the board)to the markes I made on the tips (1/4" from midline), with a straight yard stick and drew a line connecting the two. Did this on both sides. After drawing the line, I use my reference marks and measure the distance from the limbtappers to the edge of the board on both sides, just to insure my tappers are the same on both sides of the limb. I do this for both limbs. Then cut out the tappers with my bandsaw. I cut near the line, not on it, and use the belt sander to sand it down to my line.
Belly fade; I place my board sideways in my vice so I can draw my belly fade on the core. I measure 1/4" from the back of the core at the tips. I then use a yard stick to make a line for my belly fades. I do this by placeing the yard stick on the side of the core (on my fade line at the belly edge) connecting it to the 1/4" mark I just drew at the tips. I then connect the two dots with a pencile. I now have a line the runs from the belly of the core, at the end of the fade, slopeing down to the 1/4" mark. I do this on the other three sides of the bow and cut out the belly fade with my bandsaw. I then use the sander to grind it down to the line. I also keep up with the thickness with my calipers to make sure my tapper lines are true as I grind it. I also use the calipers to insure my limbs are flat so when I glue on the belly lams, I will have to have a perfectly smooth matting surface. As Im doing this, I floor tiller it to a smooth arch, this will help me bend it into the R-D shape and make tillering a bit easier.
Here is the cut out core when was all done.
Oh, let me digress. Some thing important about the boo, I forgot to mention. When you cut your boo, you want to make sure your last nodes on either end. line up at equal distances on the two limbs. Here is a pic so you can see how my last nodes end up equal on each end of the core.
The nodes do not have to be on the ende exactly, it just happened with this piece of boo.
01-23-2009, 06:32 AM
#6
Dominant Buck
Thread Starter
Join Date: Feb 2003
Location: land of the Lilliputians, In the state of insanity
Posts: 26,274
After cutting my core out, I clamp on my boo to the back and line it all up so I can trace off my limb tappers to my boo. I then cut out the boo to the shape of the core. I then check to see if I need to fix the tapper of the boo. Sometimes you get a side that is thicker because the boo doesnt line up exacltly perfect. I simply adjust the high sides and keep and eye on it with the caliper.
Now to get ready to glue up. I will do this bow with multiple glue ups.
First, I clean the Ipe with acetone. Ipe is oily wood, not quite as bad as cocobola, rose wood, or blood wood, but still oily. I have found that it is not too oily to use titebond III. Which is good because I wont have to use a two part epoxy and bake it. Not quite as messy either.
After cleaning the ipe, real good, I use painters tape to mask off the belly of the core. I dont want to get it messy because ive got it all smooth and even for the later glue up. I also mask off the back of the boo. Just so the clean up is easier.
I now transpose mycenter markof the core, power lam, and boo to the edges so I can see them to line them up when I start the glueing.
I put the core in my vice, back up,and lay my power lam down, belly up, as well as laying the boo down belly up. This way everything is ready for glue and easy to access.
I spead a coat of titebond on the core and smooth it out with a popsicle stick, same for the bottom of the power lam. I then put the powerlam on, lining up the center marks I made on the sides. now spread a coat of glue on the back of the power lam and the belly of the boo and put it all together. Agian, keeping an eye on the center lines. I clamp the middle with a spring clamp to hold everything while I wrape the thing up with an inner tube. I use inner tubes for strech clamps.
01-23-2009, 06:43 AM
#7
Dominant Buck
Thread Starter
Join Date: Feb 2003
Location: land of the Lilliputians, In the state of insanity
Posts: 26,274
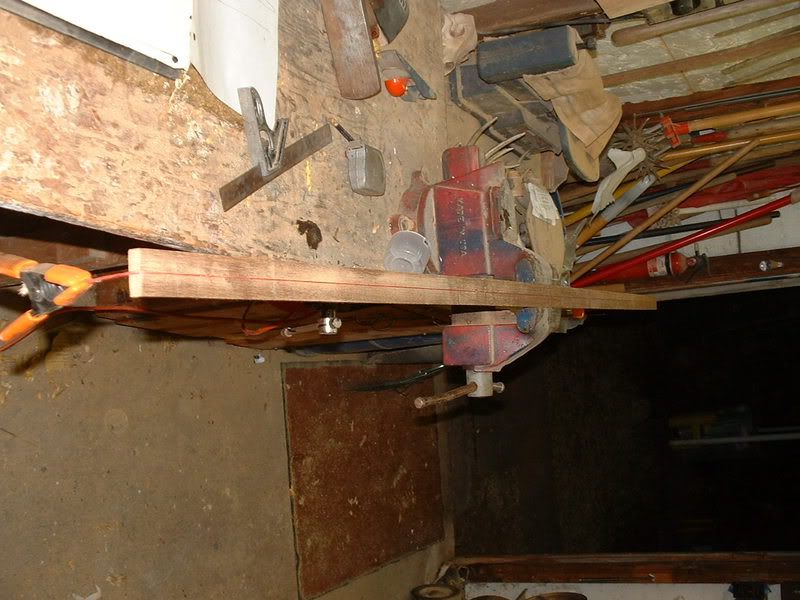
Now to put some sexy curves in it. Ill do this with a simple 2" x 4" and some blocks at the ends to support the tips. Im going for a deflexed handle area, so Ill have a deflexed riser. I get the curve in themiddle of the bowby placeing two pieces of 3/4" x 3/4" stock on top of each other and under the center mark of the bow. I clamp down the bow to the center mark of my 2" x 4" with a c-clamp. this is just to hold it in place until I can get my reflex clamps set. I then measure 16" down from limb tip and mark this spot on the inner tube with a sharpy. I then place a clamp at this point and clamp the limbs down to the 2"X4". Im going to try to get quite a bit of reflex, just to insure I end up with plenty at the end of tillering. Be careful not to clamp in too much, you can cause the belly to splinter. If you want to put in a bunch of reflex, put alam of hickory or some other stock at least 1/8"along the entire length of the belly. You can do it before you glue up. Just lay it under the belly of your core before you clamp on the backing. The painters tape will keep it from sticking to the belly.
Put on both reflex clamps and clamp a little on one side, then the other until you get to the desired amount of reflex. I had no real goal for the amount of reflex, so I just eyeballed it until I got a good sexy shape. Be sure to measure the distance from the bow belly to the 2" x 4", just under the clamps to keep the amount of reflex even.
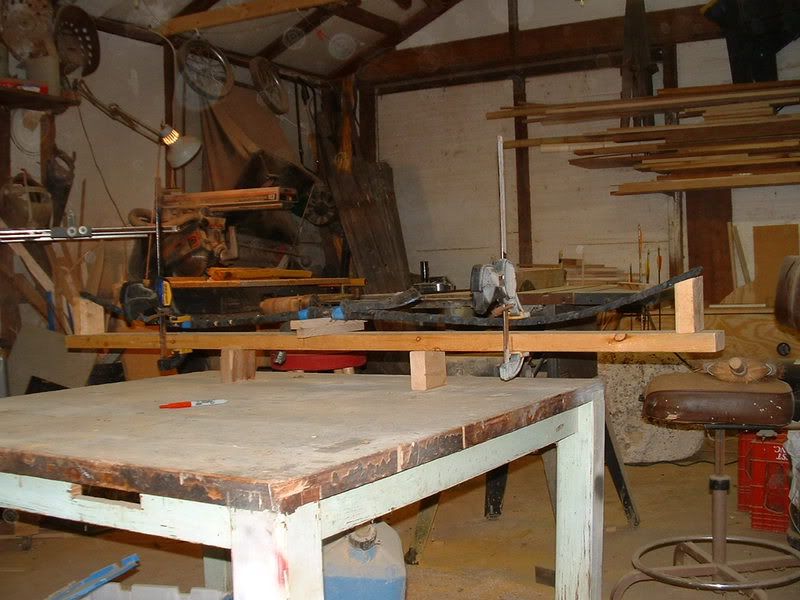
This is all I got done last night. Ill see what more I can get done later on today.
Put on both reflex clamps and clamp a little on one side, then the other until you get to the desired amount of reflex. I had no real goal for the amount of reflex, so I just eyeballed it until I got a good sexy shape.
Be sure to measure the distance from the bow belly to the 2" x 4", just under the clamps to keep the amount of reflex even.This is all I got done last night. Ill see what more I can get done later on today.
01-23-2009, 07:04 AM
#8
Dominant Buck
Thread Starter
Join Date: Feb 2003
Location: land of the Lilliputians, In the state of insanity
Posts: 26,274
ORIGINAL: bowman15
Wow. You're really starting with raw material. That's alot of work.
Wow. You're really starting with raw material. That's alot of work.
Actually, im too cheap to buy all the stuff.
01-23-2009, 09:04 AM
#9
Giant Nontypical
Join Date: Feb 2003
Location: Burleson TX USA
Posts: 6,455
Mate.
She's a lookin good.
Want me to check the place I got mine from and see if they are still on sale???????????
I think I only paid something like $79 for mine, it's only a 4"er but perfect for what I wanted it for.
She's a lookin good.
I sure could use a jointer
I think I only paid something like $79 for mine, it's only a 4"er but perfect for what I wanted it for.