Restoring/rebuilding a very old shotgun

 02-17-2014, 02:34 AM
#23
Typical Buck
Thread Starter
Join Date: Jan 2014
Posts: 921
It would be improper to work on the shotgun on Valentine’s day so I took my sweetheart out to dinner instead and Saturday I was out of town attending an archery club annual convention I donated some prizes to so Sunday was my only day to work on the shotgun.
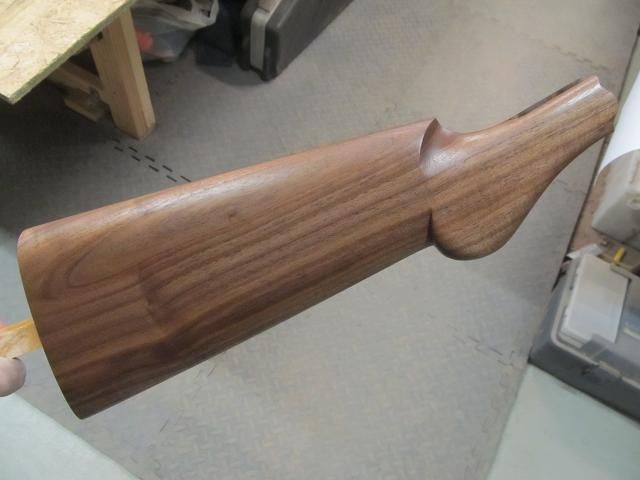
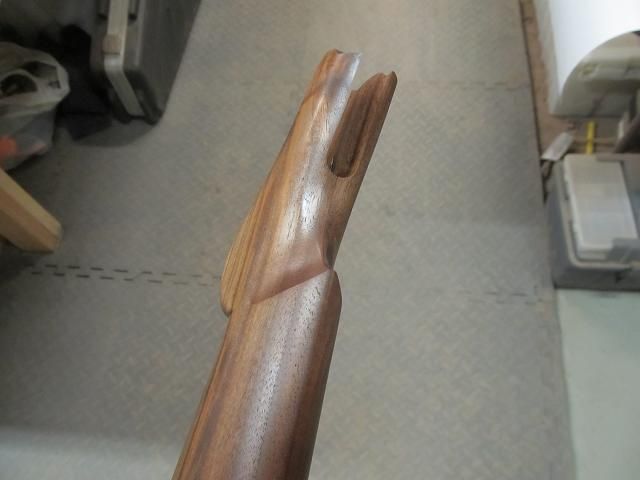
Pointing and fluting the comb of the stock was where I left off.
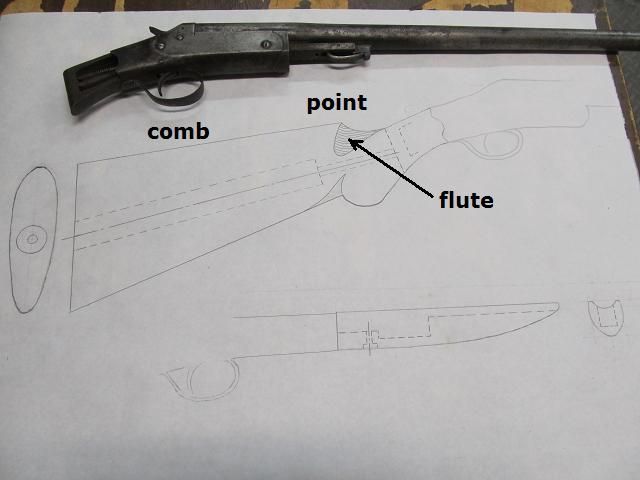
I used a rat tail rasp and then a length of electrical conduit with sandpaper wrapped around it to remove the wood for the flute.
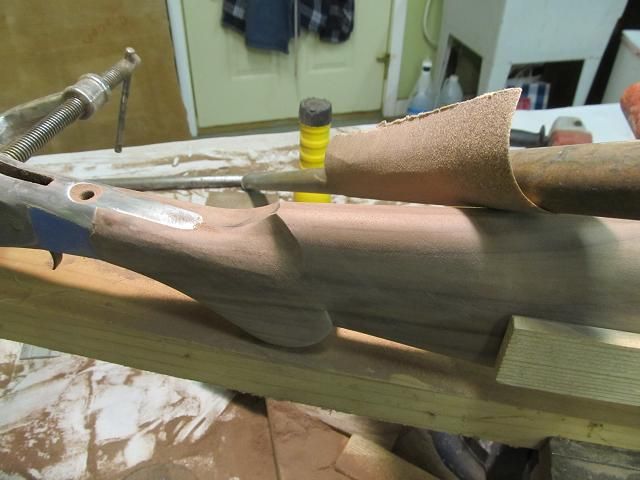
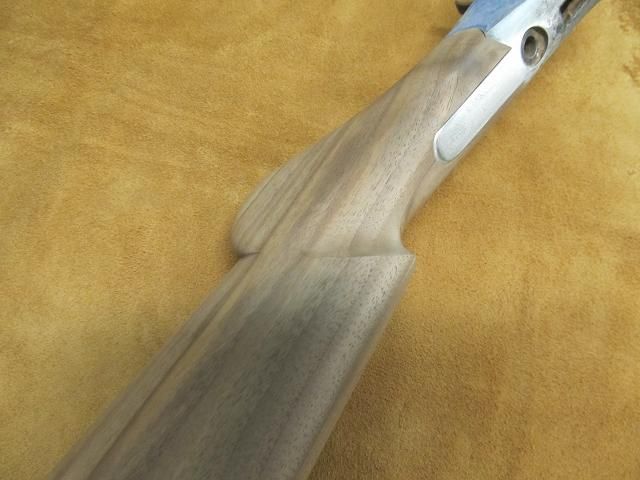
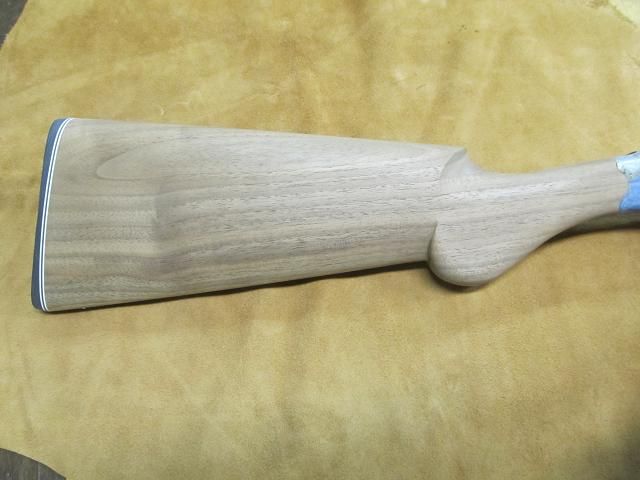
Then the entire stock was then final sanded from 180 to 600 grit and the first application of tung oil was applied. 7 more applications to go.

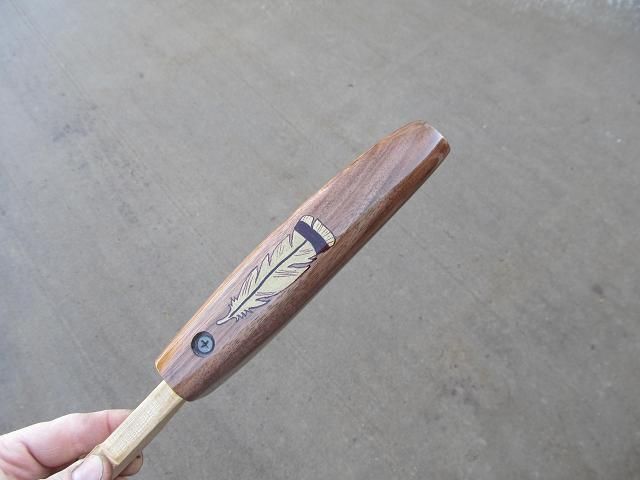
After 7 coats of tung oil on the fore grip I gave it a rub down with 0000 steel wool and then thought I would embellish the underbelly a bit so I got out the gold metallic and black, oil based sharpie paint pens and had a go at it. A few more coats of tung oil over the top of the paint will seal it in real nice.
I took it outside and shot a very brief video of the finish so far.
http://www.youtube.com/watch?v=8gQO4...ature=youtu.be
I am almost to the point where I can check “making a gun stock” off the list of things I have always wanted to try doing.
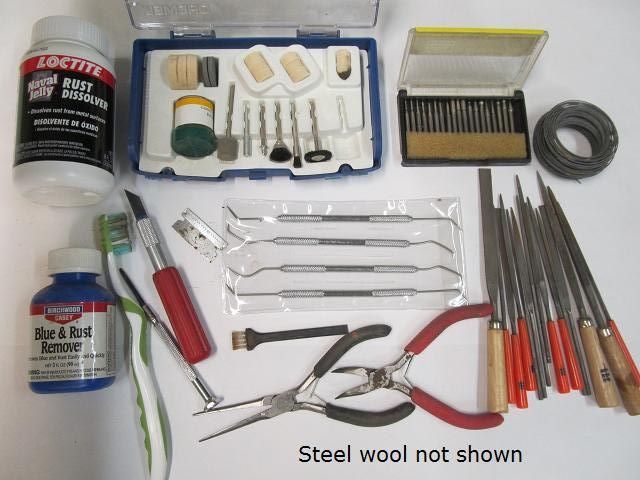
When I tried to disassemble the metal parts of the rusty old gun I was unable to turn the three screws that hold major components. I was bending the tips of screwdrivers and at least one screw slot was showing damage from attempts to break it free. I didn’t want to apply heat to such an old weapon and sure as hell didn’t want to snap the head off the screws with an impact driver. What to do?.............. Google it.
Penetrating oil was the likely solution but in searching for the best performing product I came across a recipe I had not heard of but Im given to understand its no secret to mechanics and gun smiths.
It calls for equal parts Automatic transmission fluid and Acetone. Should you encounter corroded screws or bolts and find yourself in need of penetrating fluid I can highly recommend this concoction. I found this blurb online.
Machinist’s Workshop magazine tested penetrants for break out torque on rusted nuts.
They arranged a test of all the popular penetrants with the control being the torque required to remove the nut from a “scientifically rusted” environment.
Penetrating oil ….. Average "break free" load
None …………………........ 516 pounds
WD-40 ………………........ 238 pounds
PB Blaster …………........ 214 pounds
Liquid Wrench ……...... 127 pounds
Kano Kroil …………....…. 106 pounds
ATF-Acetone mix…....….53 pounds
.
The ATF-Acetone mix was a “home brew” mix of equal parts automatic transmission fluid and acetone.
Note the “home brew” was better than any commercial product at unseizing rusted fasteners and not just by a little. It really out performed any other product on the market.. Its much less expensive than specialty oils as well. A quart of ATF is less than $4 and a quart of acetone costs about $6.
I hoped to speed the penetrating action by submerging the entire receiver in the mixture and then vibrating it with an ultrasonic cleaner/bath. The only problem is, I don’t have an ultrasonic parts cleaner.
What I do have is an old Oster hair trimmer and an empty bean can.
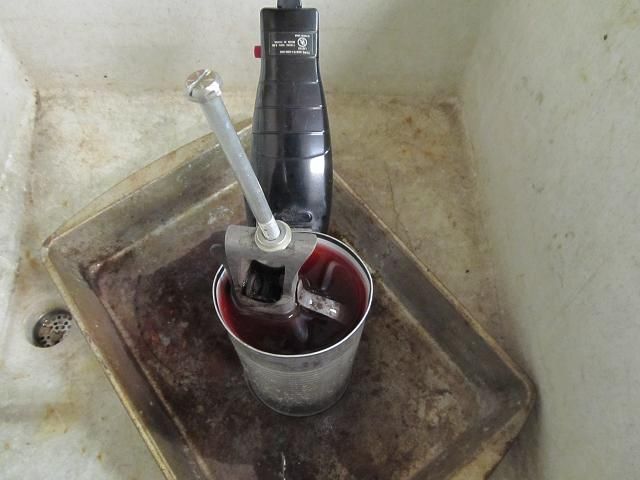
If you are concerned about mixing the highly flammable Acetone fumes and electricity, you can run this device on your neighbor's patio while he is at work. (safety first). Here is a short video of this engineering marvel at work.
http://www.youtube.com/watch?v=xqlZ48PRSGw
I let the receiver soak in the solution for 24 hours then wiped the entire assembly dry. The seized screws and pins were removed with normal hand held screwdriver torque with no damage to the parts. The fluid had soaked the threads the entire depth of the parts. Im impressed by this simple mixture of fluids and will store that trick for future uses.
Now the shotgun is reduced to 40 rusty parts.
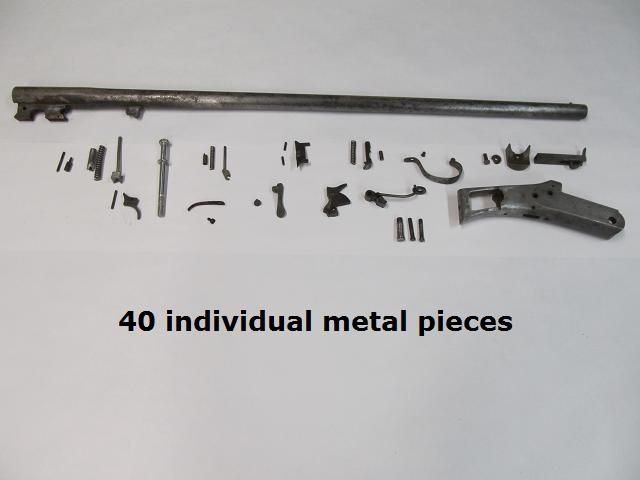
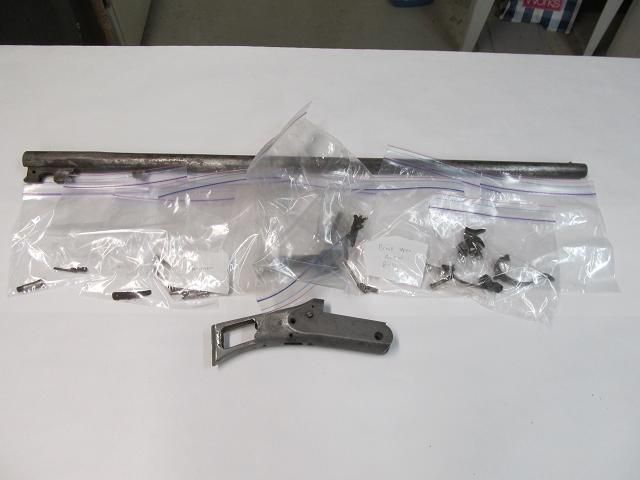
All the parts are bagged with labels telling me what they are for. I photographed every step of disassembly. I don’t want parts (some are very close in appearance to one another) to get mixed up. As I restore them they will be rebagged until such time as I reassemble the shotgun.
Now the fun begins. I can replace nostrils full of powdered walnut with powdered iron and steel.
To be continued…..
Pointing and fluting the comb of the stock was where I left off.
I used a rat tail rasp and then a length of electrical conduit with sandpaper wrapped around it to remove the wood for the flute.
Then the entire stock was then final sanded from 180 to 600 grit and the first application of tung oil was applied. 7 more applications to go.
After 7 coats of tung oil on the fore grip I gave it a rub down with 0000 steel wool and then thought I would embellish the underbelly a bit so I got out the gold metallic and black, oil based sharpie paint pens and had a go at it. A few more coats of tung oil over the top of the paint will seal it in real nice.
I took it outside and shot a very brief video of the finish so far.
http://www.youtube.com/watch?v=8gQO4...ature=youtu.be
I am almost to the point where I can check “making a gun stock” off the list of things I have always wanted to try doing.
When I tried to disassemble the metal parts of the rusty old gun I was unable to turn the three screws that hold major components. I was bending the tips of screwdrivers and at least one screw slot was showing damage from attempts to break it free. I didn’t want to apply heat to such an old weapon and sure as hell didn’t want to snap the head off the screws with an impact driver. What to do?.............. Google it.
Penetrating oil was the likely solution but in searching for the best performing product I came across a recipe I had not heard of but Im given to understand its no secret to mechanics and gun smiths.
It calls for equal parts Automatic transmission fluid and Acetone. Should you encounter corroded screws or bolts and find yourself in need of penetrating fluid I can highly recommend this concoction. I found this blurb online.
Machinist’s Workshop magazine tested penetrants for break out torque on rusted nuts.
They arranged a test of all the popular penetrants with the control being the torque required to remove the nut from a “scientifically rusted” environment.
Penetrating oil ….. Average "break free" load
None …………………........ 516 pounds
WD-40 ………………........ 238 pounds
PB Blaster …………........ 214 pounds
Liquid Wrench ……...... 127 pounds
Kano Kroil …………....…. 106 pounds
ATF-Acetone mix…....….53 pounds
.
The ATF-Acetone mix was a “home brew” mix of equal parts automatic transmission fluid and acetone.
Note the “home brew” was better than any commercial product at unseizing rusted fasteners and not just by a little. It really out performed any other product on the market.. Its much less expensive than specialty oils as well. A quart of ATF is less than $4 and a quart of acetone costs about $6.
I hoped to speed the penetrating action by submerging the entire receiver in the mixture and then vibrating it with an ultrasonic cleaner/bath. The only problem is, I don’t have an ultrasonic parts cleaner.
What I do have is an old Oster hair trimmer and an empty bean can.
If you are concerned about mixing the highly flammable Acetone fumes and electricity, you can run this device on your neighbor's patio while he is at work. (safety first). Here is a short video of this engineering marvel at work.
http://www.youtube.com/watch?v=xqlZ48PRSGw
I let the receiver soak in the solution for 24 hours then wiped the entire assembly dry. The seized screws and pins were removed with normal hand held screwdriver torque with no damage to the parts. The fluid had soaked the threads the entire depth of the parts. Im impressed by this simple mixture of fluids and will store that trick for future uses.
Now the shotgun is reduced to 40 rusty parts.
All the parts are bagged with labels telling me what they are for. I photographed every step of disassembly. I don’t want parts (some are very close in appearance to one another) to get mixed up. As I restore them they will be rebagged until such time as I reassemble the shotgun.
Now the fun begins. I can replace nostrils full of powdered walnut with powdered iron and steel.
To be continued…..
Last edited by DIY_guy; 02-17-2014 at 03:20 AM.
02-18-2014, 02:25 AM
#27
Typical Buck
Thread Starter
Join Date: Jan 2014
Posts: 921
I’ve been enjoying posting these daily progress and restoration updates. Sadly, I spent last night searching for my mailbox and my driveway and raking the roof so the gun sat untouched after work after yet another snow storm.